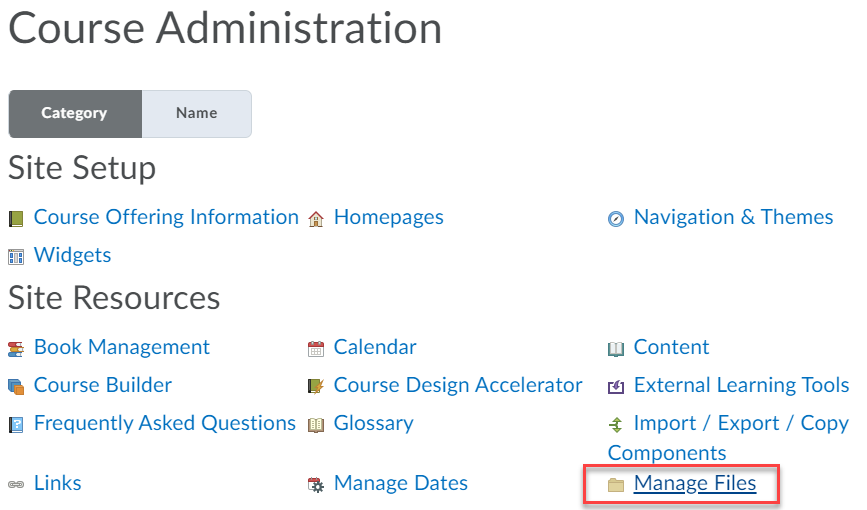
Course Administration Topics
What is the Manage Files Area and How Do I Access It?
You may have noticed that when adding files to your course shell, you are often provided with an option to add files from My Computer of the Course Offering Files area. You can upload files to the Course Offering Files area by accessing the Manage Files tool. This method is often useful in uploading multiple files, or extracting zip files.
- To access the manage files area, click Course Admin in the top navigation bar.

- From the Course Administration window, click Manage Files.
How Do I Upload Files to the Manage Files Area?
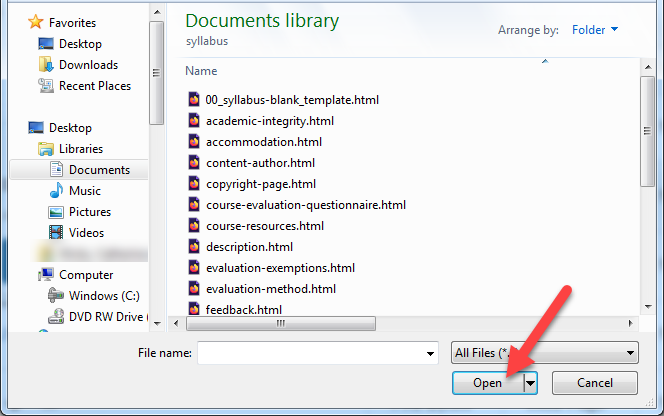
- From the Manage Files area, navigate to the folder where you would like to upload your file(s) (if applicable) then click Upload. (Note: You can organize your files later by using cut and paste; however, it is more efficient to navigate to the folder where you would like to upload your files prior to uploading.)

- Select the file(s) on your computer that you would like to upload. You can select multiple by holding Ctrl/Cmd + Left click, or click and drag). Click Open. Alternatively, you can select multiple files via the file explorer (on your computer) and drag and drop them into the upload box.
Note: In order to upload file folders, the files must be zipped, uploaded, and then extracted the manage files area.
- Click Save.
I have some content in a previous course that I would like to use. How can I copy it over?
Please refer to Copy Components.