Configuring Recording Settings
Webex provides a number of options for customizing recordings from your sessions. These options are important to consider if you are planning to share a recording of a synchronous session with students or if you are recording asynchronous lectures using Webex.
It is important to note that once you set your recording preferences for a session, they will apply to all future recordings as well, unless you change the configurations between your sessions.
NOTE: Webex recording preferences have to be configured before you launch the session you plan to record. You cannot adjust them during the session, even if you have launched the session but have not yet started recording.
> Overview of Recording Settings
To access your Webex recording settings, log into mun.webex.com with your MUN Login ID and password. Once logged in, go to Preferences and then Recording (#1 and #2 in the image below).
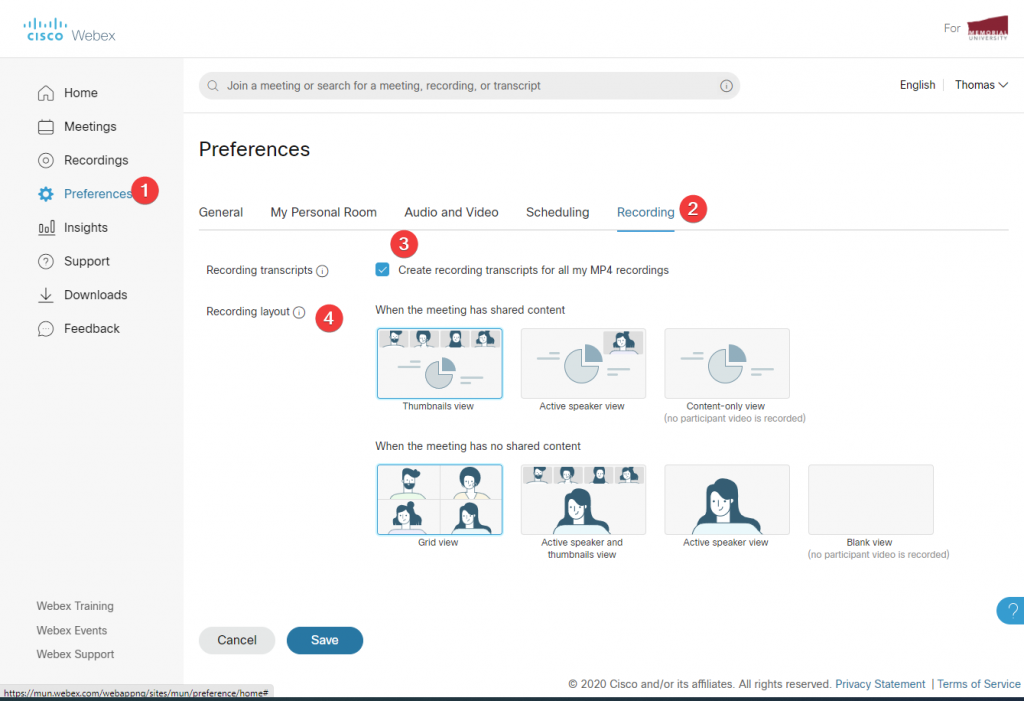
- Recording transcripts (#3 in the image above): You can enable or disable the creation of a transcript of the sessions you are recording to the Webex cloud.
- A recorded session will be processed through AI voice recognition software, and a transcript will be generated along with time marks. Viewers can then see this transcript as they watch the recording, or they can enable closed captioning on the videos.
- The accuracy of recognition is not 100%. Depending on the speed of speech, background noise, and number of speakers, voice recognition accuracy will vary. However, you can review and make corrections to the transcript before you share the recording.
- Transcripts are only available in English.
- Recording layout (#4 in the image above): This option lets you control how content or video is recorded in your sessions. Two items are always recorded: shared content and audio. You can control what will be recorded in the following two scenarios (both are explained in detail in the next menu item):
- when the meeting has shared content
- when the meeting has no shared content.
> Recording Layout Options Explained
All Webex recordings capture audio from all participants. The video portion of the recording, however, can be configured in a variety of ways.
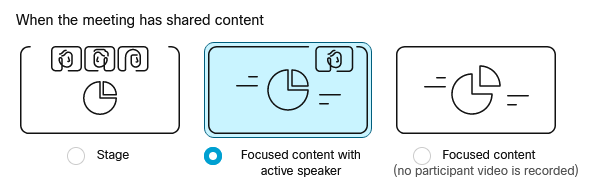
When content is being shared, the recording options are:
- Thumbnails view: Shared content will be displayed in the centre of the screen. Above it, there will be a row of thumbnail videos of the last few speakers. Thumbnails will automatically reorder themselves as people speak in the session.
- Active speaker view: Shared content will be displayed as full screen. In the top right corner, there will be a floating thumbnail video of the active speaker.
- NOTE: In this view, information that appears in the top right of your content may be obstructed by the video thumbnail.
- Content-only view: Only the shared content will be recorded with no participant video.
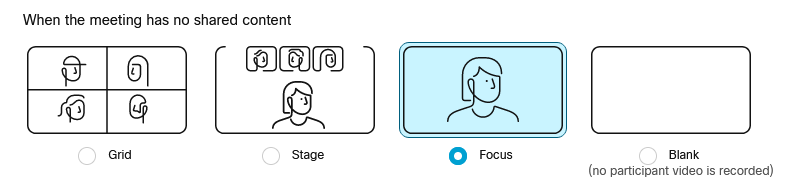
When no content is being shared, the recording options are:
- Grid View: Video of up to 25 participants will be recorded and displayed in a grid.
- Active speaker and thumbnails view: The active speaker in the session will appear in the centre of the screen, and thumbnails of the last few speakers’ videos will be at the top.
- Active speaker view: Only the active speaker will appear on the screen. When a participant starts to speaks, their video will appear on the screen.
- Blank view: No host or participant video is recorded, and the screen will appear as blank.
> Managing Transcripts
If you have enabled transcript generation in your Webex account using the instructions above, you will be able to view and edit the transcripts. Simply log in to the Webex portal with your MUN Login ID and password, and click on Recordings in the left-side menu (#1 below).
NOTE: Depending on the length of the session, it can take several hours for a recording to process and become available. Transcripts will not be available at the same time as the recording. It takes roughly double the processing time for transcripts to be made available.
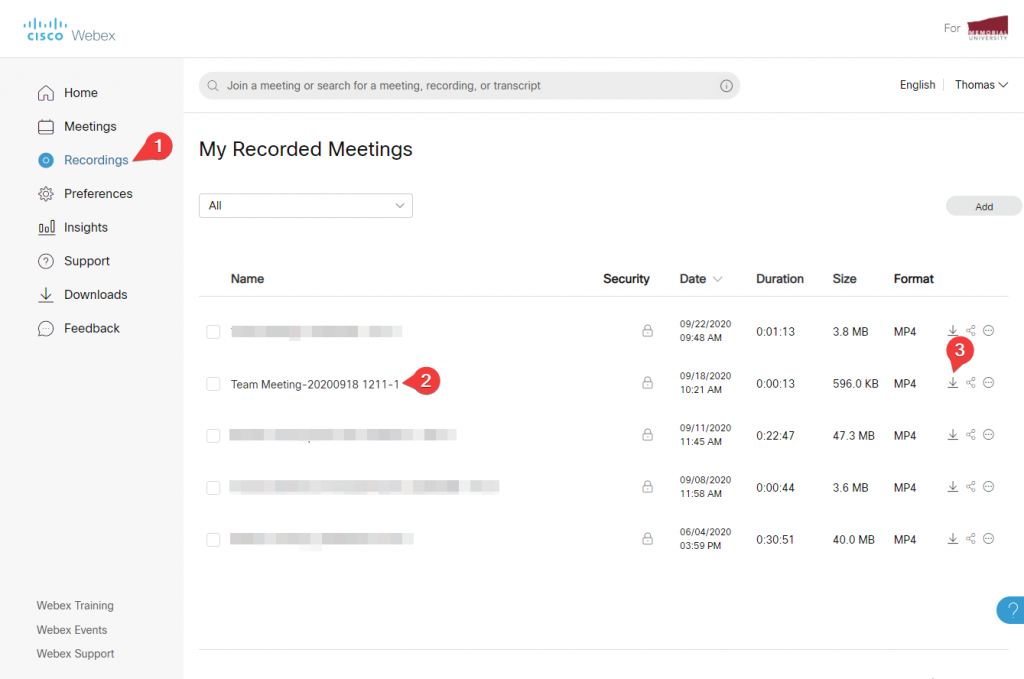
To view your recording or to edit your transcript, click on the title of the meeting (#2 above). If you would like to download the video and the transcript file, you can do so by clicking the download button (#3 above).
Your recording will appear similar to the one displayed below.
- The playback area (#1 above) will show the video or content shared in the session.
- The closed captioning button (#2 above) will allow you to enable or disable the display of closed captions on your video. This is a personal setting – others viewing your videos will be able to enable or disable this option themselves.
- The transcript area (#3 above) will display the transcript of the session to viewers.
- At the very top of this area is a search box, that allows searching through the transcript.
- Blocks of text in the transcript have the following properties:
- A time stamp indicating when the text begins, and at what time the text will appear in the video if closed captioning is enabled.
- The text generated by AI that will be displayed.
- A pencil icon (#4 above) which allows you to edit the text in the transcript. Clicking the pencil opens a basic text field that will allow you to adjust the text and save it to the transcript. This is useful to correct words that were not properly detected by the AI.
- Blocks of text can be clicked on, and the video will skip to the timestamp of that block of text.