Getting Started with Webex
This page outlines the process of setting your Webex account for the first time and introduces you to the Webex dashboard. The settings available in the dashboard are important to understand whether you will be using Webex within Brightspace or on its own.
Click the items below for details on how to start using Webex in your course.
1. Request a Webex account from ITS (video instructions included)
In order to use Webex and integrate it with Brightspace, you must first request a Webex account from Memorial’s Information Technology Services (ITS).
- Go to the ITS site and follow instructions on the page.
- Once your account is created, you will get an email saying that Memorial University has invited you to Cisco Webex.
- The email will also contain a link to activate your account. Click on that link to complete the activation process.
- When the account is activated, you will be redirected to the https://mun.webex.com/ domain. This is your springboard for creating and hosting sessions.
NOTE: When activating and signing in to your Webex account, use your MUN login ID and not your email alias, e.g. x56yz@mun.ca and not jsmith@mun.ca.
Watch the following video to see how to obtain a Webex account
.smux-iframe-container { position: relative; overflow: hidden; width: 100%; padding-top: 55.25%; } .smux-iframe { position: absolute; top: 0; left: 0; bottom: 0; right: 0; width: 100%; height: 100%; }2. Run a network test
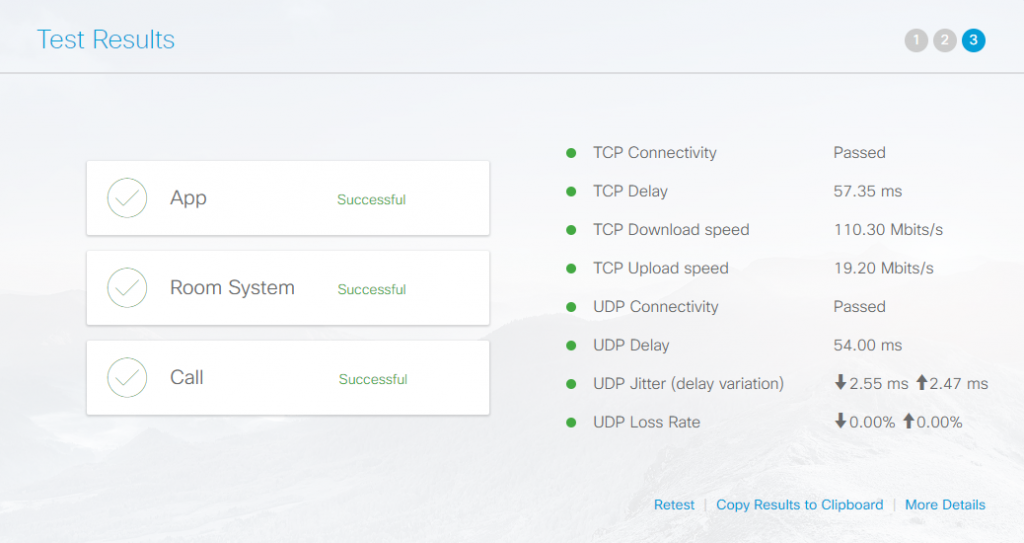
You will want to determine if your computer meets the networking requirements to participate in meetings.
- Access he Cisco Webex Network Test by clicking here.
- Follow the steps on the page.
- The Test Results page will provide a summary of your computer’s performance.
3. Sign in to Webex
- Go to mun.webex.com. Click the Sign In button in the top right corner of the page.
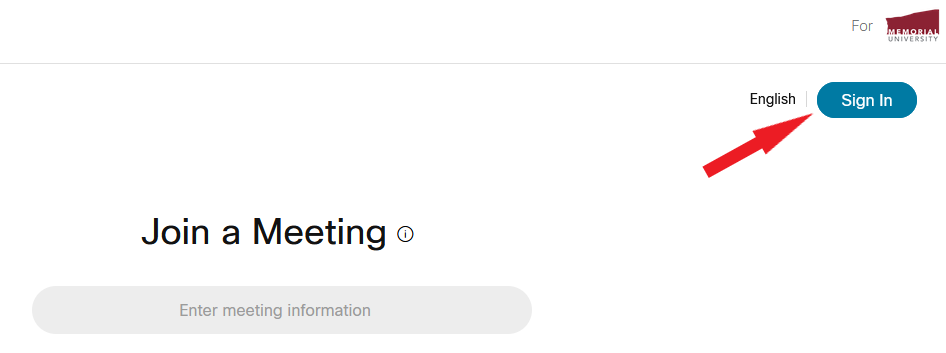
- Enter your @mun email address. Use your MUN Login ID (e.g. x56yz@mun.ca) and not your alias (jsmith@mun.ca).
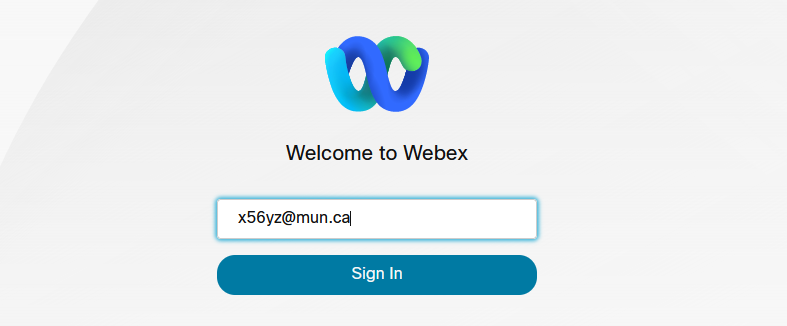
- You will now be directed to the MUN login page to enter your username and password to complete the authentication process.
4. Explore your Webex dashboard
Your dashboard is the page you see when you log in to the Webex portal. This is where you will be creating and launching meetings.
Some of the major functions of the dashboard are explained below.
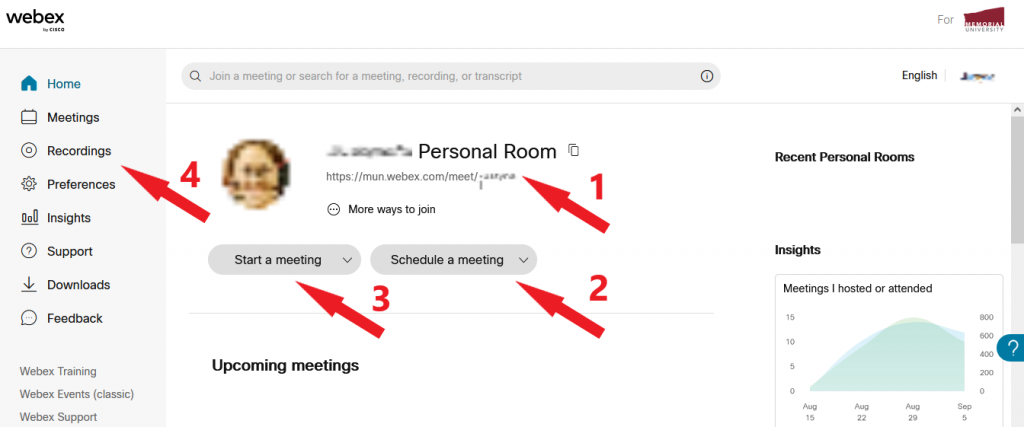
- URL to your Personal Room: You can copy and share this link with people for ad-hoc (unscheduled) meetings. Once the recipient clicks on this link, they will have to enter their name and email address, and then will be directed to your room.
- Schedule a meeting: Use this function to create meetings that will occur in the future. You can optionally enable a repeating meeting schedule. You will be asked for some information about the meeting: date/time, name, password, agendas, invitations, send email reminders as well as other options.
- Start a meeting: Clicking this will take you into your Personal Room. This is useful for ad-hoc meetings. There are no passwords or schedules to manage – you only need to share your room url with the person you want to meet with.
- Recordings: This is where you can find recordings of your sessions.