While editing an HTML page, place your cursor on the area of the page where you would like to insert the table. Using the Brightspace editor, click on the Table button, then on Insert Table. (You may need to click Other Insert Options to see the table option)
Insert table
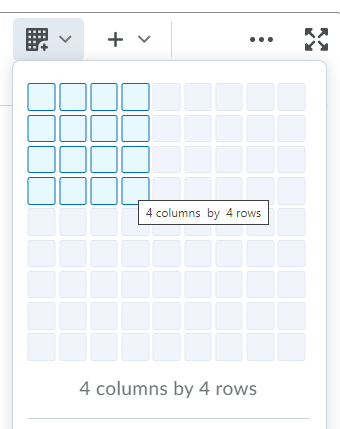
A grid will appear. Click and drag on the grid to select the number of cells (columns and rows) you need. (Note that you can increase/decrease the rows and columns later.) Once you stop dragging and release the mouse click, an empty table will appear. You can populate the table by placing text in each cell of the table.
Table grid
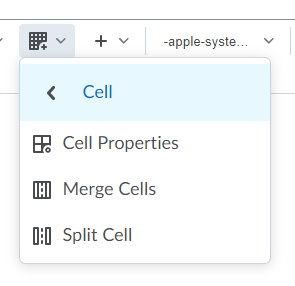
There are a number of common table editing options available for tables such as merge, split, insert/remove rows and columns, etc. To access the options, place your cursor in a table cell (or highlight several rows or columns). Click the arrow next to the table icon.
Table actions
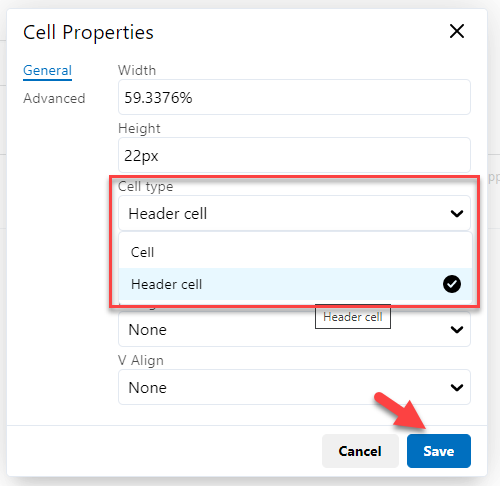
In order to increase the readability of your tables and also to increase accessibility for students, you can indicate which table rows and columns are headings. Place your cursor in a table cell. Click the arrow next to the table icon and then click Cell, then Cell Properties.
Cell properties
Under Cell Type. Choose Column Header, for example to indicate that the cell is a column header. Click Save.
Cell properties: cell type
Be sure to save your changes when finished by clicking Save or Save and Close at the bottom of the HTML editing window.