Respondus Quiz Builder
If you create online quizzes for your courses, this tool is for you! Respondus is a Windows-based quiz-builder application that allows you to transfer quiz questions from a text file (e.g., Word) to a quiz in Brightspace. Whether you have test banks of questions from a publisher or questions you have written yourself, Respondus can help you create quizzes that can be easily imported into Brightspace.
Installing Respondus
The Respondus 4 application files are available to all faculty members and instructors at Memorial. To install and start using Respondus 4, follow the steps below.
Note
The Respondus application does not work on a Mac.
- Go to online.mun.ca and log in to Brightspace
- Select Instructor Resource Centre from your list of courses.
- Go to Course Content, and you will see Respondus Quiz Maker as one of the content modules.
- Open the Respondus 4.0 Quick Start Guide (also available here).
- Locate the Installation section of the document, and follow the steps for installing the campus-wide version of Respondus.
Note
During the installation process, you will be prompted to enter Memorial’s license information for Respondus. This information is available in the text document you will download with the Respondus .zip file (see image below).

If you do not see the Instructor Resource Centre in your list of courses, contact the CITL Support Centre and they will add it for you.
Importing Questions into Respondus
The Respondus quiz-building application allows you to convert questions and assessments that you have already created in Word (or other text formats) into a quiz that you can publish to the Brightspace quiz tool. Files with the following extensions can be imported into Respondus: .txt, .rtf, .doc, .docx, .csv, .zip, and .xml.
To import quiz questions from a text file into Respondus, follow the process below.
Note
You can also import the publisher’s test banks for your textbook into Respondus. To do that, open the Respondus app on your computer and select Test Bank Network from the available options.
Step 1: Correctly format text to be imported
Regardless of the file type you are using, you need to follow simple formatting guidelines to ensure that the questions transfer properly from the text file to Respondus.
For example, numbered lists should not be used in the text you are going to import. Instead, you should follow the style illustrated in the box below, and mark the correct answer with an asterisk. Thus, a multiple choice question would look like this:
1. Supermoons occur with:
A. Spring tides
B. Full moon close to equinox
*C. Moon at perigee
D. Moon at apogee
E. Sun at apogee
2. Tidal fronts arise from:
A. Gravitational pull of the sun
B. Gravitational pull of the moon
*C. Strong tidal currents and topography
D. Upwelling
E. Basin topography
etc.
For information on formatting other question types, please consult the ‘Importing Questions‘ section of the Respondus User Guide.
Step 2. Import questions from a text file into Respondus
Once you have formatted your questions in a text file, you are ready to import them into Respondus. To do that, follow the steps below.
- Open the Respondus app on your computer. The application will open on the Start tab.

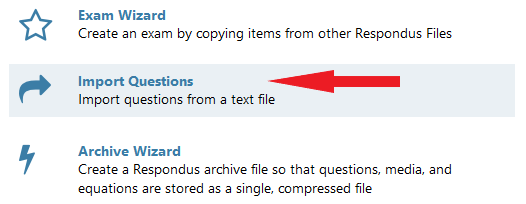
- Click Import Questions.
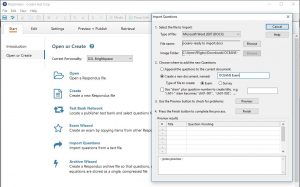
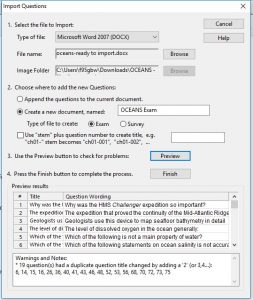
- A new box with various import options will pop up. (Click the image below for a larger view).
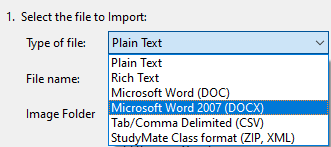
- Open the dropdown menu next to Type of file and select the type of file you used to save your questions (e.g., .docx if you have a Word file).
- Next to File name, click Browse and locate the correct file on your computer.

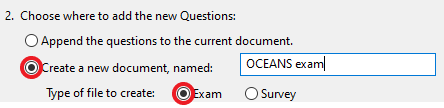
- Ensure that the radio button next to ‘Create a new document: named‘ is selected, and create a Respondus folder where questions from the text file will be saved.
- Click Preview to check for any issues.

- Click Finish to import questions into Respondus.

The Import Questions box should now look like the one below (click image to view larger).
Step 3: Configure quiz settings
After questions have been imported into Respondus, you will need to configure settings for your quiz.
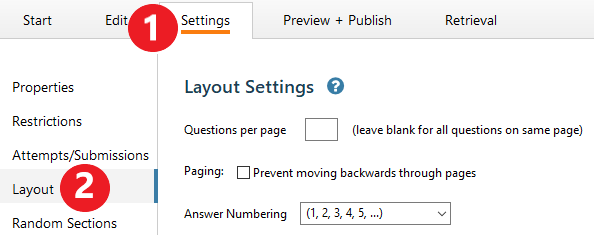
- In the Respondus app, go to the Settings tab and select Layout in the side menu. Select your desired options.
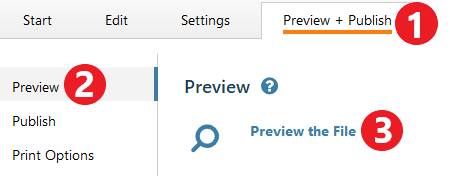
- Next, go to the Preview and Publish tab and select Preview in the side menu. Click Preview the File to view the question and make sure there are no issues.
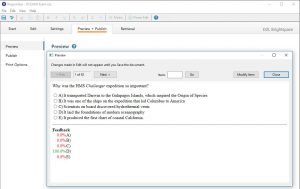
- If all questions look fine, click Close. If any changes are required, click the Modify Item button at the top of the Preview window.
Video Instructions
The video below illustrates how to import questions from Word and other file types into Respondus.
Importing Questions with Respondus 4
Additional Tips
1. Randomize answers in multiple choice questions
When creating multiple-choice questions in the Brightspace quiz tool, you can select the option to randomize the order of answers for each student. This option has to be selected for each individual multiple-choice question.
The option to randomize answers in multiple-choice questions is also available in Respondus. You can set it for each question individually, or you can set it for all multiple-choice questions in the quiz in one step.
Note
You need to adjust the randomization setting in Respondus before you import the questions from your text file into Respondus. Changing this setting after import will not apply random order to the answers.
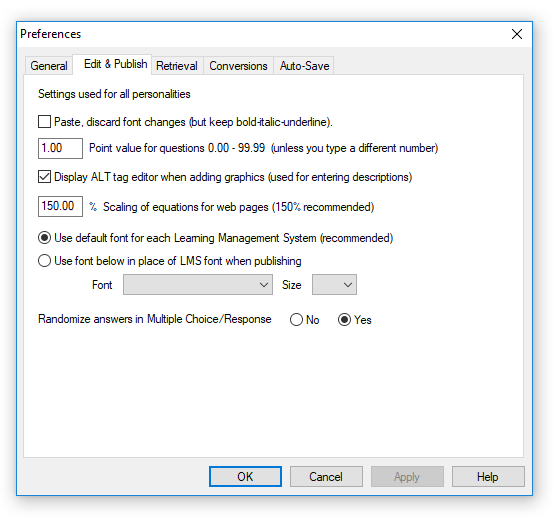
To randomize answers in multiple-choice questions in Respondus, do the following:
- Go to file File and select Preferences.
- Click the Edit & Publish tab.
- Select Yes next to Randomize answers in Multiple Choice/Response.
- Click OK.
2. Messy imports from Word
Sometimes in a Word document, some multiple-choice questions get mish-mashed together. One ‘trick’ that usually helps fix the issue is to select all the text in the Word document, then select a uniform font type and size. In our experience, that fixes issues with most questions; however, some problems may still persist.
A more advanced way that has worked for us is to turn on hidden characters and pull up the Style editor in Word. There are usually soft paragraph breaks, or fake lists, or some sort of hidden styles applied to the problem area. You can select all the text and apply “normal” which corrects most issues.
If you can (e.g., if there is not a lot of formatting required such as bold, italics, super/sub-scripts, tables, images, etc.), paste the question into Notepad or WordPad to get rid of all hidden styles which may be tripping Respondus up.
Publishing Quiz from Respondus to Brightspace
Once you have saved a quiz using Respondus, you are ready to publish it to the quiz tool in your Brightspace course site.
- Open the Respondus app on your computer.
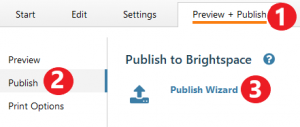
- Select the Preview and Publish tab.
- Click Publish and then Publish Wizard.
- A new window with the Publish Wizard will pop up.
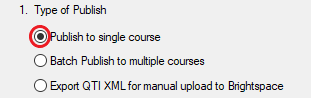
- In #1, select ‘Publish to single course‘ (if appropriate)
- In #2, open the dropdown menu and select ‘Add new server’
- Click Next

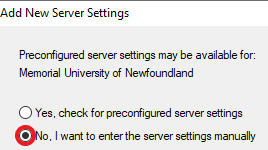
- A new ‘Add New Server’ window will open. If you are connected to the MUN domain, you can check for preconfigured server settings (option 1). If not, select the option to enter the settings manually.
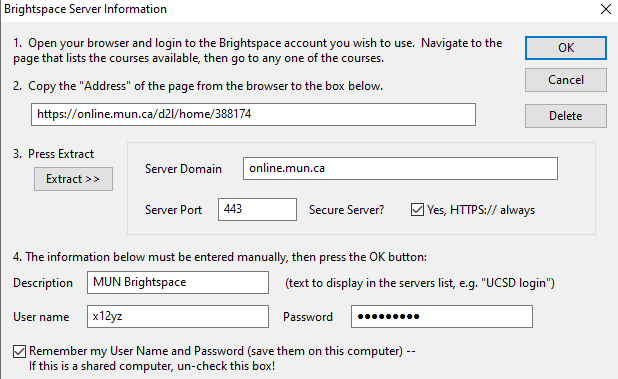
- ‘Brightspace Server Information’ window will open.
- First, open an internet browser log in to Brightspace.
- Go to the home page for the course where you want to import the quiz, and copy the url for that page.
- In #2, paste the url for the Brightspace course site.
- In #3, click Extract or manually enter the following information:
- Server Domain: online.mun.ca
- Server Port: 443
- In #4, enter a description of your choice (e.g. ‘MUN Brightspace’) as well as your MUN username and password.
- Click OK.
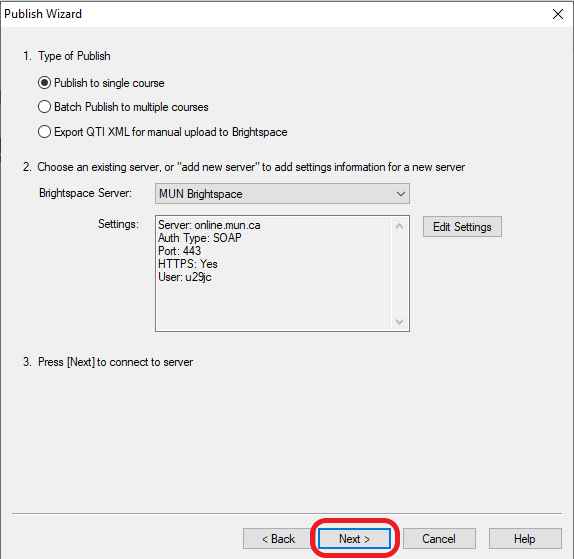
- You will now be taken back to the ‘Publish Wizard‘ window – it will look like the image below. Click Next.
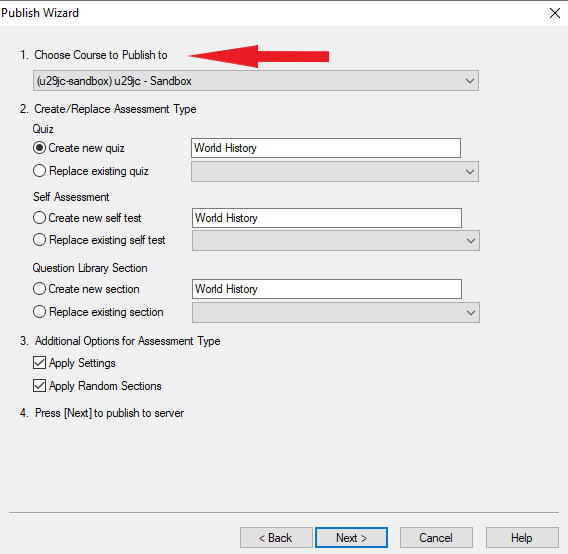
- On the next page, select the course where you want to import the quiz, choose the name and specific location for the quiz.
- If you have configured all the appropriate settings for the quiz in Respondus, you can send it directly to a specific quiz in Brightspace.
- Another option is to send the questions to the ‘Question Library‘ for the course.
- Click Next and the publishing process will begin.
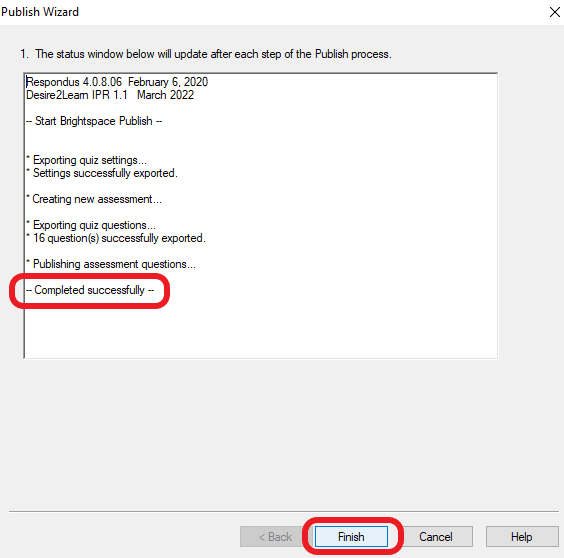
- You will now see a page with the status information for your publish. Wait until the ‘Completed Successfully’ message displays, and click Finish.
- Go to the Brightspace course site where you published your quiz and verify that it has been imported to the correct location.
- You can now open the quiz in Brightspace, you can now set up additional quiz options and/or make any further edits to the questions.