Scheduling Online Rooms Sessions
You can use Online Rooms to schedule synchronous meetings with individual students, select groups of students, or all students in your course. You can also use Online Rooms to record lectures with no students present in the session and later post the recordings to your course site. Click on the menu items below for details on how to schedule your sessions.
> Things to Note About Scheduling
There are a few things to keep in mind when scheduling Online Rooms sessions:
- Give students sufficient notice. To ensure students can attend, you should schedule your sessions with as much advance notice as possible (at least 24 hours).
- Students cannot join a session before the scheduled start time. As an instructor, you can enter your Online Rooms sessions 10 minutes before the scheduled start time. Students, however, cannot enter until the exact start time. If you would like to allows students to join early (e.g., to troubleshoot for potential technical issues), select an earlier start time when scheduling your Online Rooms sessions. For example, for a 9:00 am class, select 8:30 am as the session start time.
- The session closes at the scheduled end time. The duration you set for your Online Rooms session is the maximum amount of time you will have in that session. When the time runs out, the session will close automatically. Thus, it is recommended that you schedule Online Rooms sessions to be longer than the actual allocated class time.
- Pay close attention to time zones. Since Online Rooms is an add-on to Brightspace, time settings may not always be synced between the two systems. If you are in a different time zone than your students, double-check if the time of the Online Rooms sessions you have scheduled is correct. Issues with the system autocorrecting the time to match the instructor’s time zone have been reported.
> Scheduling Classes
To schedule a class or a series of classes using Online Rooms, follow the steps below.
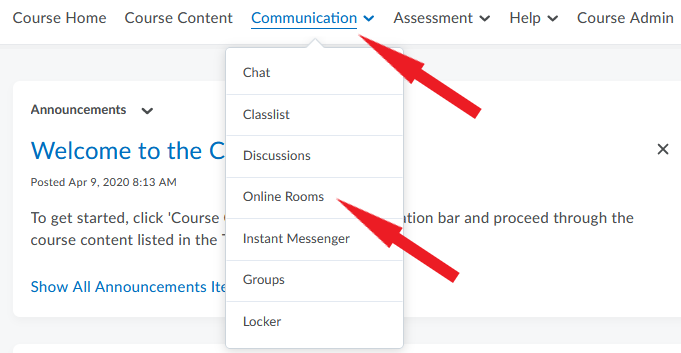
- On your course homepage, click Communication in the navigation bar.
- Select Online Rooms from the drop-down menu.
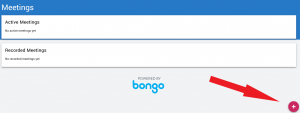
- On the Meetings page that opens, click on the pink circle in the bottom right corner of the screen.
- In the Schedule Meeting window that opens, enter the following information:
- Name of the meeting.
- Date and time of the meeting.
- The maximum duration of the meeting (NOTE: When the time set here runs out, your session will close automatically with no option to extend it.)
- How many weekly meetings will take place, if applicable.
- Whether or not the meeting will be recorded (NOTE: Alternatively, you can click the Record button in the session after launching it).
- Whether you wish to invite external participants to the meeting (e.g., a guest speaker).
- Leave Invite entire class selected, and the information about the session can be transferred to the course calendar.
- Click Save.
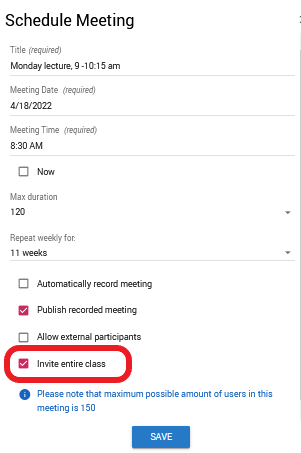
NOTE: The Publish recorded meeting setting is selected by default, and we do not recommend changing it. If you unselect this option but choose to record the session, the recording file that generates will not be usable.
> Scheduling Individual or Small-Group Meetings
If you want to use Online Rooms to hold office hours or consultations for individual or select groups of students, follow the steps below.
- On your course homepage, click Communication in the navigation bar.
- Select Online Rooms from the drop-down menu.
- On the Meetings page that opens, click the pink circle in the bottom right corner of the screen.
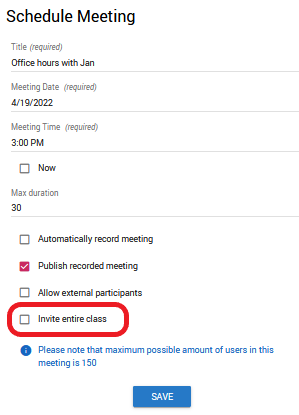
- In the Schedule Meeting window that opens, enter the following information.
- Name of the meeting.
- Date and time of the meeting. Alternatively, you can choose ‘Now as the start time if you are ready to launch the meeting right away.
NOTE: Settings for future meetings can be edited at a later time, but ‘Now’ meetings cannot be edited.
- Maximum duration of the meeting (NOTE: When the time is up, the session will close automatically with no option to extend it.)
- How frequently you want the meeting to repeat, if applicable.
- Whether or not the meeting will be recorded (NOTE: Alternatively, you can click the Record button in the session after launching it).
- Whether you want to invite external participants to the meeting (e.g., a guest speaker).
- Unselect Invite entire class (otherwise, the whole class will have access to the meeting link through the course calendar).
- Click Save.
- You now need to invite participants to the meeting.
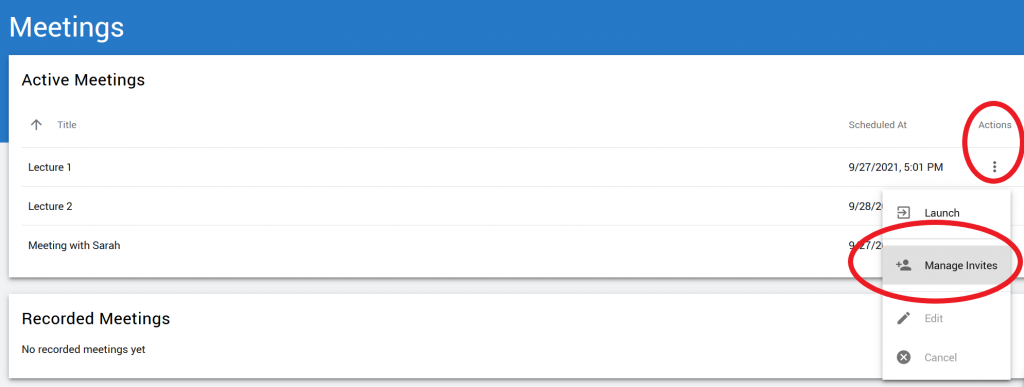
- Go to your list of Active Meetings and locate the session you have previously scheduled.
- Click on the 3-dot icon to the right of the session title (under Actions).
- Your classlist will open. Select the student(s) you want to invite to the meeting and they will receive a meeting link through their Brightspace email.
Video Instructions
For additional information about Online Rooms, please visit this resource by Bongo.