Creating Video Assignments
NOTE: To ensure a problem-free experience for you and your students, please follow Bongo’s Basic System Requirements.
Once you decide which type of video assignment you want to use in your course, you can create it directly in Brightspace. In the menu below, click on the type you want to create to view step-by-step instructions.
NOTE: A video assignment must be created within a content module. It cannot be created in any other location in Brightspace (e.g. in Assignments).
> Create an Individual Assignment
- Log in to Brightspace and go to your course site.
- Select Content in the course navbar.

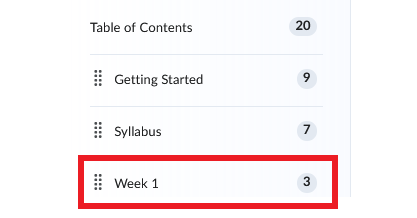
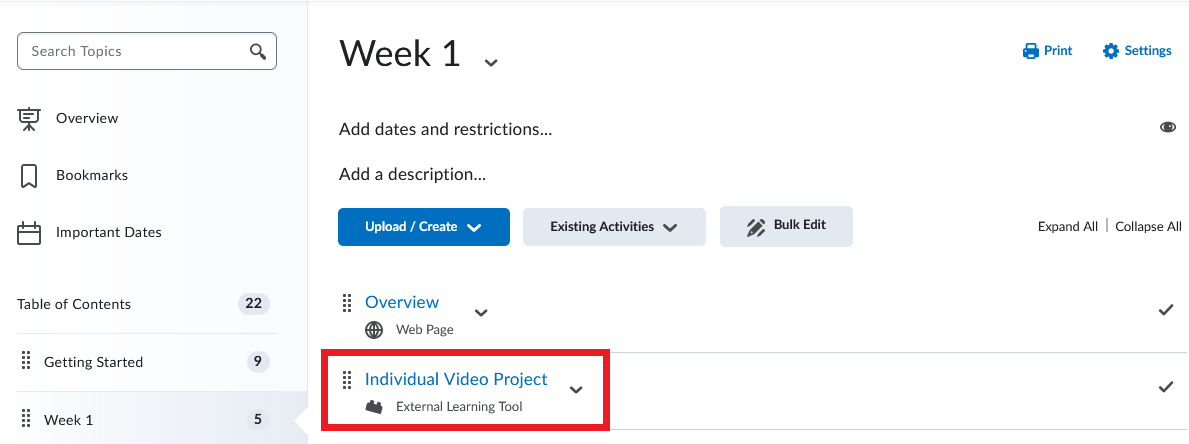
- Under the Table of Contents, select the content module where you want to place the video assignment.
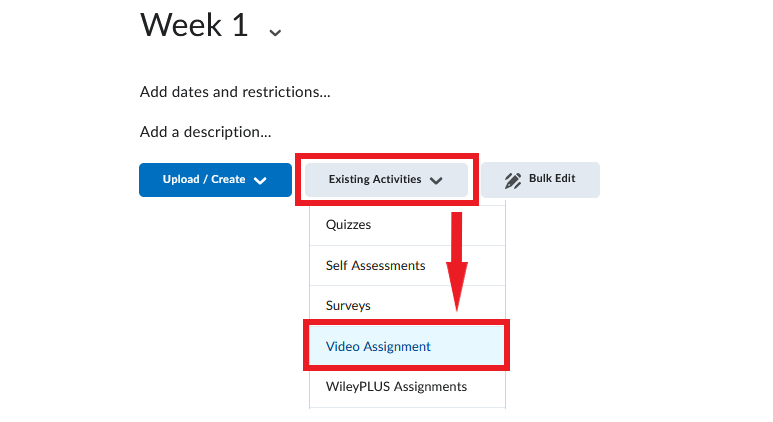
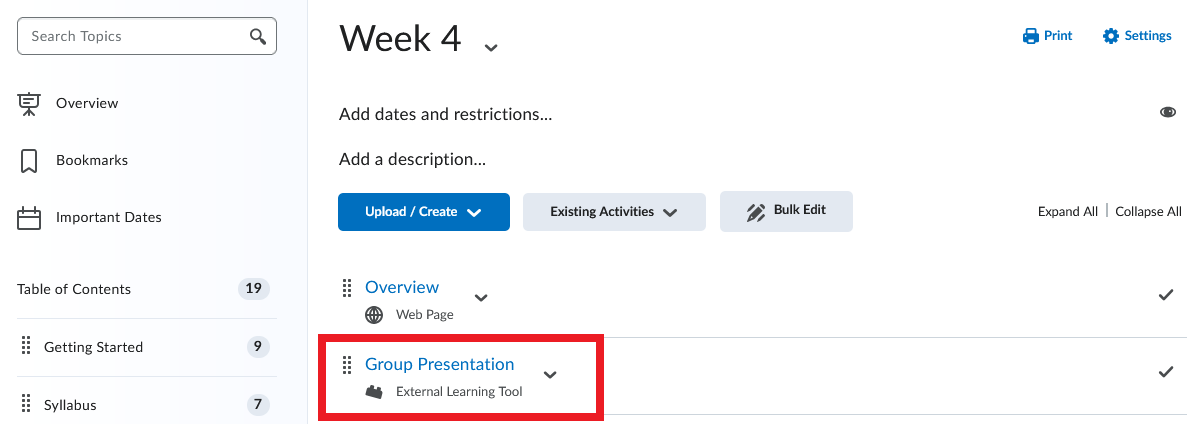
- In the content module you selected, click Existing Activities. A dropdown menu will open. Select Video Assignment from the list.
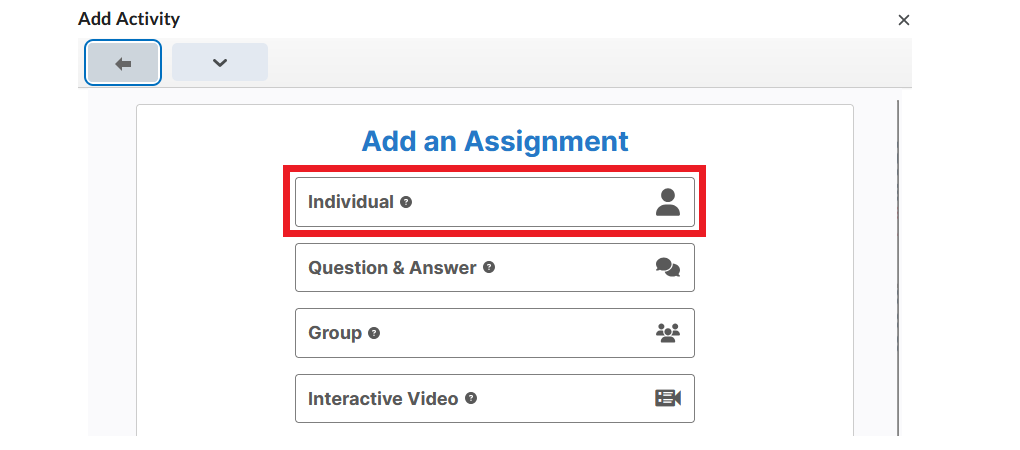
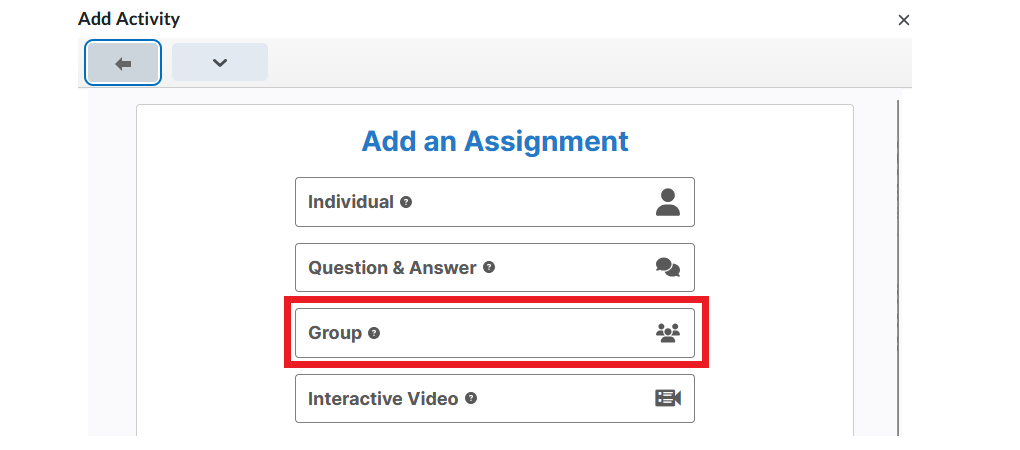
- In the new window that opens, select Individual from the list of available assignment options.
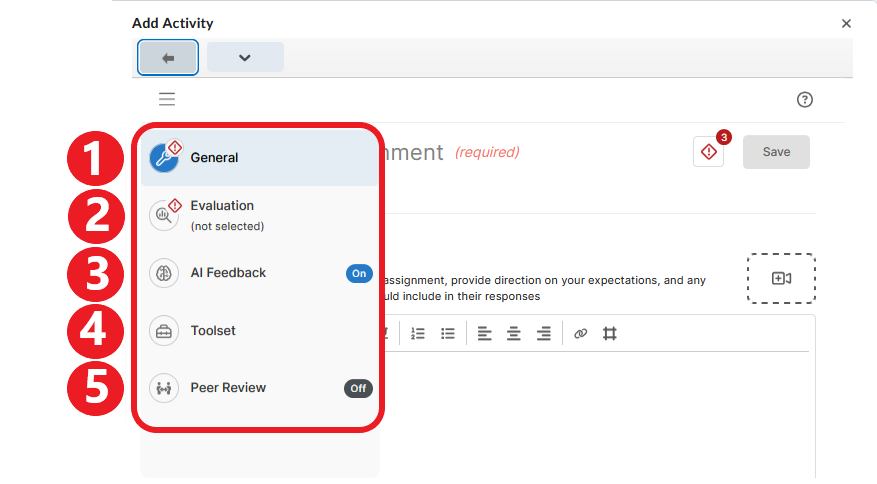
- Configure the assignment using the menu on the left side of the screen. (You may need to hover the cursor over the menu to reveal what the icons represent.) The menu for an individual video assignment contains five categories of information:
- General
- Evaluation
- AI Feedback (ON by default)
- Toolset
- Peer Review (OFF by default)
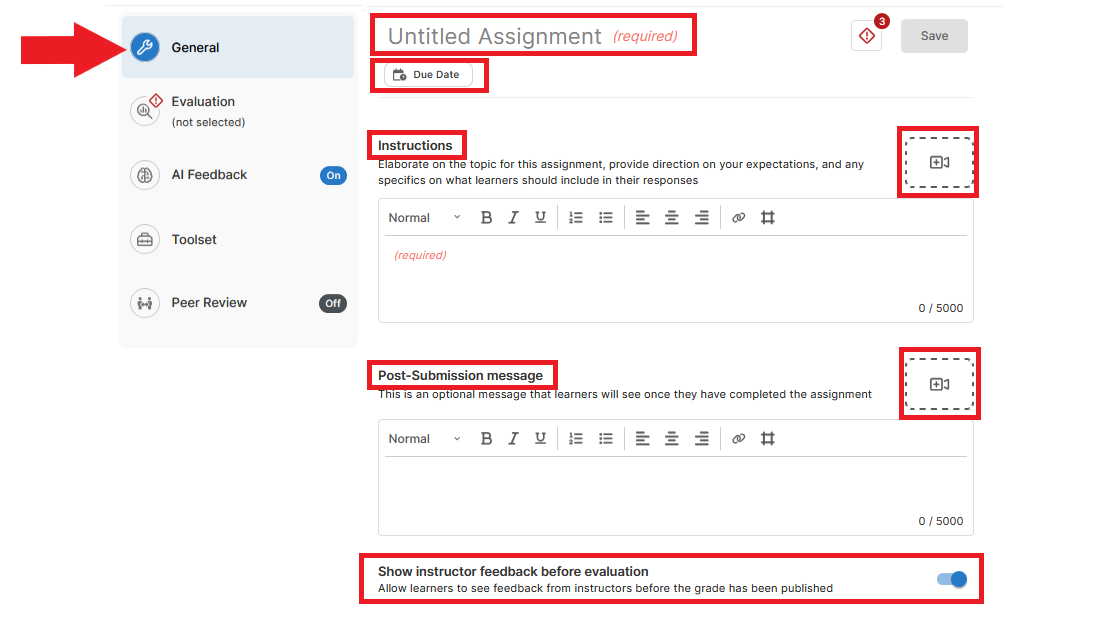
1. General Information
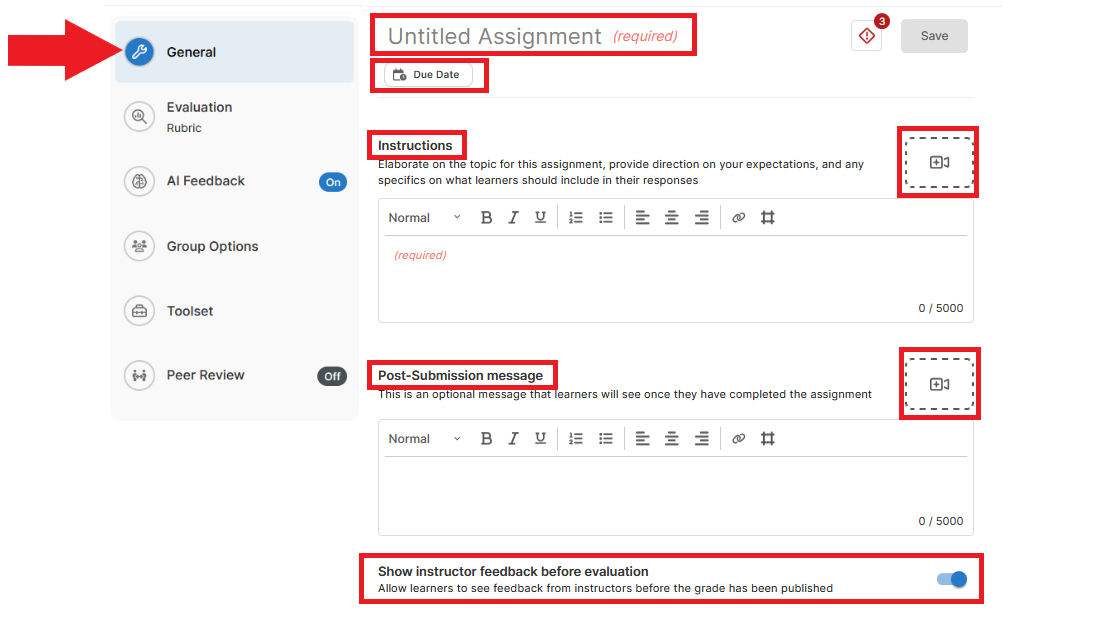
In the General section, enter the following:
- Assignment Title (required)
- Due Date
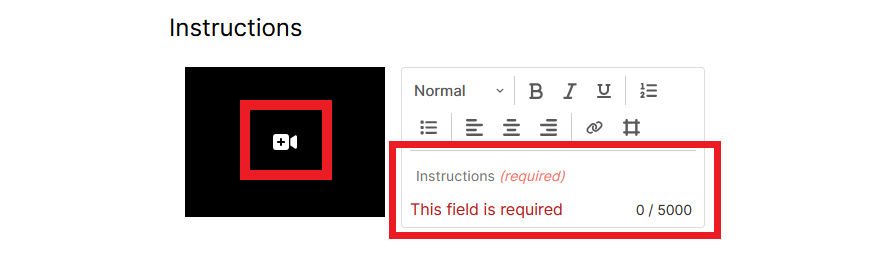
- Instructions – Written instructions are required. Optionally, you can also record video instructions by clicking the camera icon to the right (
).
- Post-Submission message – You can optionally include a written or a video message that students will see when they submit their recording.
- Show instructor feedback before evaluation. This option is ON by default. If you leave it ON, students will be able to see your feedback on their submission before the assignment grade is published. If you prefer to release feedback at the same time as the grade, turn this option OFF by clicking the toggle button.
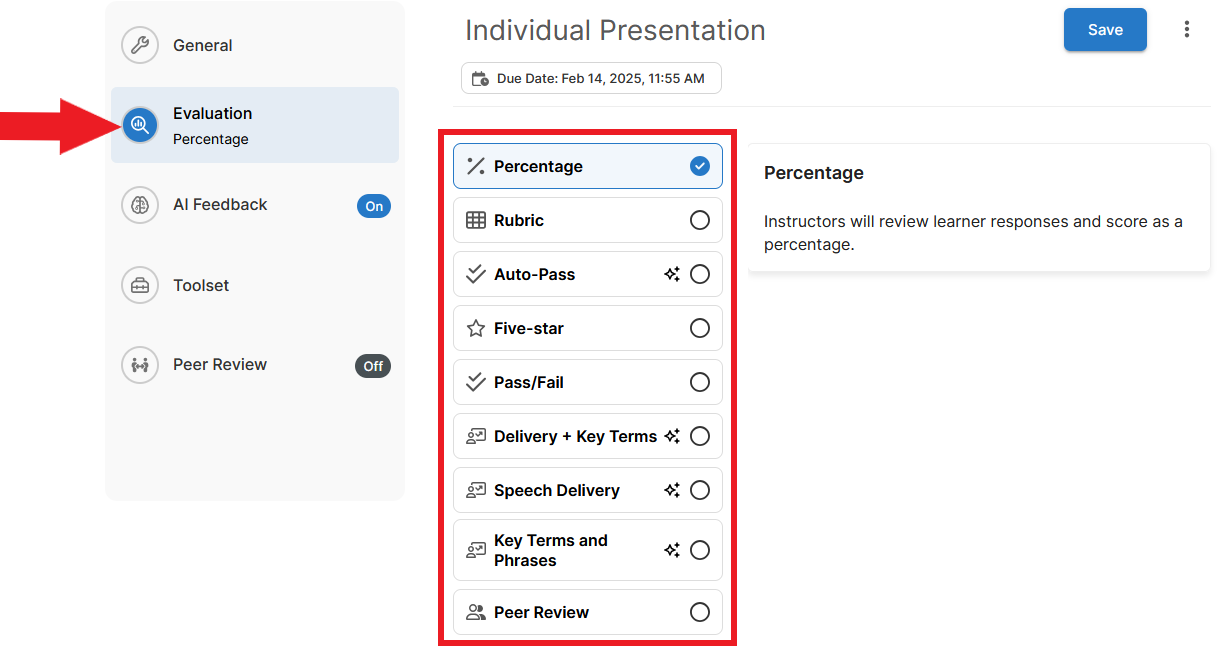
2. Evaluation
In the Evaluation section, choose how you want to evaluate the assignment. Only one evaluation method can be selected. The available options are:
- Percentage
- Rubric (if you select this option, you will need to create a rubric within the video assignment tool)
- Auto-Pass
- Five-Star
- Pass/Fail
- Delivery + Key Terms
- Speech Delivery
- Key Terms and Phrases
- Peer Review
Click on each evaluation method to see more information about that method. For more information on scoring methods in for video assignments, please visit this Bongo resource.
3. AI Feedback
AI Feedback is a tool that automatically transcribes a recording, analyzes it, and provides feedback on the following parameters:
- quality of speech delivery (speech rate, filler words, clarity)
- students’ use of specific words and phrases (this function is optional; for details, see More options below).
NOTE: AI Feedback can help students prepare better submissions. Students can create a recording, have it auto-analyzed using AI Feedback, and decide whether the recording is ready for submission or if they should re-record.
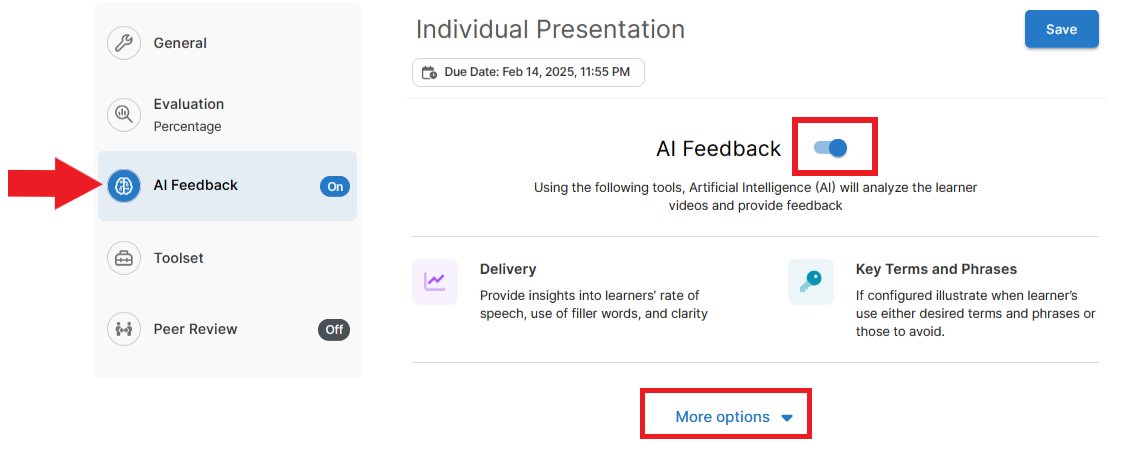
AI Feedback is turned ON by default. If left ON, the AI analysis and score will be available to students and the instructor. You can turn this function OFF by clicking the toggle button next to AI Feedback.
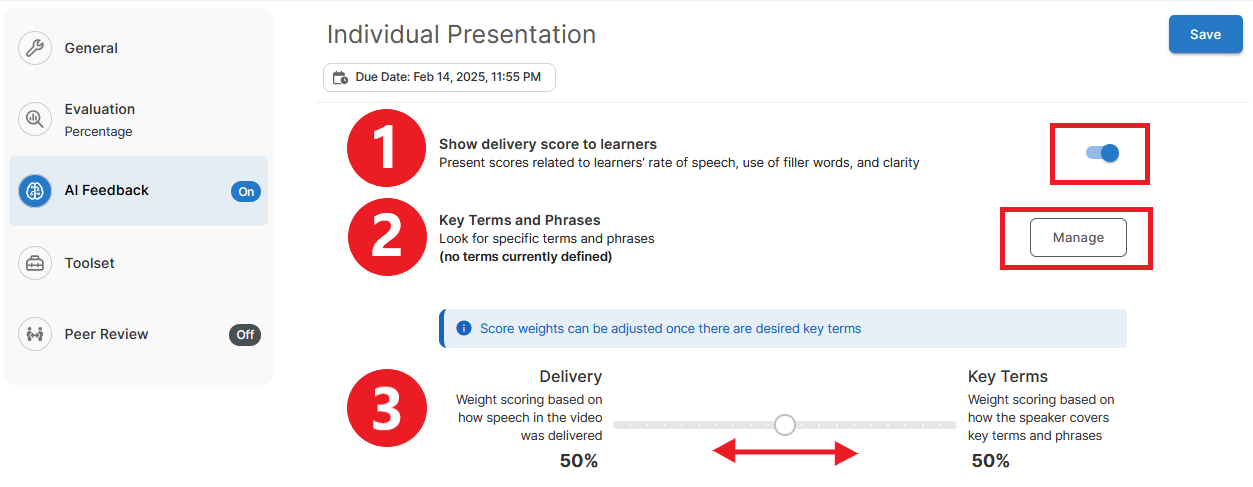
If you decide to keep AI Feedback ON, click More options to set additional parameters. Under More options you can:
- Hide the score generated by AI Feedback from students – students will still get a detailed analysis of their speech but without a numerical score.
- Enter key terms and phrases you would like students to use in their recordings (these terms will be identified and highlighted in the auto-generated transcript).
- Determine what portion of the grade should be based on speech delivery in relation to the use of key phrases.
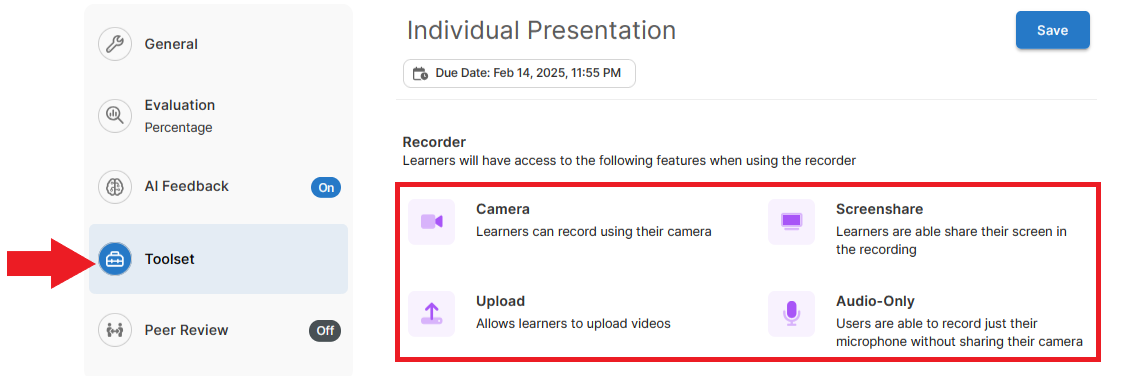
4. Toolset
The Toolset section lists the tools students will have access to when preparing their submissions. Students can:
- use a camera
- share their screen
- create an audio-only recording
- upload an existing recording from their device
Note that for an individual video assignment, the instructor cannot disable any of these tools.
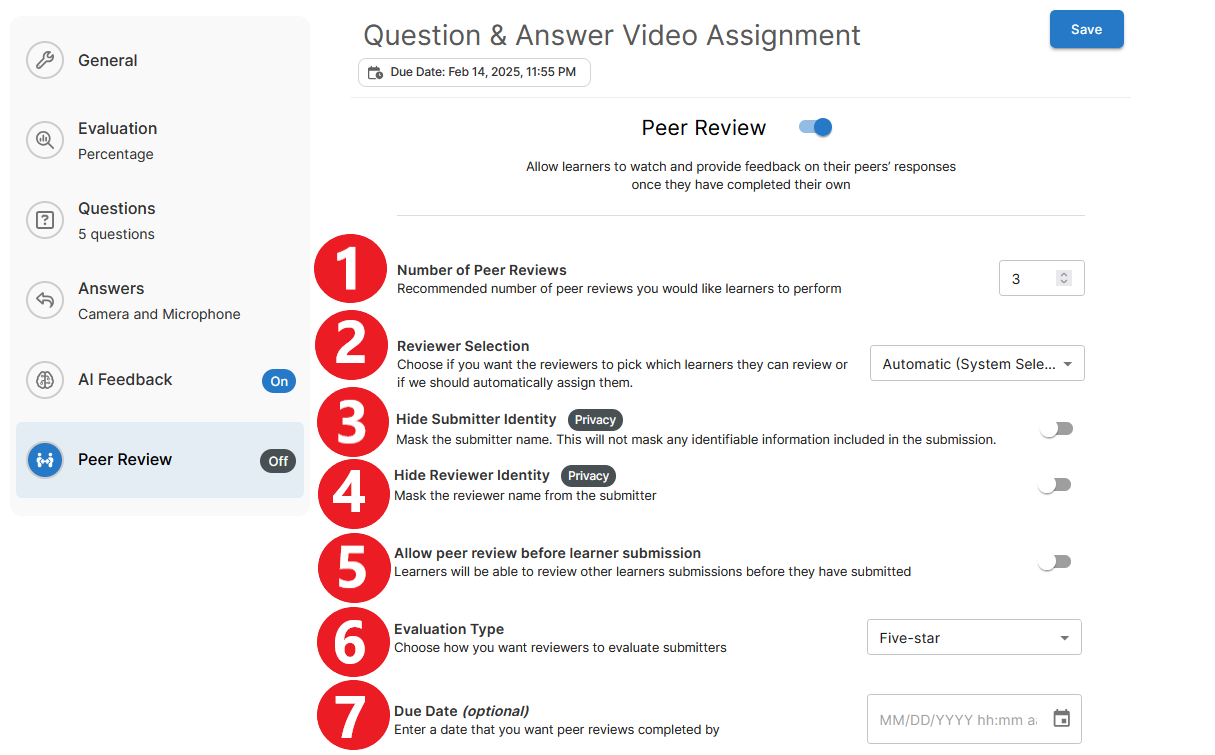
5. Peer Review
The peer review function is turned OFF by default. If you wish to incorporate peer review in the assignment, enable it by switching the toggle button to the ON position. Then click More options to set additional parameters.
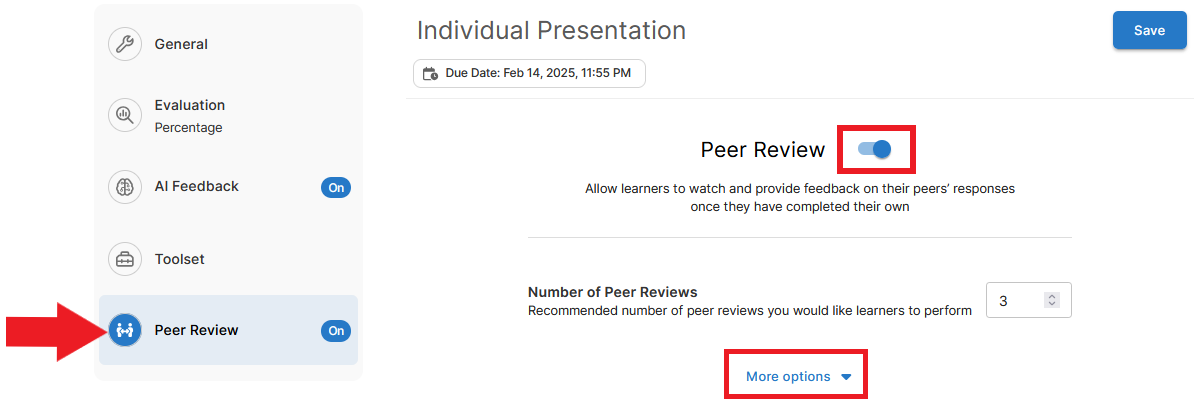
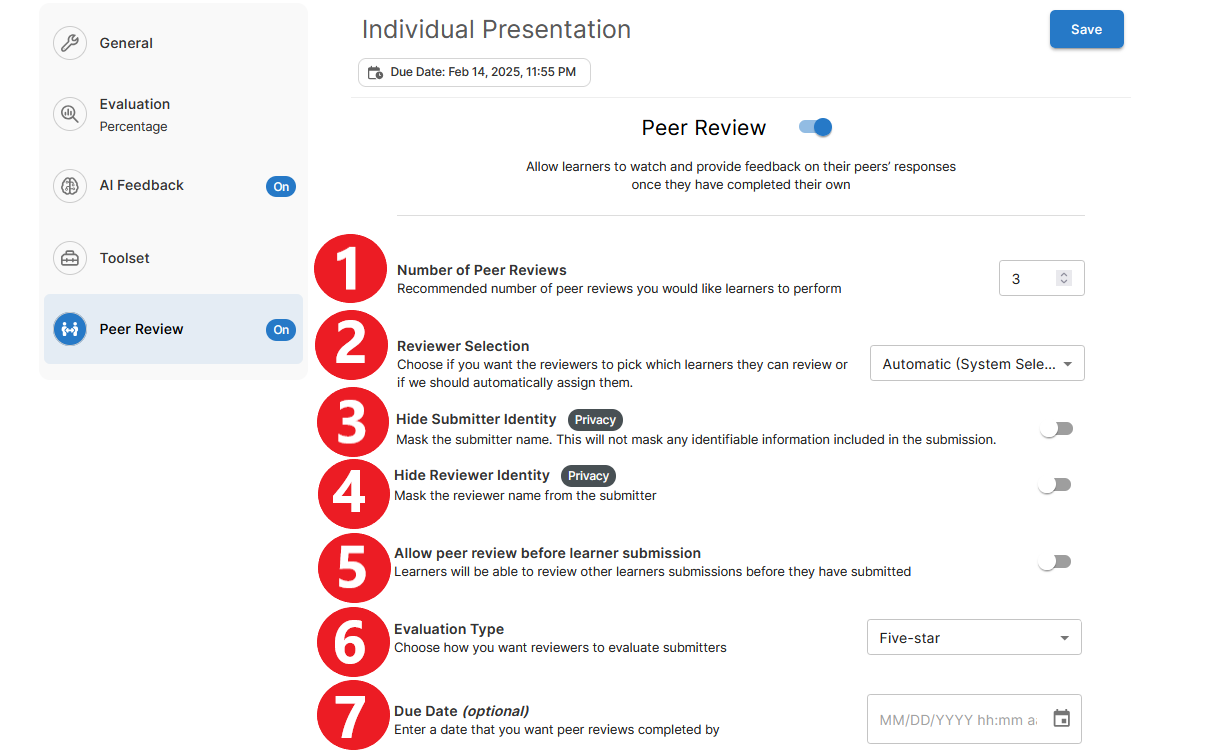
Under More options, you can set the following:
- the number of reviewers per submission
- the way reviewers will be assigned to submissions (A. the system can assign them randomly, or B. students can choose which submission(s) they want to review)
- whether to hide or reveal the identity of the submitter
- whether to hide or reveal the identity of the reviewer(s)
- whether to make peer feedback available to students before recordings have to be submitted to the instructor (this option would give students a chance to reflect on peer feedback and re-record if necessary)
- the evaluation method the peer reviewers should use (two options are available: A. a five-star rating, or B. a rubric provided by the instructor)
- optionally, a due date for the peer reviews
When you have finished creating the video assignment, click Save at the top of the page.
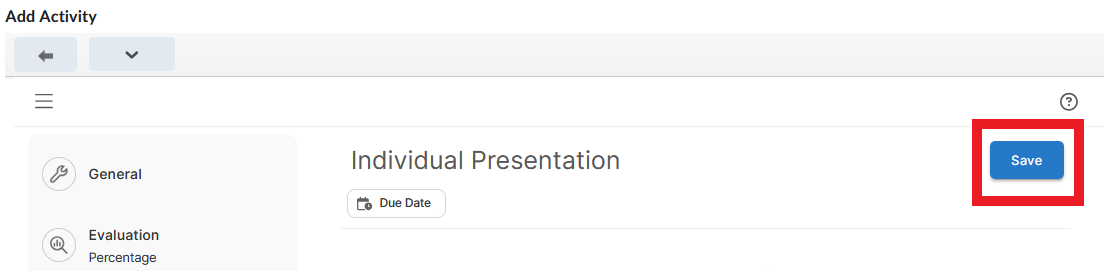
The new assignment will now appear in a content module in Brightspace.
For more information on the individual video assignment, please refer to this Bongo resource.
> Create a Group Assignment
- Log in to Brightspace and go to your course site.
- Select Content in the course navbar.
- Under the Table of Contents, select the content module where you want to place the video assignment.
- In the content module you selected, click Existing Activities. A dropdown menu will open. Select Video Assignment from the list.
- In the new window that opens, select Group from the list of available assignment options.
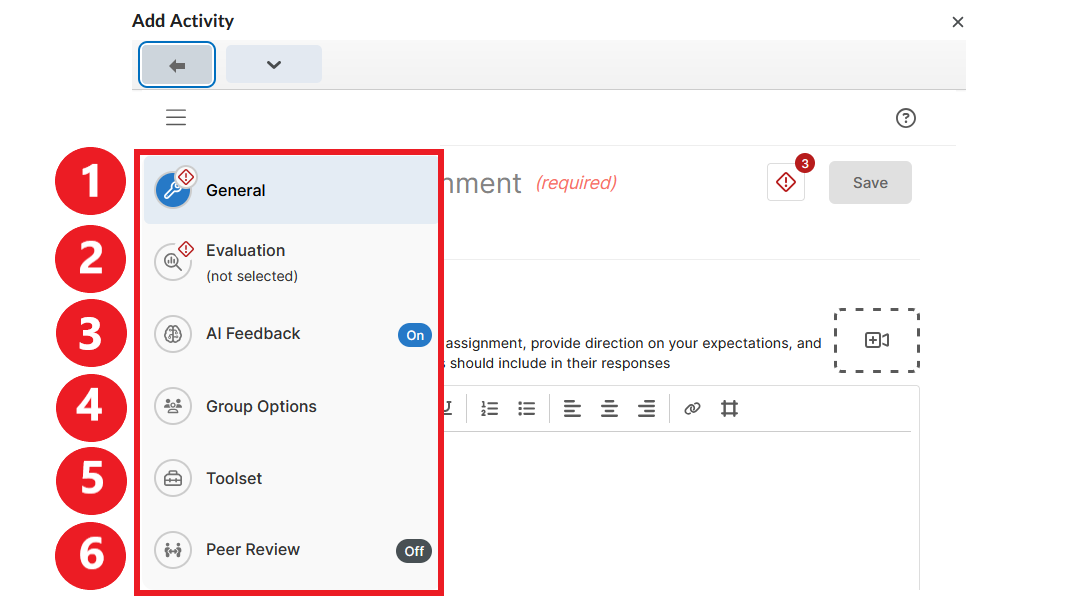
- Configure the assignment using the menu on the left side of the screen. (You may need to hover the cursor over the menu to reveal what the icons represent.) The menu for a group video assignment contains six categories of information:
- General Information
- Evaluation
- AI Feedback (ON by default)
- Group Options
- Toolset
- Peer Review (OFF by default)
1. General Assignment Information
In the General section, enter the following:
- Assignment Title (required)
- Due Date
- Instructions. Written instructions for the assignment are required. Optionally, you can also record video instructions by clicking the camera icon to the right(
- Post-Submission message. You can optionally include a written or a video message that students will see when they submit their recording.
- Show instructor feedback before evaluation. This option is ON by default. If you leave it ON, students will be able to see your feedback on their submission before the assignment grade is published. If you prefer to release feedback at the same time as the grade, turn this option OFF by clicking the toggle button.
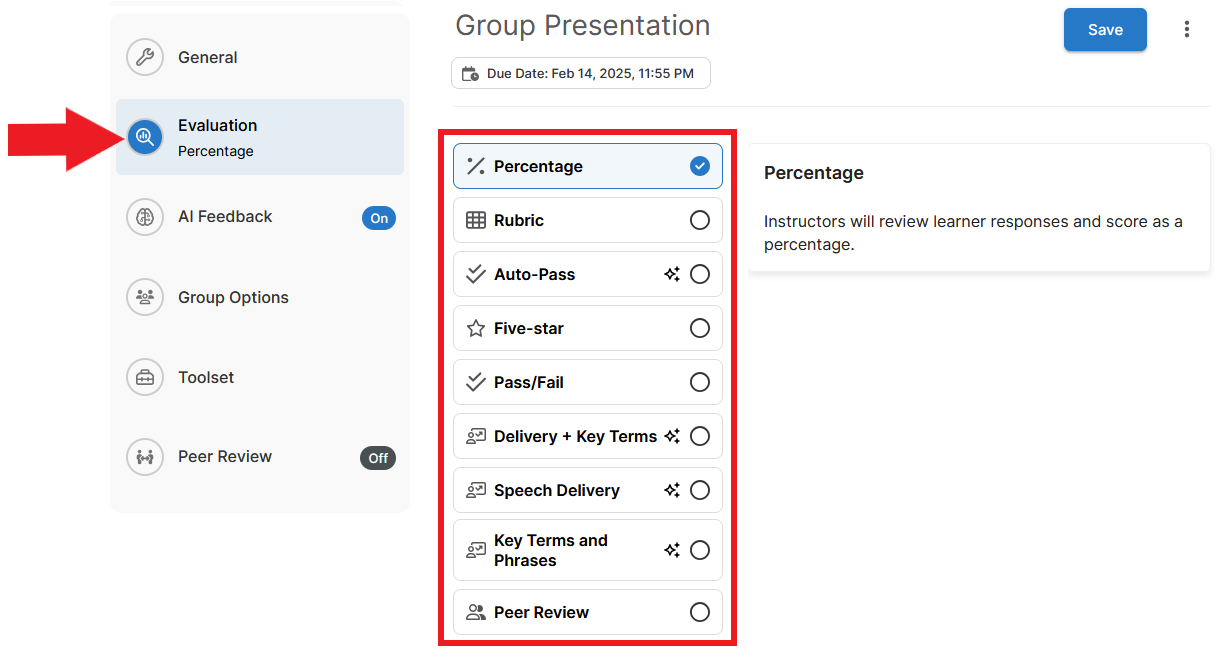
2. Evaluation
In the Evaluation section, choose how you want to evaluate the assignment. Only one evaluation method can be selected. The available options are:
- Percentage
- Rubric (if you select this option, you will need to create a rubric within the video assignment tool)
- Auto-Pass
- Five-Star
- Pass/Fail
- Delivery + Key Terms
- Speech Delivery
- Key Terms and Phrases
- Peer Review
Click on each evaluation method to see more information about that method. For more information on scoring methods in the Video Assignment tool, please visit this Bongo resource.
3. AI Feedback
AI Feedback is a tool that automatically transcribes a recording, analyzes it, and provides feedback on the following parameters:
- quality of speech delivery (speech rate, filler words, clarity)
- students’ use of specific words and phrases (this function is optional; for details, see More options below)
NOTE: AI Feedback can help students prepare better submissions. Students can create a recording, have it auto-analyzed using AI Feedback, and decide whether the recording is ready for submission or if they should re-record.
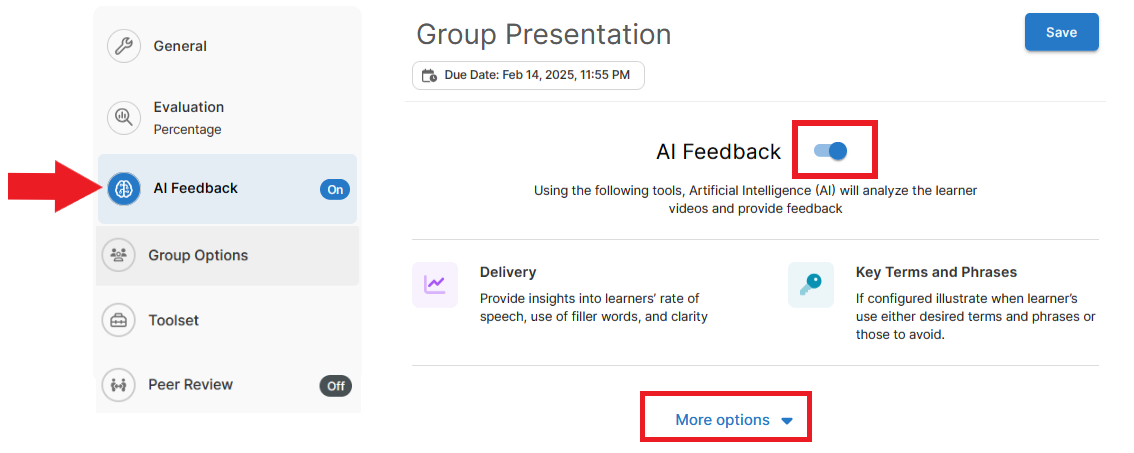
AI Feedback is turned ON by default. If left ON, the AI analysis and score will be available to students and the instructor. You can turn this function OFF by clicking the toggle button next to AI Feedback.
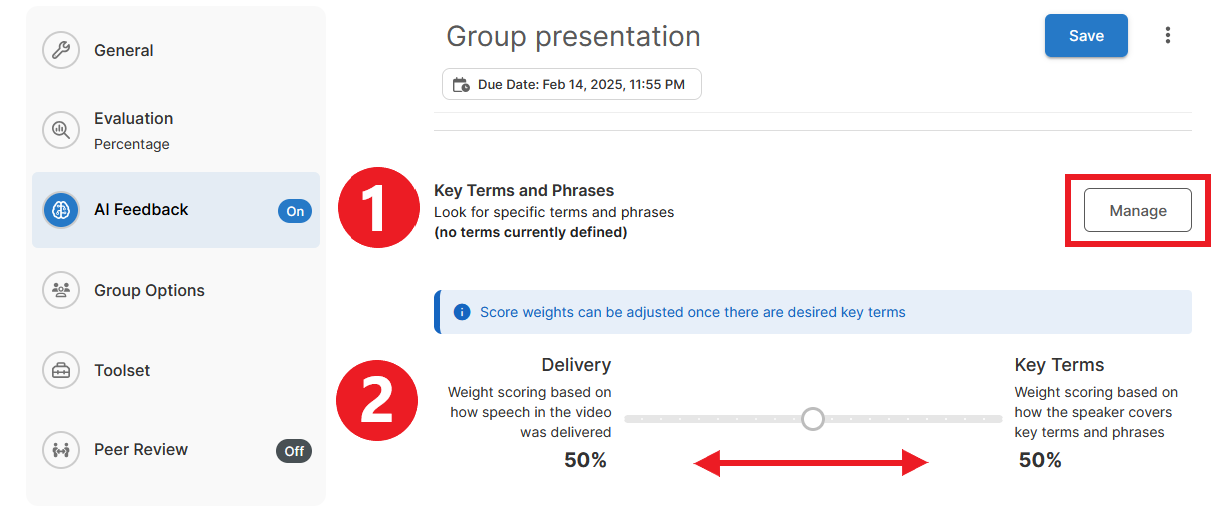
If you decide to keep AI Feedback ON, click More options to set additional parameters. Under More options you can:
- Enter key terms and phrases you would like students to use in their recordings (these terms will be highlighted in the transcript auto-generated transcript).
- Determine what portion of the grade should be based on speech delivery in relation to the use of key phrases.
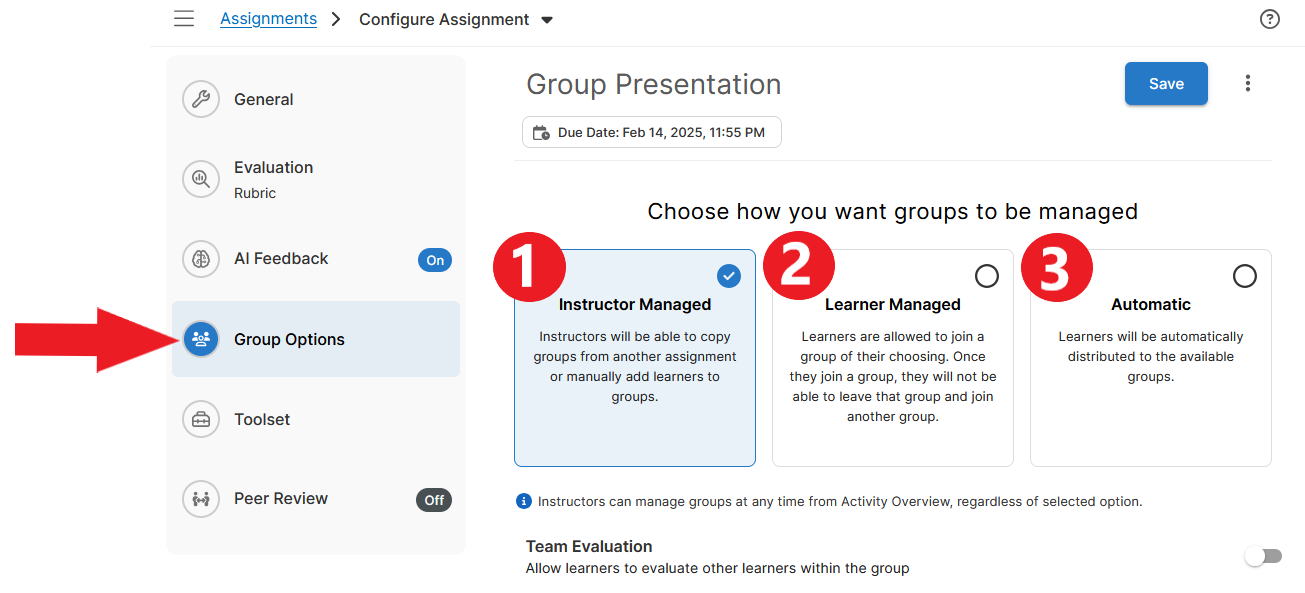
4. Group Options
NOTE: Before students can be assigned to groups within the video assignment tool, they first need to click on the assignment link in Content in Brightspace. Until they click that link, their name will not appear on the video assignment page.
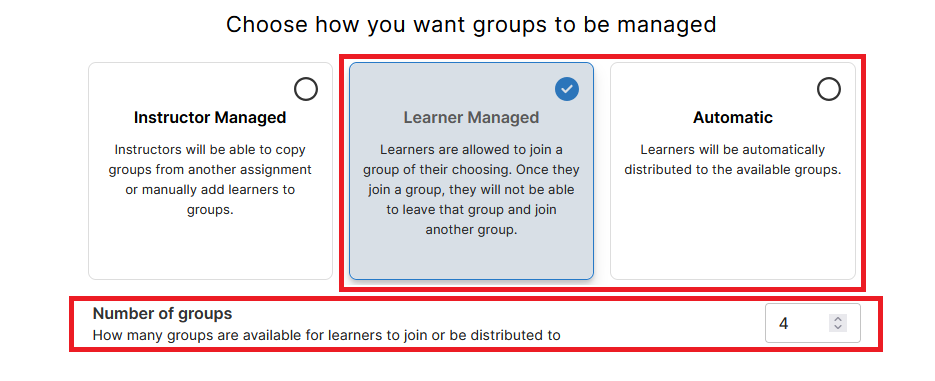
Under Group Options, decide how you want to create groups for the assignment. The following options are available:
- You can manually place students in groups.
- Students can select their own groups (if they do not select a group by a certain date, the instructor can manually place them into groups).
- Students can be randomly assigned to groups by the system.
NOTE: Regardless of the option selected at this stage, instructors can make changes to the groups at any time.
If you selected Learner Managed or Automatic option for group formation, you will be prompted to determine the maximum number of groups you want to create.
- By default, Team Evaluation is turned OFF. If you want students within each group to evaluate each other, turn this option ON by clicking the toggle button on the right. Then click the downward arrow and select one of two available evaluation methods:
- Five-Star
- Rubric (if you select this option, you will need to create a rubric within the video assignment tool)

NOTE: Team evaluations are anonymous. Each group member will only see the average score they were given by the other members of their team. Instructors may take the score into account when deciding on the final grade for each student.
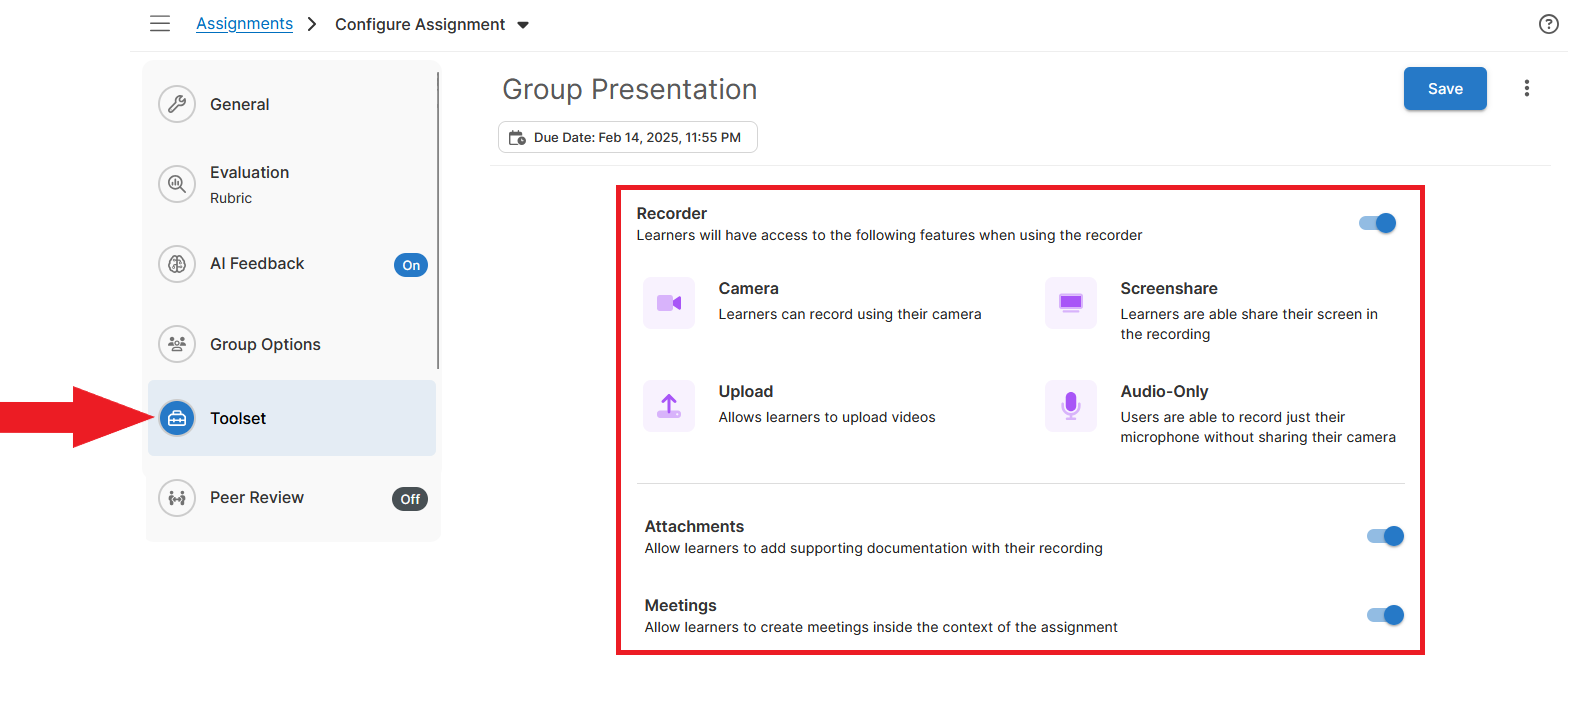
5. Toolset
The Toolset section lists the tools students will have access to when preparing their submissions. Students can:
- use a camera
- share their screen
- create an audio-only recording
- upload an existing recording from their device
- add attachments to their submission (e.g. PPT slides)
- schedule online room meetings to practice and create their recordings
Please note that the instructor can disable some or all of these functions.
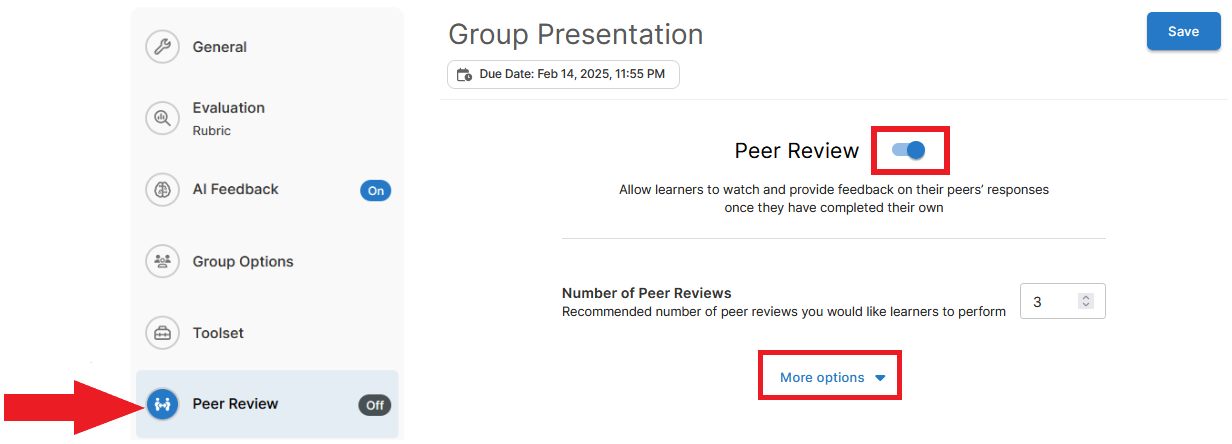
6. Peer Review
The peer review function is turned OFF by default. If you wish to incorporate peer review in the assignment, enable it by switching the toggle button to the ON position. Then click More options to set additional parameters.
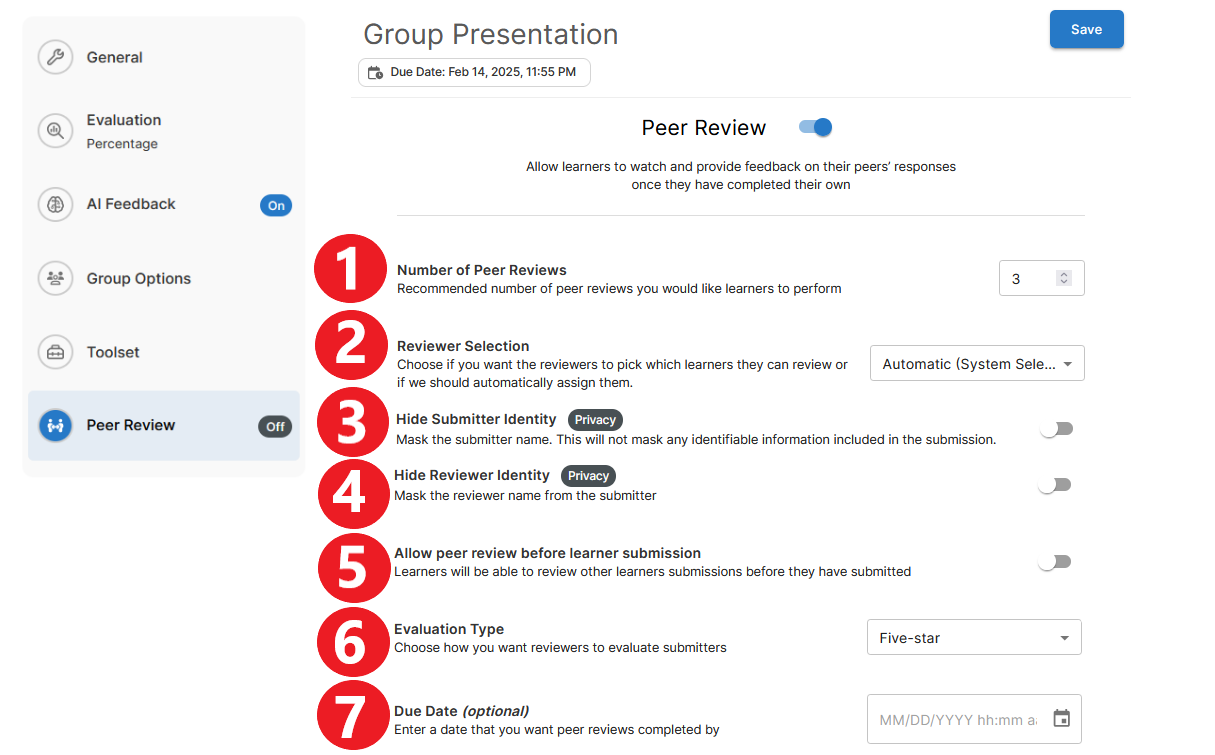
Under More options, you can set the following:
- the number of reviewers per submission
- the way reviewers will be assigned to submissions (A. the system can assign them randomly, or B. students can choose which submission(s) they want to review)
- whether to hide or reveal the identity of the submitter
- whether to hide or reveal the identity of the reviewer(s)
- whether to make peer feedback available to students before recordings have to be submitted to the instructor (this option would give students a chance to reflect on peer feedback and re-record if necessary)
- the evaluation method the peer reviewers should use (two options are available: A. a five-star rating, or B. a rubric provided by the instructor)
- optionally, a due date for the peer reviews
When you have finished creating the video assignment, click Save at the top of the page.

The new assignment will now appear in a content module in Brightspace.
For more information on the group video assignment, please refer to this Bongo resource.
> Create a Question-and-Answer Assignment
- Log in to Brightspace and go to your course site.
- Select Content in the course navbar.
- Under the Table of Contents, select the content module where you want to place the video assignment.
- In the content module you selected, click Existing Activities. A dropdown menu will open. Select Video Assignment from the list.
- In the new window that opens, select Question and Answer from the available assignment options.
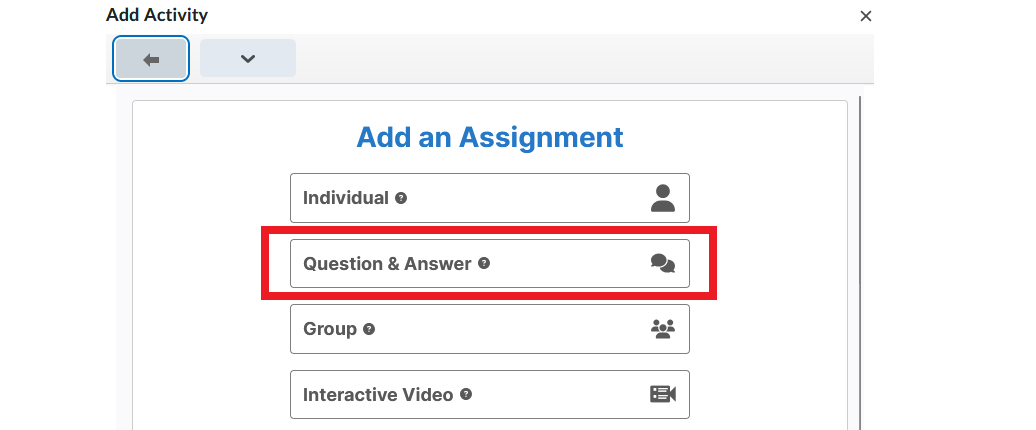
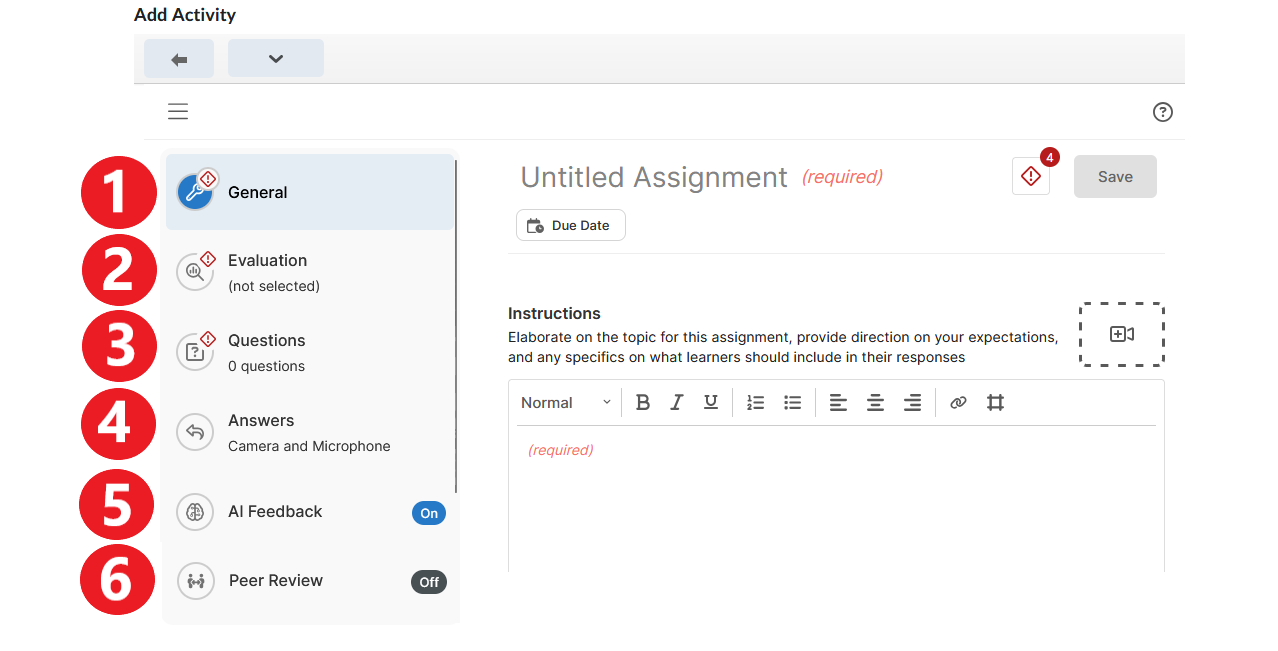
- Configure the assignment using the menu on the left side of the screen. (You may need to hover the cursor over the menu to reveal what the icons represent.) The menu for a question-and-answer assignment contains six categories of information:
- General Information
- Evaluation
- Questions
- Answers
- AI Feedback (ON by default)
- Peer Review (OFF by default)
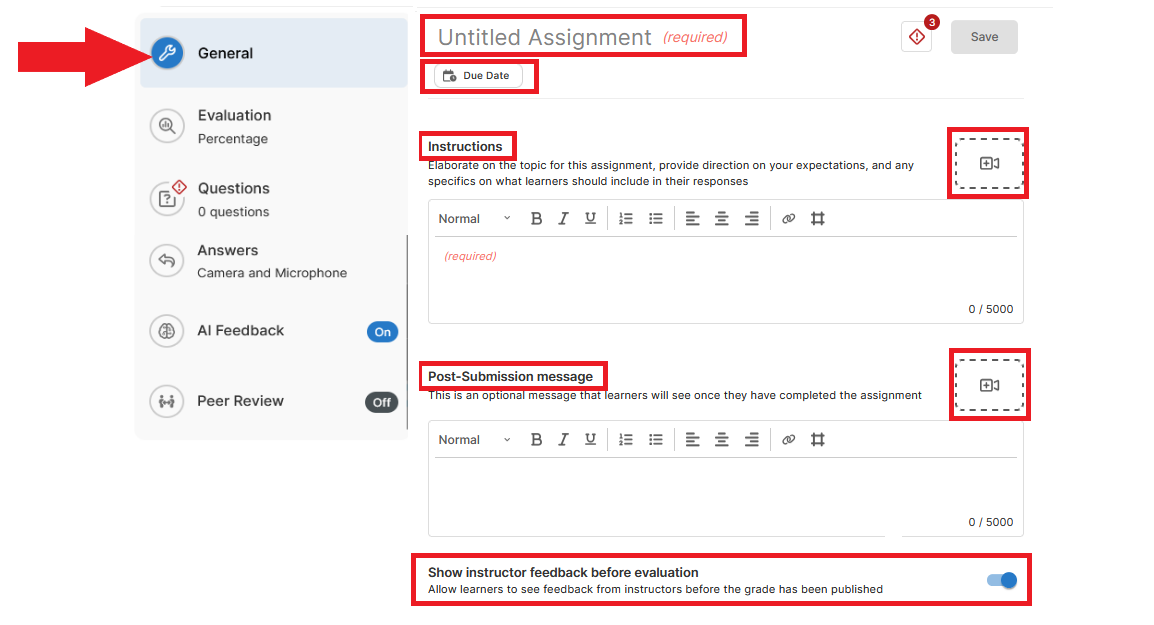
1. General Assignment Information
In the General section, enter the following:
- Assignment Title (required)
- Due Date
- Instructions. Written instructions are required. Optionally, you can also record video instructions by clicking the camera icon to the right (
- Post-Submission message. You can optionally type and/or record a message that students will see when they submit their recording.
- Show instructor feedback before evaluation. This option is ON by default. If you leave it ON, students will be able to see your feedback on their submission before the assignment grade is published. If you prefer to release feedback at the same time as the grade, turn this option OFF by clicking the toggle button.
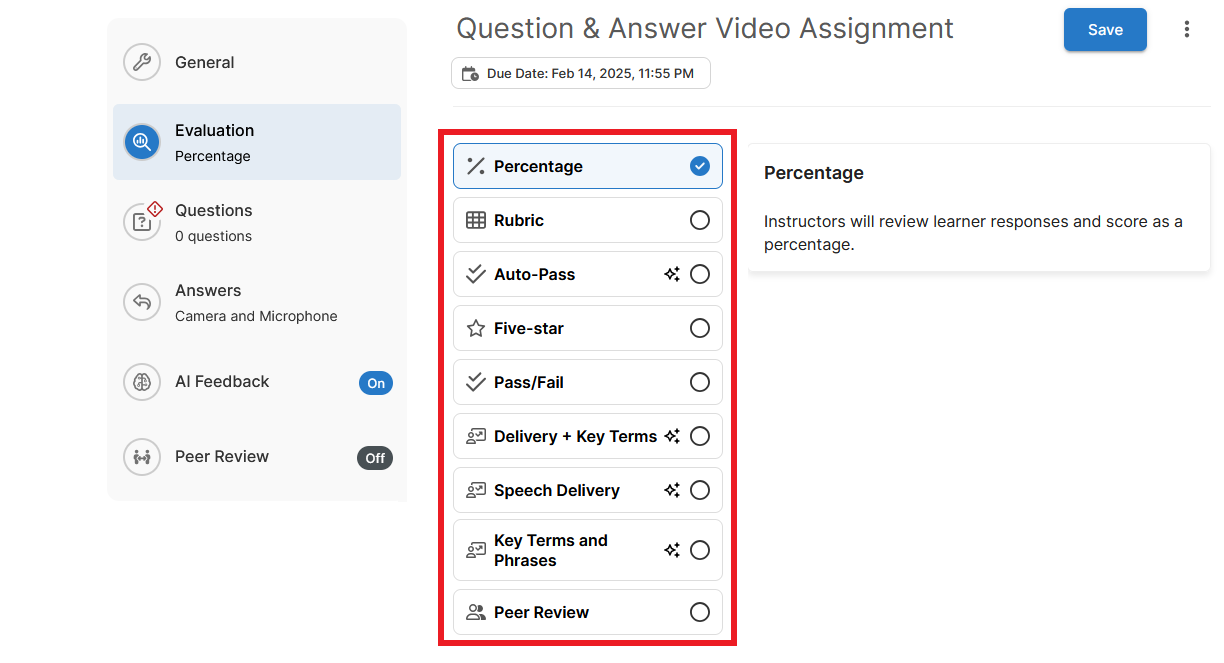
2. Evaluation
In the Evaluation section, choose how you want to evaluate the assignment. Only one evaluation method can be selected. The available options are:
- Percentage
- Rubric (if you select this option, you will need to create a rubric within the video assignment tool)
- Auto Pass
- Five Star
- Pass/Fail
- Delivery + Key Terms
- Speech Delivery
- Key Terms and Phrases
- Auto Analysis
- Peer Review
Click on each evaluation method to see more information about that method. For more information on scoring methods in the Video Assignment tool, please visit this Bongo resource.
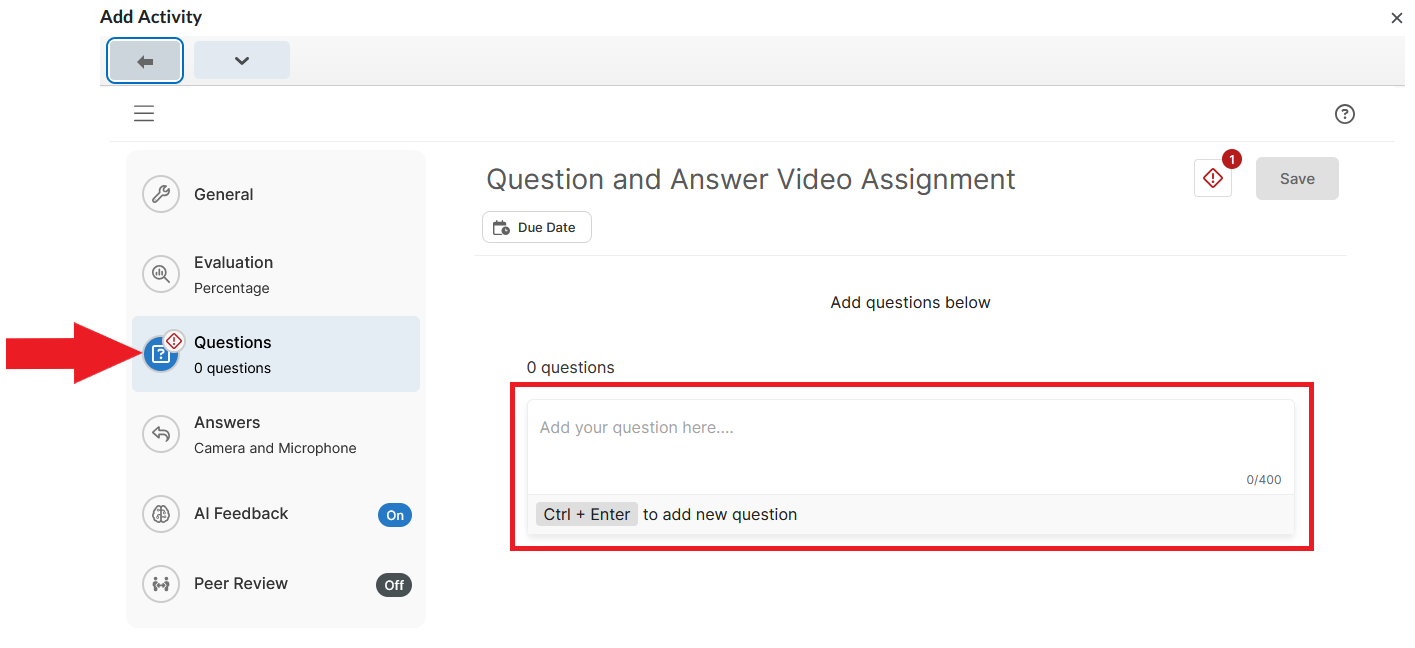
3. Questions
In the Questions section, you can enter up to 20 questions. These questions will be displayed to students one at a time, and students will have to record a response to each question.
NOTE: Question order can be randomized for each student. Also, instructors can populate an assignment with up to 20 questions, but have students answer only a few randomly selected questions from that pool. These settings are available in the Answers section below.
Start by typing your first question in the text field, and press Control + Enter to save it.
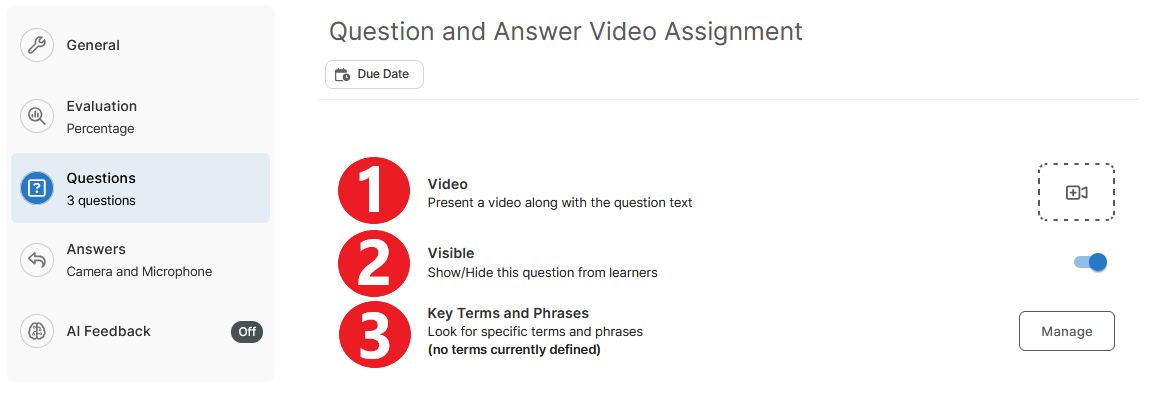
Once you create a question, additional options for that question will appear. You can:
- Add a video to a question (both the question text and the video will be presented to students).
- Hide a particular question from students by clicking the toggle button.
- Enter key terms and phrases you want students to use in their response to that particular question (these terms will be identified and highlighted by the AI Feedback tool). NOTE: For this feature to work, AI Feedback needs to be enabled for the assignment – see point #5 below.
Continue with the remaining questions. Once you finish adding questions, you can make the following changes:
- reorder questions by clicking the ‘drag’ icon next to a question and moving it to a different place in the sequence
- delete a question by clicking the trash icon next to it

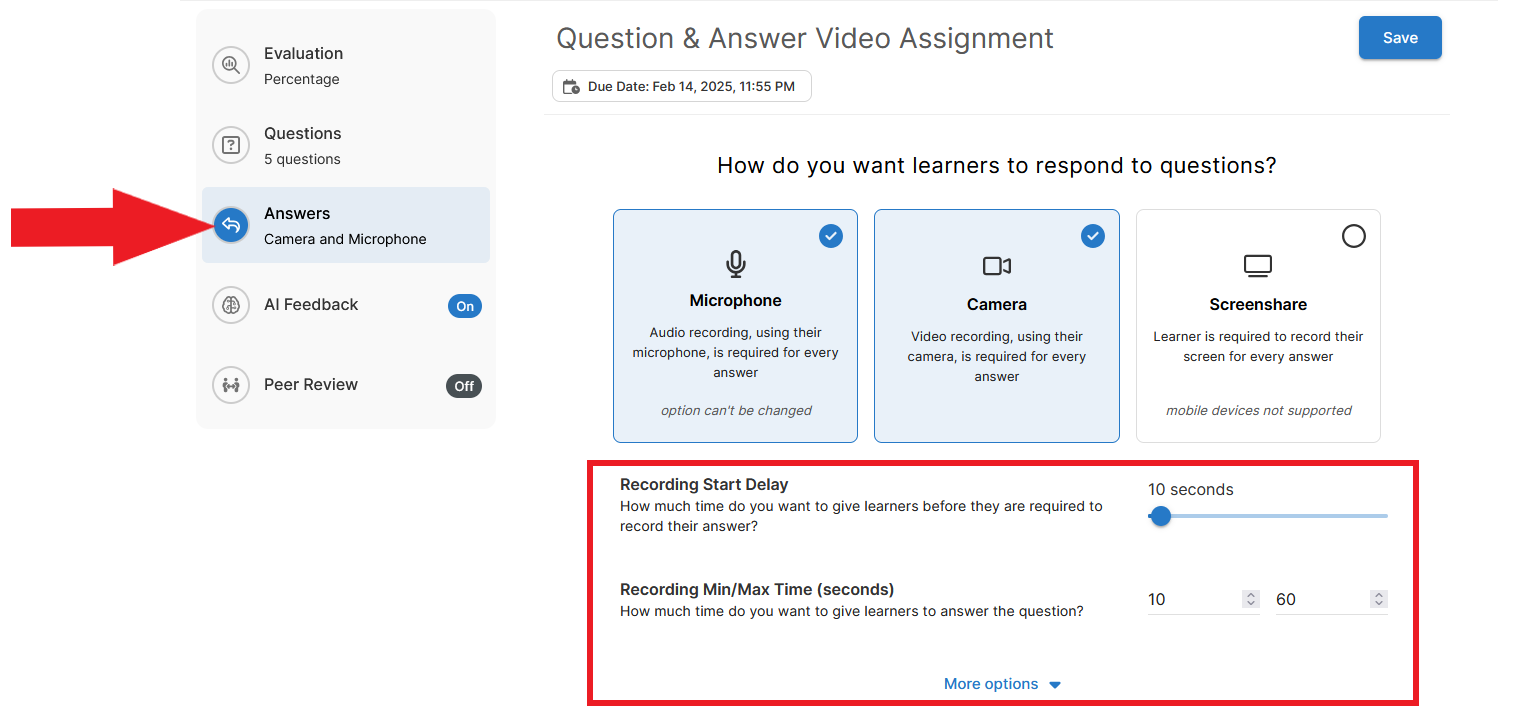
4. Answers
In the Answers section, select the tools you want to make available to students to record their answers. The options are:
- Microphone (enabled by default and cannot be disabled)
- Camera (if selected, students will have to use a camera to record every answer)
- Screenshare (if selected, students will have to share their screen to record every answer)
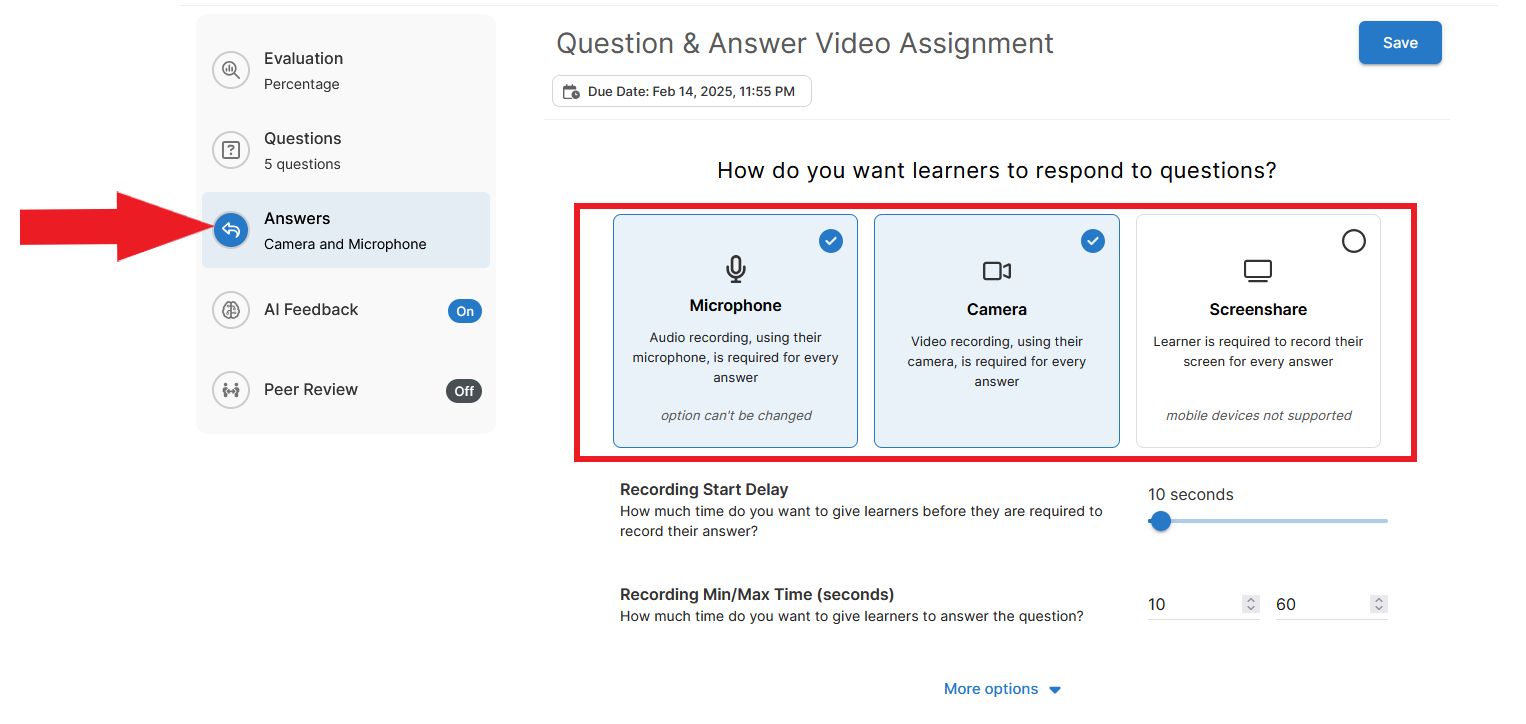
NOTE: If Screenshare is selected, students will need to use a device that supports screen recording. Mobile devices do not have this functionality.
Next, set the timing for student responses:
- Recording Start Delay. Determine how many seconds students should have between the time they view a question and the recording of the answer begins. The delay allows students to gather their thoughts and prepare a response.
- Minimum and Maximum Recording Time (no upper limit)
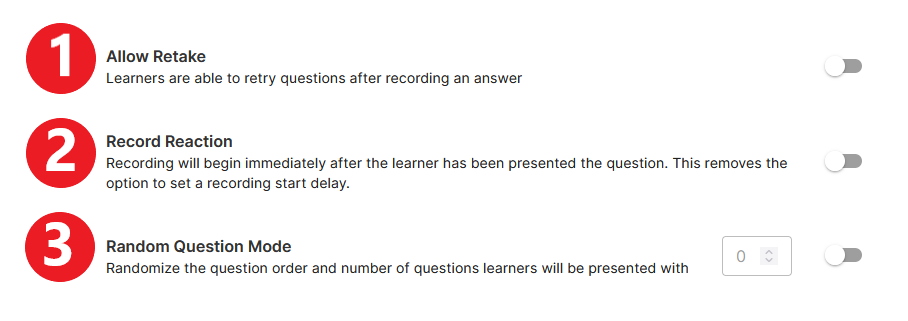
Under More Options, additional settings are available. You can:
- Allow students to re-record their answers (students will record their response, view the recording, and decide whether to submit it or rerecord).
- Set the recording to start immediately after a student sees a question (students will not have any time to gather their thoughts).
- Randomize the order in which the questions will be presented to students (you can have each student answer all questions but in a different order, or you can have each student answer only a few questions from a larger pool)
5. AI Feedback
AI Feedback is a tool that automatically transcribes a student’s recording, analyzes it, and provides feedback on the following parameters:
- quality of speech delivery (speech rate, filler words, clarity)
- students’ use of specific words and phrases. NOTE: Key words and phrases have to be entered in the Questions section (see point #3 above).
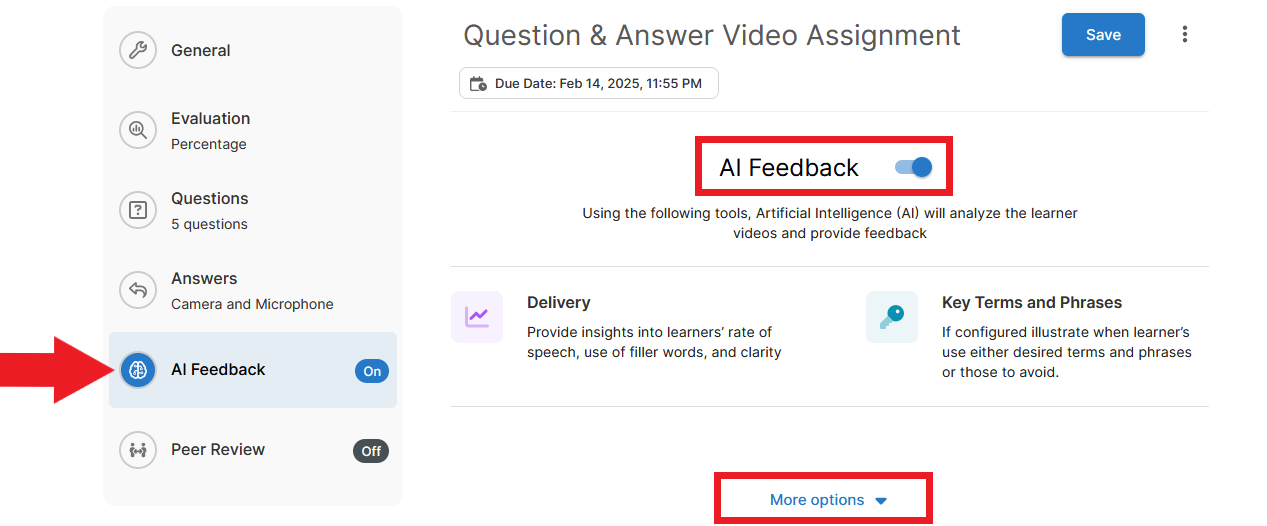
NOTE: In a Question and Answer video assignment, AI Feedback analysis is available to students only after they have submitted their recordings for evaluation. Thus, students cannot use the auto-analysis to improve their responses before submitting them.
AI Feedback is turned ON by default. If left ON, the AI analysis will be available to students and the instructor. You can turn this function OFF by clicking the toggle button next to AI Feedback.
6. Peer Review
The peer review function is turned OFF by default. If you wish to incorporate peer review in the assignment, enable it by switching the toggle button to the ON position. Then click More options to set additional parameters.
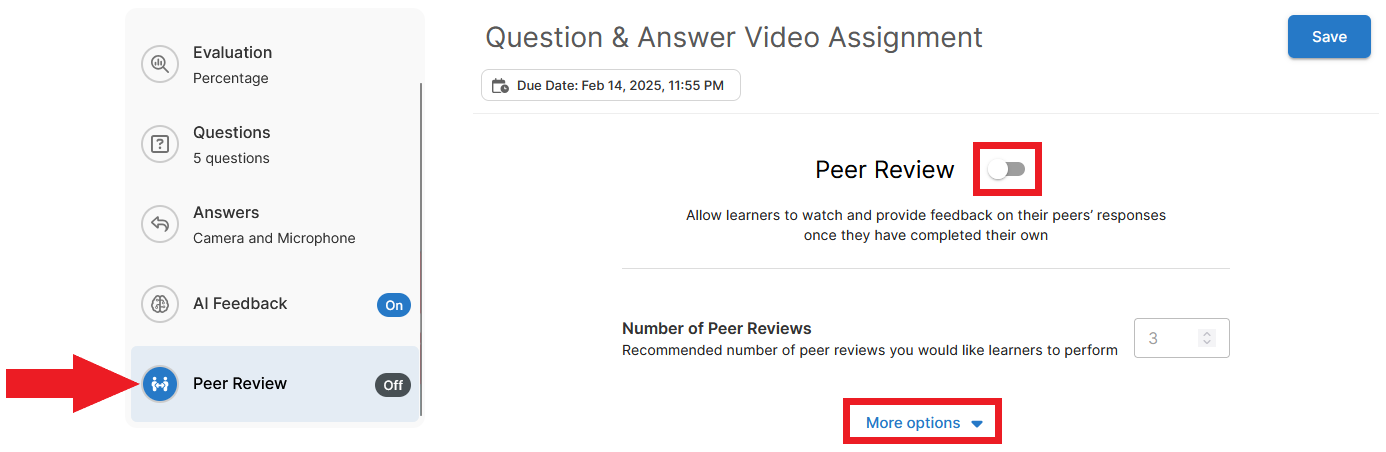
Under More options, you can set the following:
- the number of reviewers per submission
- the way reviewers will be assigned to submissions (A. the system can assign them randomly, or B. students can choose which submission(s) they want to review)
- whether to hide or reveal the identity of the submitter
- whether to hide or reveal the identity of the reviewer(s)
- whether to make peer feedback available to students before recordings have to be submitted to the instructor (this option would give students a chance to reflect on peer feedback and re-record if necessary)
- the evaluation method the peer reviewers should use (two options are available: A. a five-star rating, or B. a rubric provided by the instructor)
- optionally, a due date for the peer reviews
When you are finished creating the video assignment, click Save at the top of the page.

The new assignment will now appear in a content module in Brightspace.
For more information on the question-and-answer video assignment, please refer to this Bongo resource.
> Create an Interactive Video
- Log in to Brightspace and go to your course site.
- In the course navbar, select Content.
- Under the Table of Contents, select the content module where you want to place the video assignment.
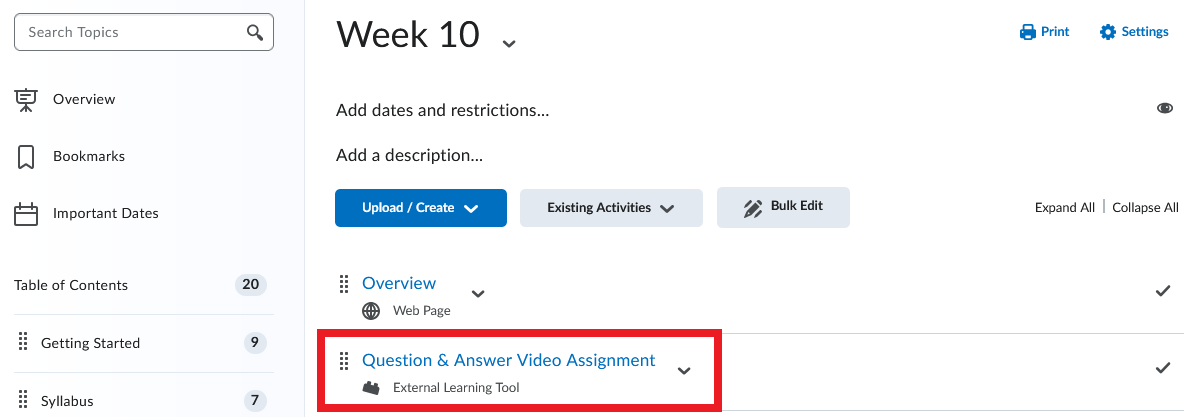
- In the content module you selected, click Existing Activities. A dropdown menu will open. Select Video Assignment from the list.
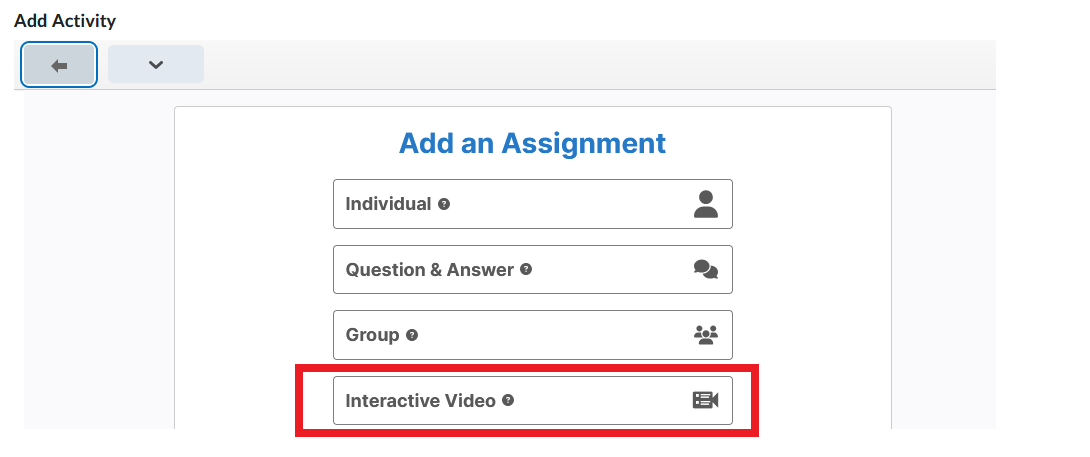
- A new window will open. Select Interactive Video from the available assignment options.
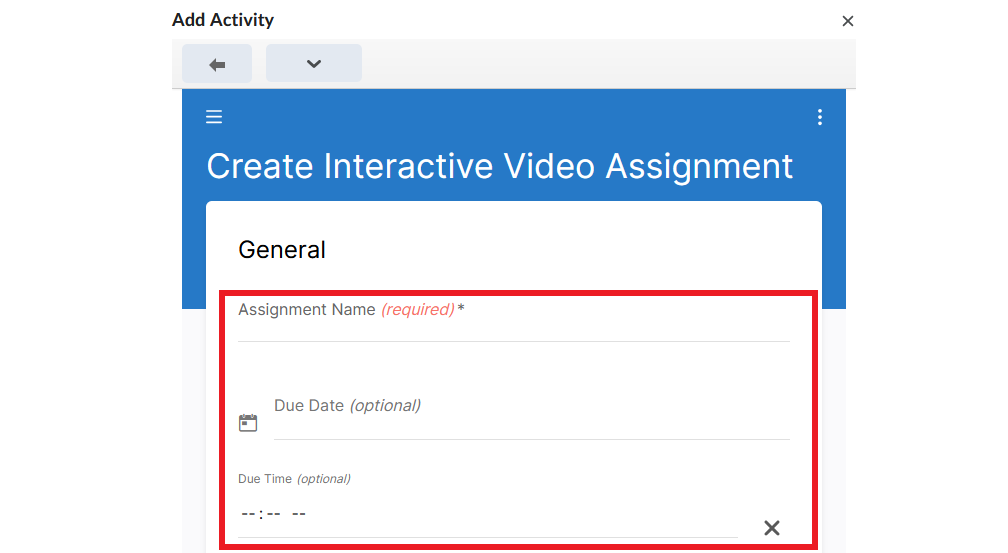
- In the General section, enter the Assignment Name and optionally a Due Date and Time for the assignment.
- In the Instructions section, enter written instructions for the assignment in the text field (required). Optionally, you can also record or upload video instructions by clicking the camera icon (
- In the Interactive Video section, click the camera icon (
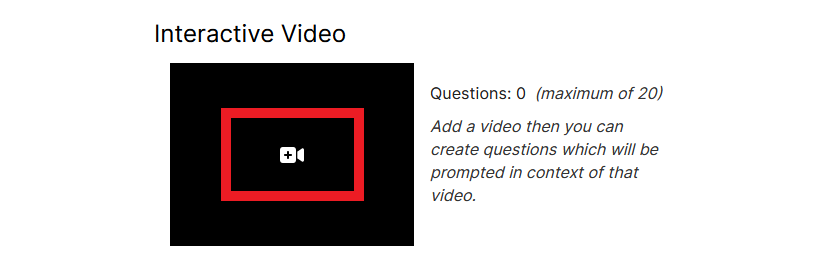
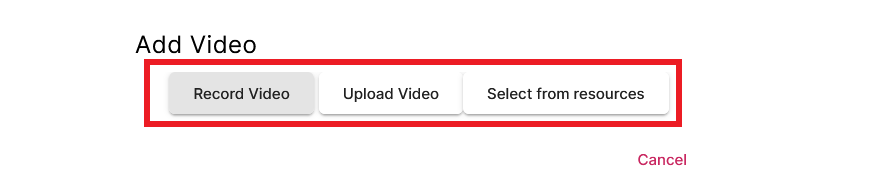
- You can add a video in one of the following ways:
- by recording a video directly in the video assignment tool (you can record video and audio, but no screensharing is available)
- by uploading a previously recorded video from your computer
- by selecting a video from your existing Bongo recordings
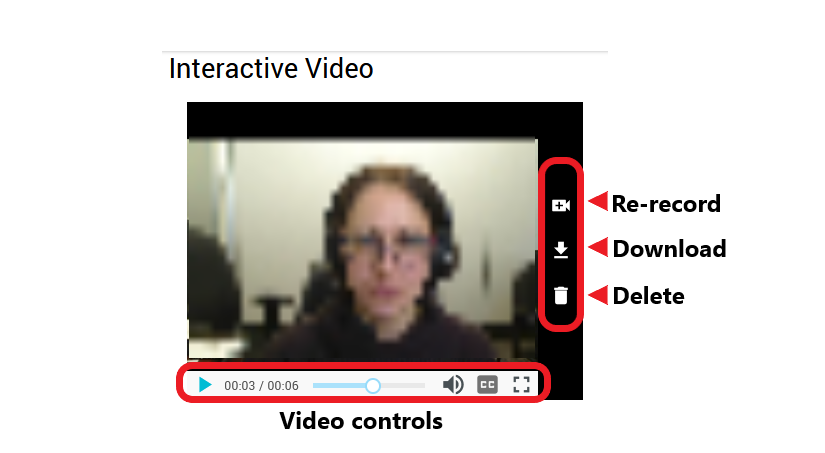
- Once you have added your video, you can preview it and decide whether you wish to use it or if you prefer to rerecord.
Adding Questions
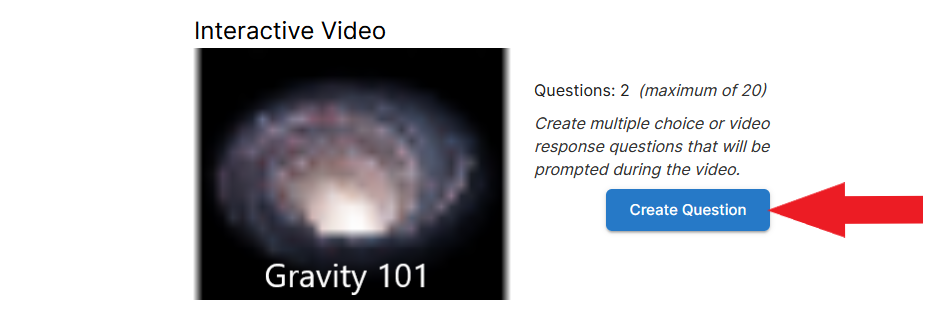
Once you have added a video, you can start adding questions to it. You can create up to 20 questions.
NOTE: In this assignment type, students watch a portion of the video, the video pauses, and a question appears on the screen. Once students provide a response to the question, the video resumes and the steps repeat (if the assignment involves multiple questions).
- First, identify the specific times in the video where you would like to place questions for students. Questions can be added throughout the video or they can be presented at the end.
- To start adding questions, click the Create Question button next to the video panel.
- You can create two types of questions in this assignment type:
- Multiple Choice – a question appears on the screen and students select an answer
- Video Response – a question appears on the screen and students record their response to the question
NOTE: It is not possible to limit the amount of time students have to answer questions in an interactive video. If you use Multiple Choice questions, students have unlimited time to answer each question. If you use Video Responses, students have unlimited time to prepare a response, and 120 minutes to record it. Therefore, this assignment type is not recommended for high-stakes evaluations.
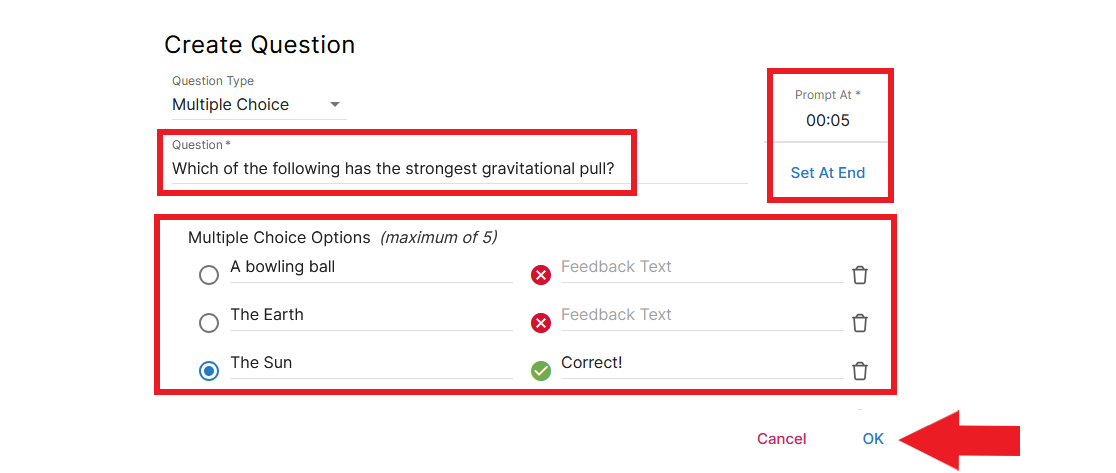
- If you select Multiple Choice, you will be prompted to enter the following information:
- question text
- answer choices
- the correct answer
- the specific time in the recording when the question should appear
- optionally, you can also enter Feedback Text – the text that will appear when a student selects a particular answer. For example, if the selected answer is incorrect, the Feedback Text may contain an explanation why the choice is incorrect.
- When finished, click OK.
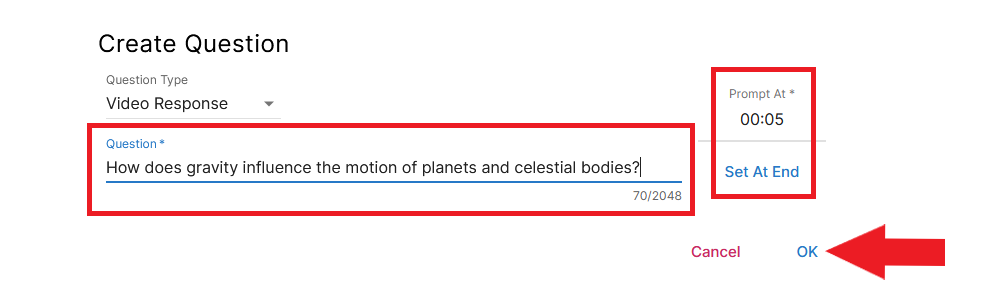
- If you select Video Response, you will be prompted to enter:
- question text, and
- specific time in the recording when the question should appear
- When finished, click OK.
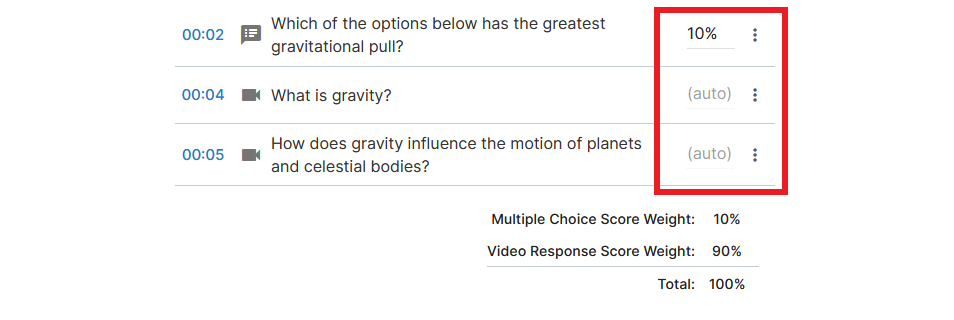
- If you are using Multiple Choice questions (alone or in combination with Video Responses), you need to enter the value of each Multiple Choice question towards the assignment grade.
- The value of Video Responses, however, cannot be adjusted. Each response is weighted equally in relation to one another, whether only Video Responses are used or if they are used in combination with Multiple Choice questions.
Evaluation
If the interactive video includes Multiple Choice questions (alone or in combination with Video Responses), the only available evaluation method is percentage.
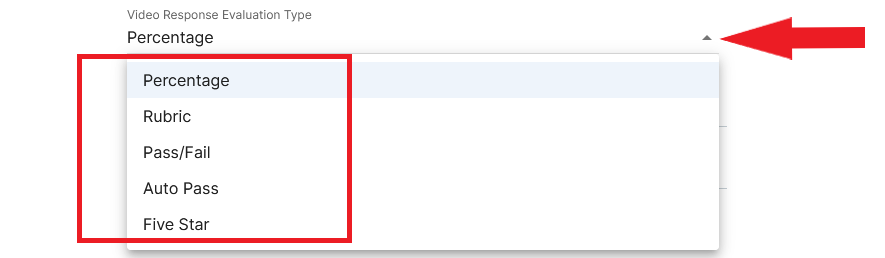
If the interactive video includes Video Response questions without any Multiple Choice questions, you can choose one of the following evaluation methods:
- Percentage
- Rubric
- Pass/Fail
- Auto Pass
- Five-Star
Peer Review
NOTE: In an interactive video assignment, peer review is only available if Video Response questions are used. If Multiple Choice questions are used, peer review is not available.
Decide if you wish to incorporate peer review into the assignment.
- If you do, leave the Peer Review toggle in the ON position (default) and enter the number of peer reviews to be completed on each student’s submission.
- If you opt not to use peer review, switch the Peer Review toggle OFF.
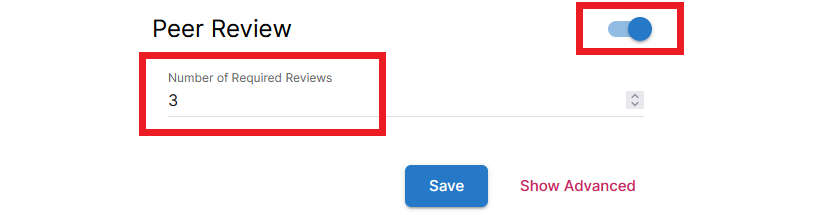
NOTE: Additional peer review settings are available – click Show Advanced to view them.
- If you are finished creating your video assignment, click Save at the bottom of the window. (If you wish to explore additional configurations, click Show Advanced next to the Save button, and refer to the next section.)

Show Advanced
Peer Review
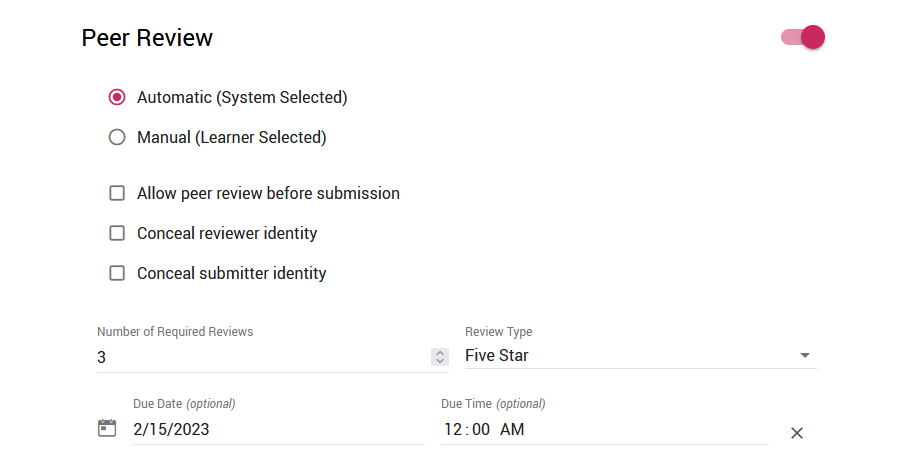
If peer review is part of the assignment, additional settings can be configured here. You can set:
- how to assign reviewers to submissions (A. the system can assign them randomly, or B. students can choose which submission(s) they want to review)
- whether to make peer feedback available to students before recordings have to be submitted to the instructor (this option would give students a chance to reflect on peer feedback and re-record if necessary)
- whether to hide or reveal the identity of the submitter
- whether to hide or reveal the identity of the reviewer(s)
- what evaluation method reviewers should use (two options are available: A. a five-star rating, or B. a rubric provided by the instructor)
- optionally, a due date for the peer reviews
Rubric Self-Assessment
This option is turned OFF by default. It can be turned ON only if Rubric is the selected evaluation method for the assignment (see Evaluation above). If you enable the Rubric Self-Assessment option, students will be able to assess their own performance using the attached rubric after they submit their assignment.

Restricted Submission Summary Details
This option is turned OFF by default. If you turn it ON, students will not be able to see the questions or their own answer(s) in the recording after they submit it.

- When finished, click Save. The new assignment will now appear in your module in Brightspace.

For more information on the interactive video project, please refer to this Bongo resource.