Getting Started with Webex
Memorial has an enterprise license for Cisco Webex. Webex can be integrated directly into Brightspace and used as an alternative to Online Rooms for teaching online synchronous classes. Webex allows instructors to:
- Host sessions with up to 1000 participants.
- Share the screen.
- Have students share their screens (one at a time).
- Record sessions and share them on your Brightspace course site afterwards.
Activating & Accessing Webex
This page outlines the process of setting your Webex account for the first time and introduces you to the Webex dashboard. The settings available in the dashboard are important to understand whether you will be using Webex within Brightspace or on its own.
Click the items below for details on how to start using Webex in your course.
1. Request a Webex account from ITS
In order to use Webex and integrate it with Brightspace, you must first request a Webex account from Memorial’s Information Technology Services (ITS).
- Go to the ITS site and follow instructions on the page.
- Once your account is created, you will get an email saying that Memorial University has invited you to Cisco Webex.
- The email will also contain a link to activate your account. Click on that link to complete the activation process.
- When the account is activated, you will be redirected to the https://mun.webex.com/ domain. This is your springboard for creating and hosting sessions.
Note
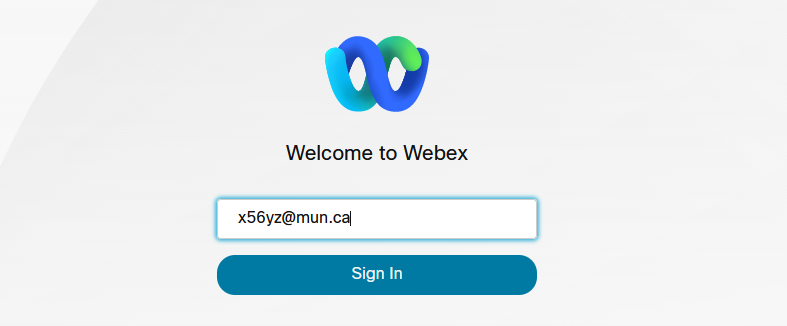
When activating and signing in to your Webex account, use your MUN login ID and not your email alias, e.g. x56yz@mun.ca and not jsmith@mun.ca.
Watch the following video to see how to obtain a Webex account
2. Run a network test
You will want to determine if your computer meets the networking requirements to participate in meetings.
- Access he Cisco Webex Network Test by clicking here.
- Follow the steps on the page.
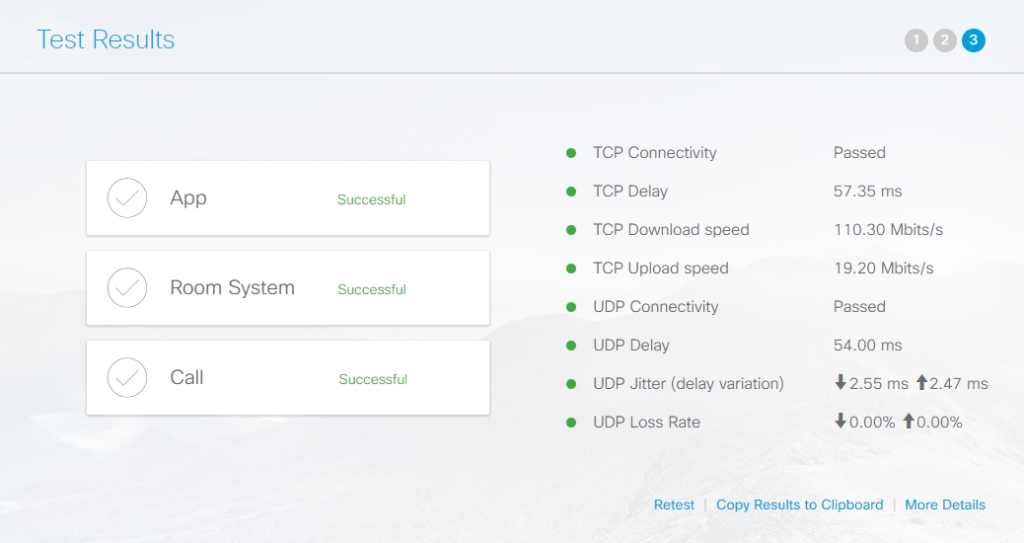
- The Test Results page will provide a summary of your computer’s performance.
3. Sign in to Webex
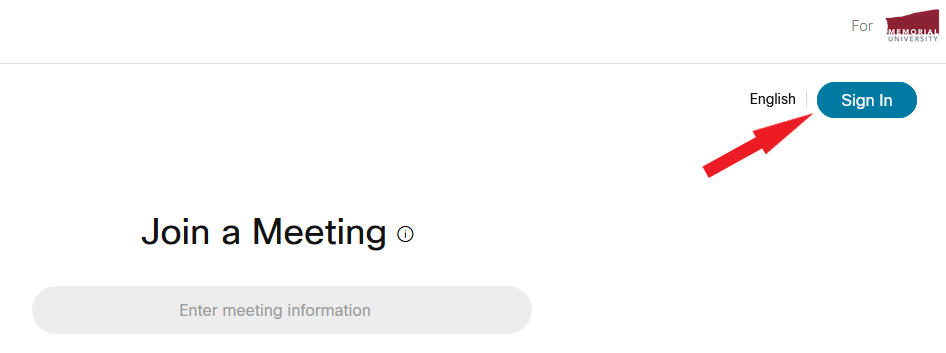
Go to mun.webex.com. Click the Sign In button in the top right corner of the page.
- Enter your @mun email address. Use your MUN Login ID (e.g. x56yz@mun.ca) and not your alias (jsmith@mun.ca).
You will now be directed to the MUN login page to enter your username and password to complete the authentication process.
4. Explore your Webex dashboard
Your dashboard is the page you see when you log in to the Webex portal. This is where you will be creating and launching meetings.
Some of the major functions of the dashboard are explained below.
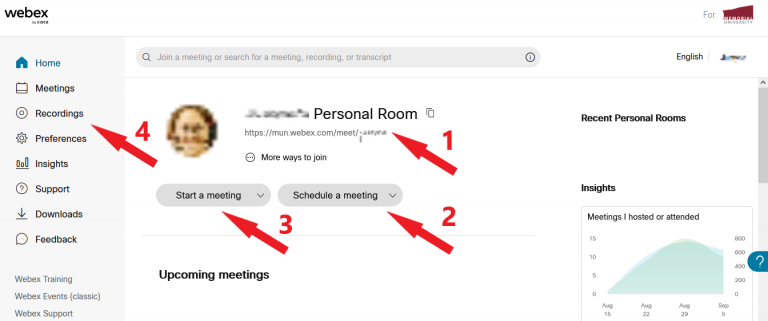
Recordings: This is where you can find recordings of your sessions.
URL to your Personal Room: You can copy and share this link with people for ad-hoc (unscheduled) meetings. Once the recipient clicks on this link, they will have to enter their name and email address, and then will be directed to your room.
Schedule a meeting: Use this function to create meetings that will occur in the future. You can optionally enable a repeating meeting schedule. You will be asked for some information about the meeting: date/time, name, password, agendas, invitations, send email reminders as well as other options.
Start a meeting: Clicking this will take you into your Personal Room. This is useful for ad-hoc meetings. There are no passwords or schedules to manage – you only need to share your room url with the person you want to meet with.
Adding Webex to Brightspace (optional)
Once your Webex account is set up, you can integrate Webex with Brightspace, which will allow you to schedule meetings and office hours and have your students join from within your Brightspace course site.
Note
If you are using a Brightspace course site developed by another instructor, Webex may already be integrated with that site. To check, go to the Communications menu on your course homepage and see if Webex is listed in the dropdown menu. If not, you can proceed with one of the options below.
There are three ways to integrate Webex into your Brightspace course. Click on the options below for details and video instructions.
Option 1: Activate course navbar with Webex (easiest)
With three simple steps, you can add a link to Webex under the Communication menu in the course navbar.
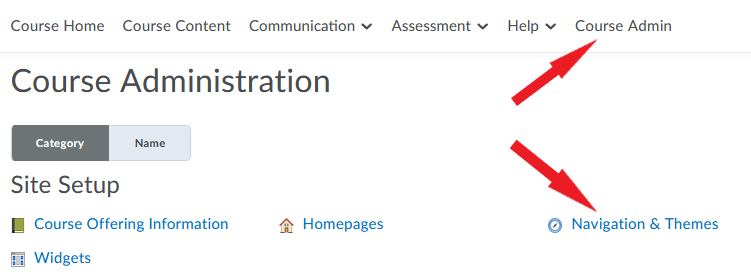
1) On your course homepage, go to Course Admin, then to Navigation & Themes.
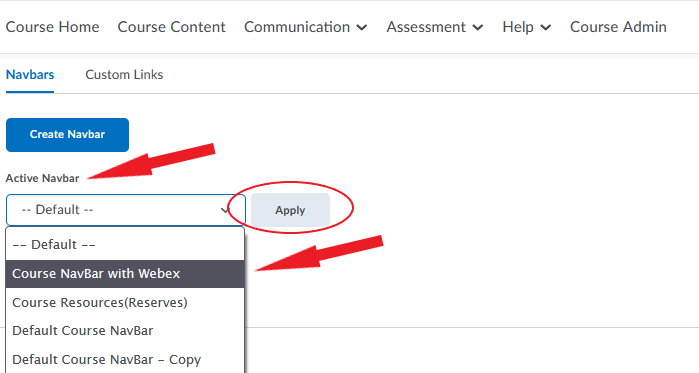
2) Locate the Active Navbar box on the page and click on it. A dropdown menu will open. Select Course NavBar with Webex from the menu and click Apply.
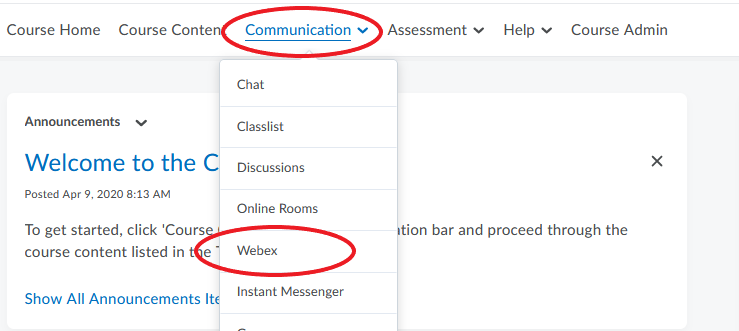
3) Your course site will now update with a link to Webex. You can find it in the navbar under the Communication tab.
Video Instructions for Option 1
Option 2: Add Webex link to course navbar
To add a Webex link directly to your course navbar, you first have to create a copy of an existing institutional navbar (steps 1-4 below), and then add a link to Webex to that copy (steps 5-9).
1) On your course homepage, go to Course Admin, then to Navigation & Themes.
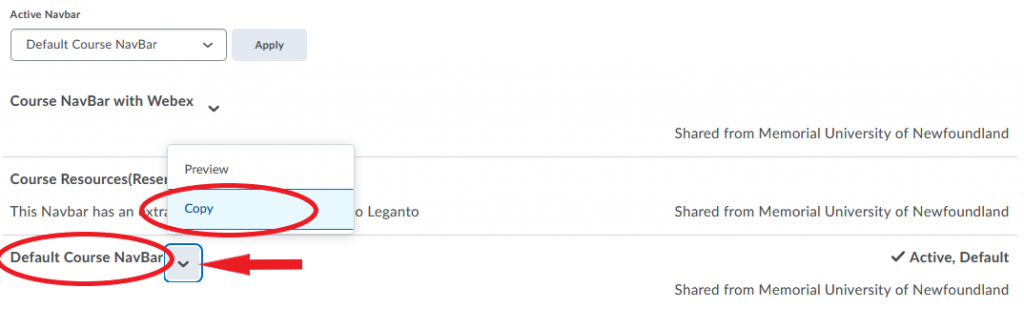
2) Locate the Default Course Navbar on the page. Click the downward arrow next to it and select Copy. NOTE: You can copy and edit other available navbars as well; we are using the Default Course Navbar as an example.
3) A new navbar will appear on the list. This new navbar will be named Default Course NavBar – Copy (you will be able to rename it later).

4) You now need to activate your new navbar. Locate the Active Navbar box on the page and click on it. A dropdown menu will open. Select the Default Course Navbar – Copy, and click Apply.
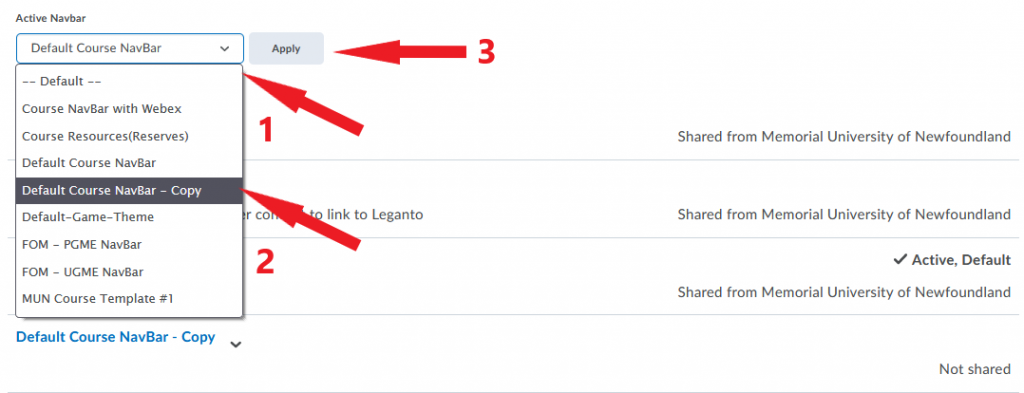
5) You are now ready to add a Webex link to your new active navbar. To do that, locate the Default Course Navbar – Copy on the page and click on it.

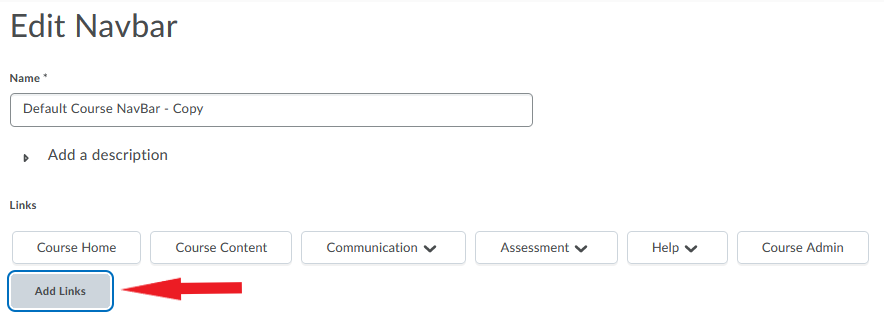
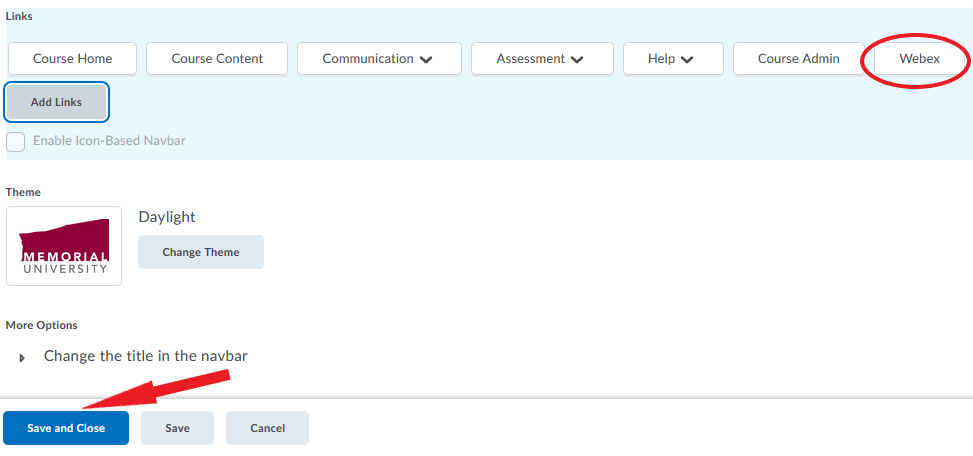
6) You will be directed to a new page. (You can rename your navbar here if you wish.) To add a Webex link, click Add Links.
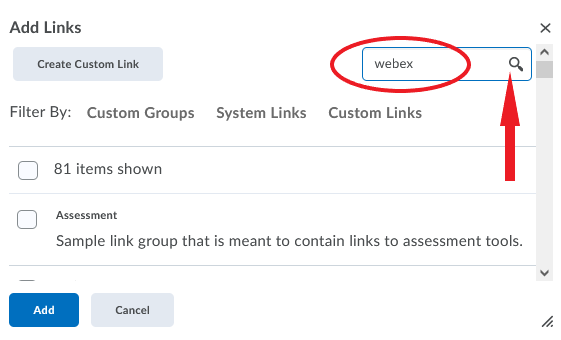
7) A window will pop up with a list of available links. Find Webex by scrolling down the list or by using the search box.
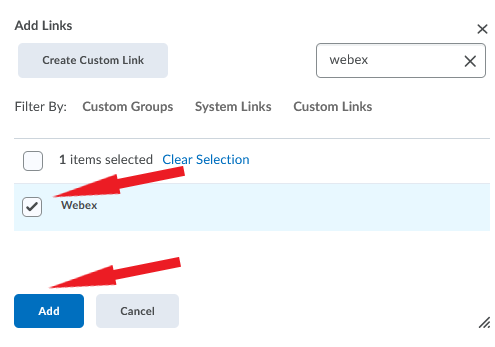
8) Once you find Webex, select it and click Add.
9) Click Save and Close. Your course homepage will now update with the Webex link directly in the navbar. NOTE: You can move the link to a different position in the navbar by clicking and dragging it.
Video Instructions for Option 2
Option 3: Add Webex link to course content
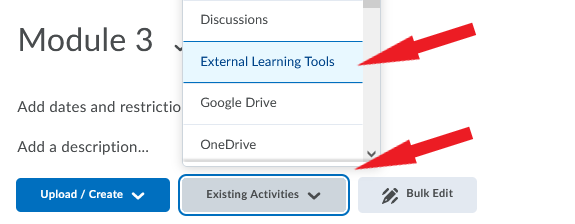
1) In Course Content, go to the module where you want to add a link to Webex. In that module, click on Existing Activities and select External Learning Tools.
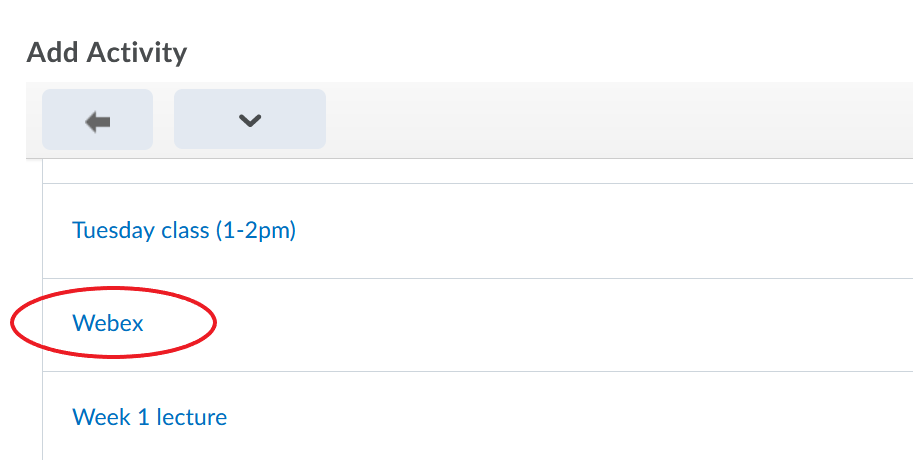
2) The Add Activity window will pop up. Locate Webex among the options on the list and click on it.
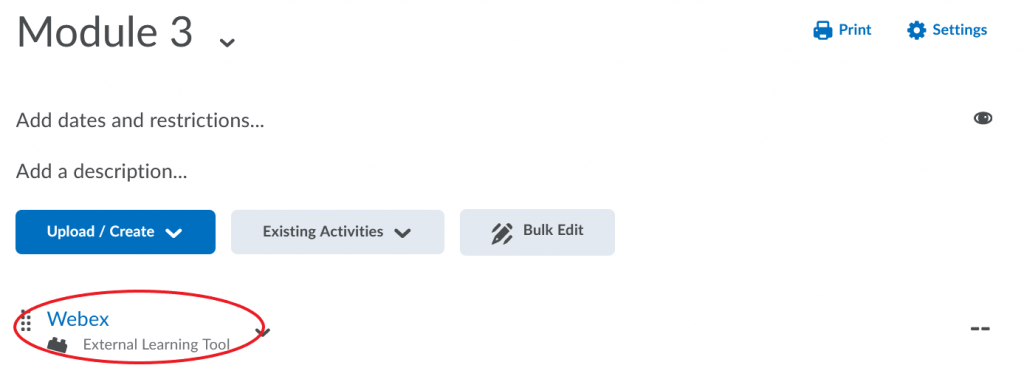
3) A link to Webex will now appear in the content module.
Video Instructions for Option 3
Activating Webex in Brightspace
Once you have added a Webex link to your Brightspace course site, you will need to launch Webex from Brightspace to complete the setup process. The first time you link to Webex from within Brightspace, you will be directed to a setup page to complete the following steps (click each for details).
Step 1: Authorize Webex to sync with Brightspace
You will be asked to provide authorization to Webex to communicate with Brightspace.
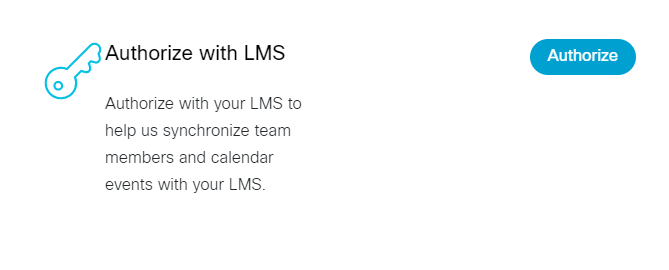
- Click Authorize.
- A window will appear asking your permission to allow Webex to use your account to perform tasks within Brightspace.
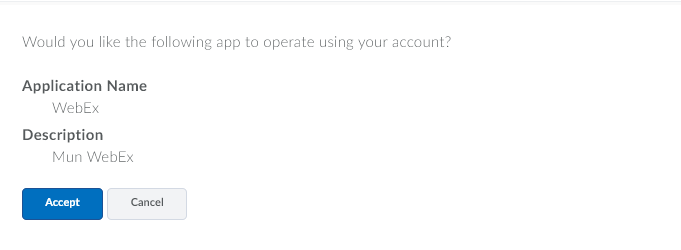
- Click Accept.
Note
Authorizing Webex for use in Brightspace is only required once as it is associated with your Brightspace account and not your specific course. You will not have to authorize Webex in any other courses where you opt to use Webex.
Step 2: Select the features you want to use in your course
Next, you will have to choose which features you want to use in your course.
- Selecting Virtual Meetings will allow you to host synchronous sessions from Brightspace.
- Selecting Office Hours will allow you to set up virtual office hours for your students.
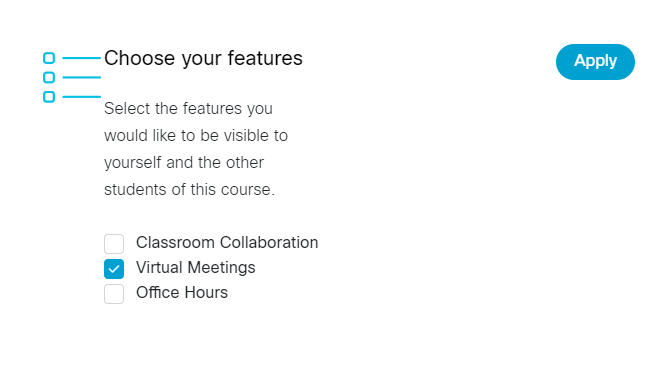
Once you select the features, click Apply. The features should now appear just below your course navbar.
Step 3. Sync your time zone
This step will allow you to sync the Brightspace time-zone settings with Webex.
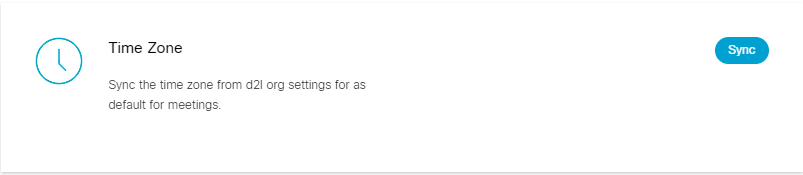
Click Sync. The meetings you create will now be created in the same time zone as Brightspace.
Congratulations! You are now set up to start using Webex in Brightspace.
Note
If you wish to use Webex in more than one course, you have to add a Webex link to each course individually. However, the setup process (Authorize, Choose Your Features, Sync Time Zone) has to be completed only the first time you add Webex to a course and does not have to be done with subsequent courses.
If you need any assistance, please reach out to the CITL Support Centre.