Creating Discussions
Note
Students cannot post in a discussion forum. For students to be able to post, a discussion topic has to be created within a forum.
Creating a Forum
To create a discussion forum:
- Log in to Brightspace and navigate to your course.
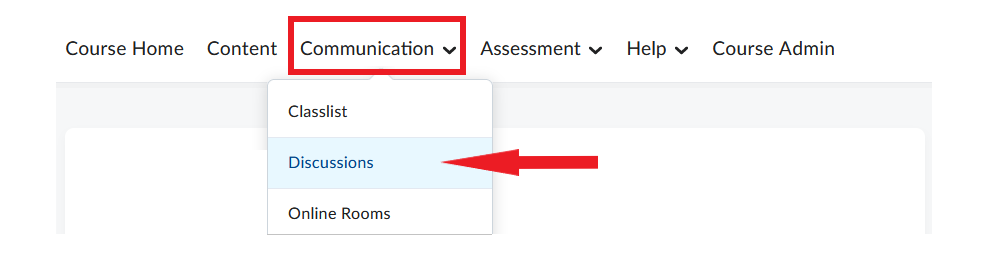
- In the course navbar, click Communication and select Discussions from the dropdown menu.
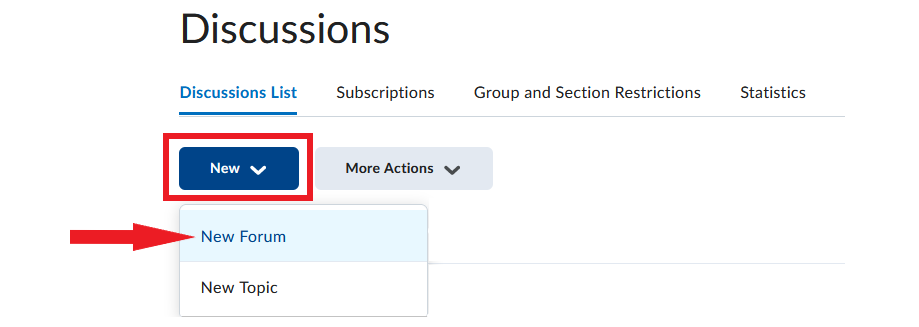
- Click New and select New Forum from the dropdown menu.
- A New Forum page will open. It contains two tabs – Properties and Restrictions. For details on the settings available in each tab, see the menu below the image.

1. Properties tab
By default, ‘New Forum’ page opens on the Properties tab. Here, enter the Title for your forum. Directly underneath the title, you can find the option to ‘Create a new topic with the same title’ as the forum. Select if appropriate.

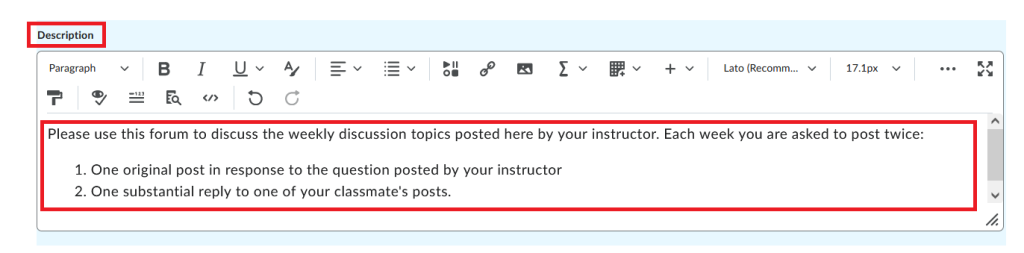
Enter the forum Description (optional).
Review the Options listed at the bottom of the page and decide whether you wish to apply any of them to the forum.
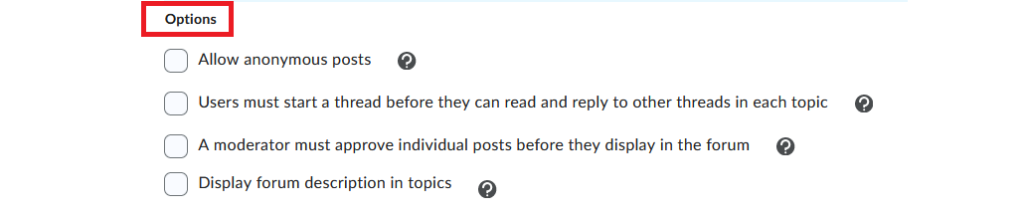
The options are:
- Allow anonymous posts – Select if you want to allow students to post without revealing their name. As an instructor, you will always be able to see who authored each post.
- Users must start a thread before they can read and reply to other threads in each topic – Select if you want students to create an original post before they can see other students’ posts.
- A moderator must approve individual posts before they display in the forum – Select if you want to manually approve each student’s post before others in the class can see it.
- Display forum description in topics – Select if you want the forum description to be repeated in each topic created in the forum. If you plan to have multiple topics in a forum, a better option is for each topic to have its own description.
Save the forum.
2. Restrictions tab
Note
Setting restrictions at the level of a forum is optional. Alternatively, you can set restrictions for the topics you will create in the forum (the same restriction types are available).
At the top of a New/Edit Forum page, go to the Restrictions tab.

Here you can set these optional parameters:
Hide from Users
Selecting this option makes a forum invisible to students. You can hide a forum while you are still developing it, but you are not yet ready to share it with students. When you are ready to share a forum with the class, you need to manually unselect this setting.

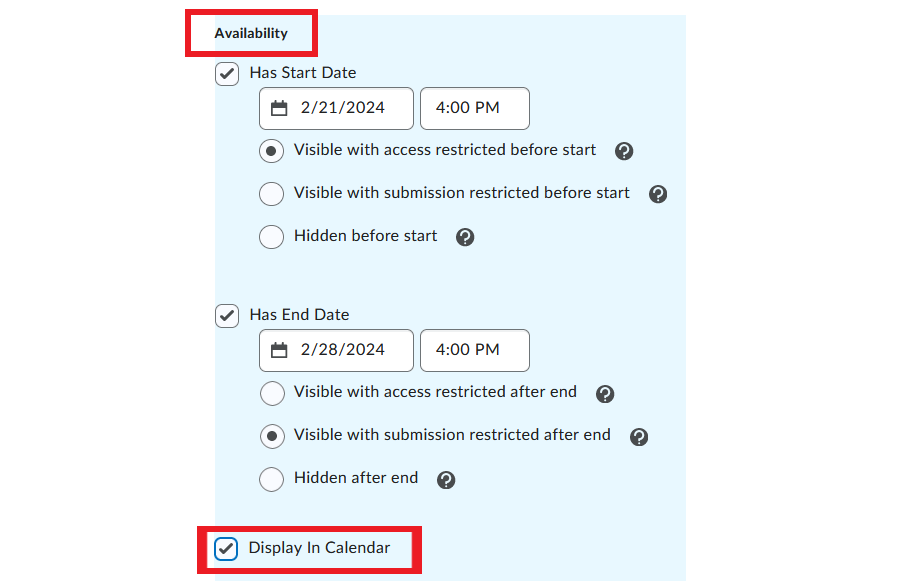
Availability Dates
You can set a Start and an End Date for a forum and thus make it available to students only for a period of time. If you apply one or both availability dates, you should also select the Display in Calendar option so that students can see the dates in the course calendar.
Note
Please review the visibility options associated with the Start and End Dates carefully. For example, if you want to restrict access to a forum until a certain date, but also want to leave the forum open for students to view even after the discussion has ended, the best options would be:
- Visible with access restricted with Start Date, and
- Visible with submission restricted with End Date.
- Release Conditions can be applied.
- Group and Section Restrictions – You can restrict the forum to a specific group or section within the course.

Click Save and Close at the bottom of the page.
Creating a Topic
Once you have your forum created, you can create topics within the forum. To create a discussion topic, follow the steps below.
- Log in to Brightspace and navigate to your course.
- In the course navbar, click Communication and select Discussions from the dropdown menu.
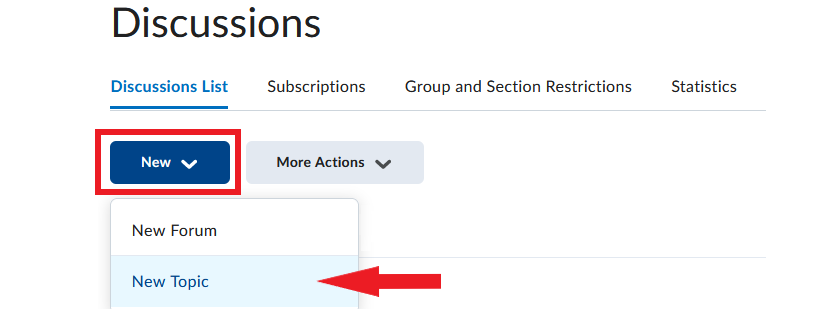
- Click New and select New Topic from the dropdown menu.
- A New Topic page will open. The page contains four sections, as marked in the image below. For details on what settings are available in each section, please refer to the menu below the image.
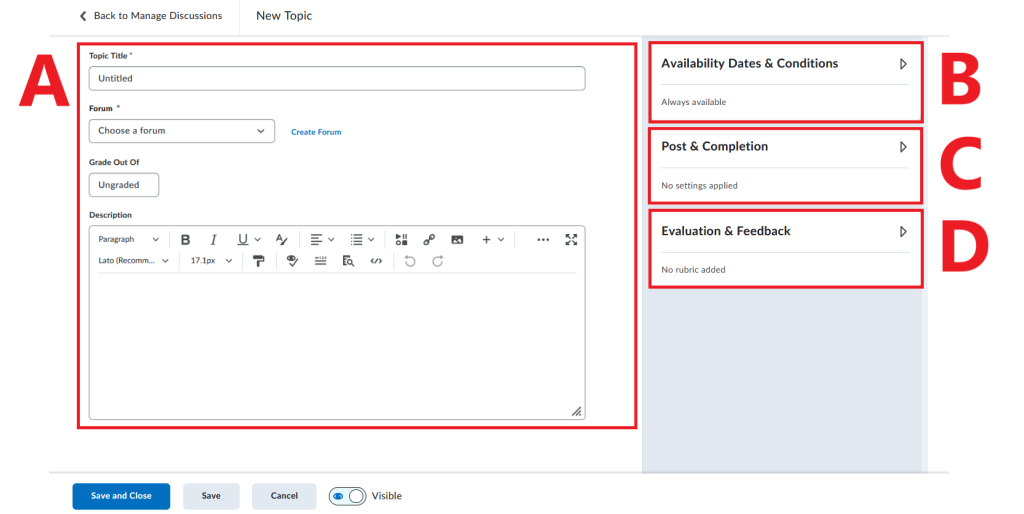
A. Topic Details & Grading Options
Enter the title in the Topic Title field.

- Decide whether you want to assign the topic to an already existing forum or create a new forum.
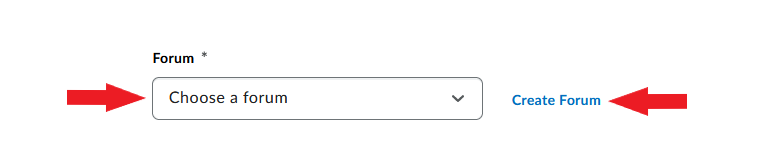
- If you are not planning to grade students’ posts for this topic, leave the Grade Out Of as Ungraded (the default setting).
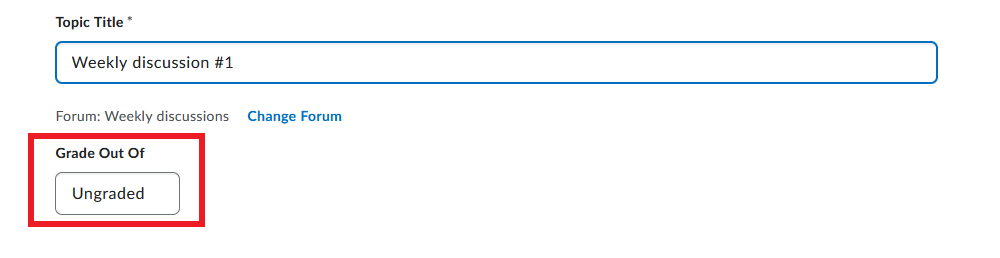
- If you are planning to grade students’ posts for this topic, click the box under Grade Out Of box and enter the maximum score students can get for the task.
- The next step depends on the status of your Brightspace grade book.
- Scenario #1: Your Brightspace grade book is NOT set up
If you have not previously created a grade item for this discussion topic in the grade book, no further action is needed in this section. When you click Save at the bottom of the page, the system will automatically create a corresponding grade book item with the same title as the discussion topic.
- Scenario #1: Your Brightspace grade book is NOT set up

- Scenario #2: Your Brightspace grade book IS set up
If you have previously created a grade item for this discussion topic in the grade book, you want to link the two at this point. To do so, click In Grade Book, and select Edit or Link to existing from the menu. Follow the prompts to link the topic to the appropriate grade book item.
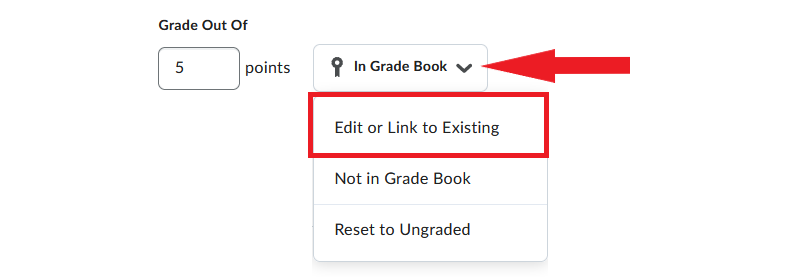
- Other options available upon entering a score in the Grade Out Of box are:
- Not in Grade Book – this option allows you to assign a score to the discussion topic, but without creating a grade item in the grade book.
- Reset to Ungraded – this option deletes the score you had entered and restores the default setting of Ungraded.
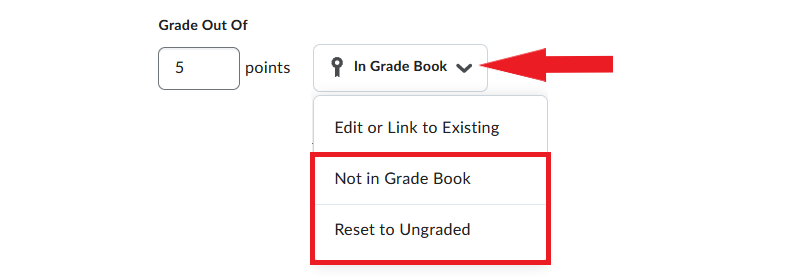
B. Availability Dates & Conditions (optional)
In this section, you can set the following parameters:
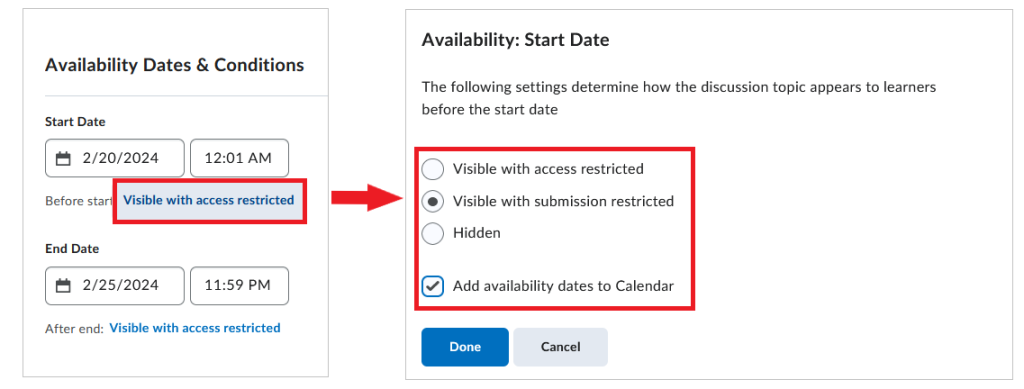
Availability Dates – You can set a Start and an End Date for your topic, and thus make it available to students only for a period of time. If you apply one or both availability dates, you should also select the Add availability dates to Calendar option so that students can see the dates in the course calendar.
Note
Visibility options associated with the Start and End Dates should be applied carefully. For example, if you want to restrict access to a topic details until a certain date, but you also want to leave the topic open for students to view even after the discussion has ended, the best options would be:
- Visible with access restricted with Start Date, and
- Visible with submission restricted with End Date.
Release Conditions can be attached to the topic.
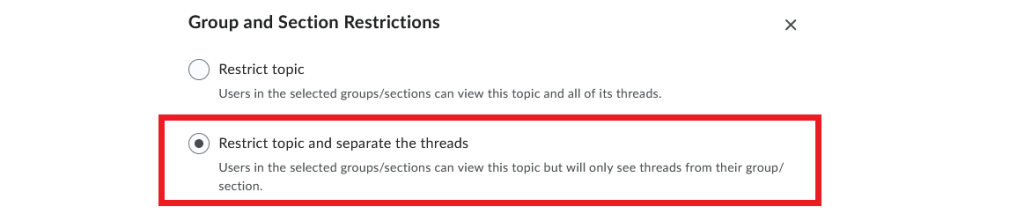
Group and Section Restrictions can be applied. This setting allows you to divide students into smaller teams (groups or course sections) for the discussion. You can organize group discussions in two different ways:
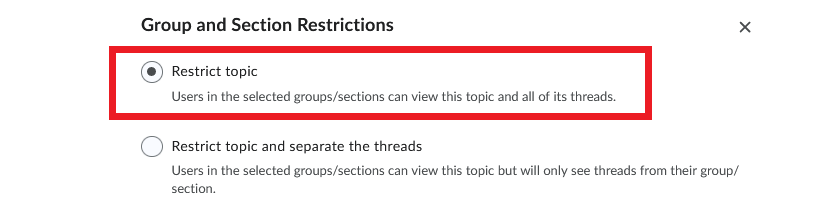
You can assign each group a different topic. To do this, select Restrict topic and choose the specific group that should discuss the topic you are creating.
You can assign the same discussion topic to the whole class, but each group would only see their own group’s posts. To do this, select Restrict topic and separate the threads and then choose the relevant Group Category or Section.
Note
Groups have to be created prior to this step.
C. Post & Completion Settings
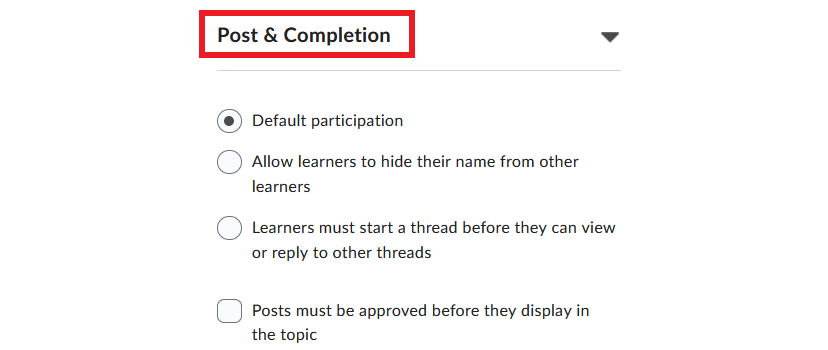
In this section, you can select one of the following settings:
- Default participation – Students can post and view other students’ posts without any restrictions.
- Allow learners to hide their name from other learners – Students have the option to post anonymously.
- Learners must start a thread before they can view or reply to other threads – Students cannot view anyone else’s posts until they add an original post.
- Posts must be approved before they display in the topic – The instructor has to manually approve each student’s post before it becomes visible to the whole class.
D. Evaluation & Feedback Settings
In this section, you can set the following evaluation parameters:
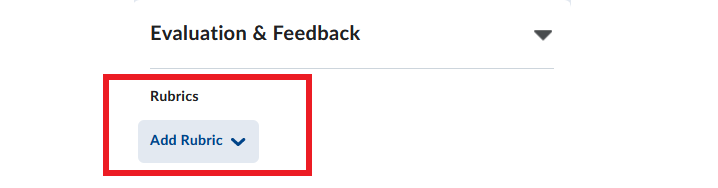
- You can add a rubric in order to share evaluation criteria with students and later use to grade their posts.
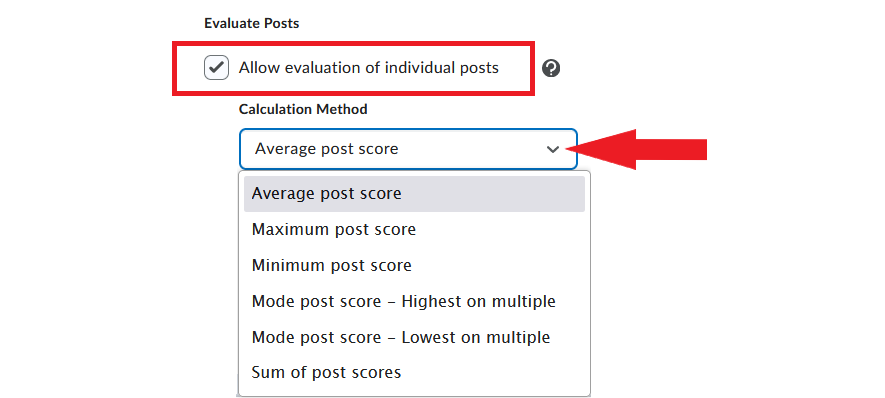
- If the topic will be graded, and if students can add more than one discussion post, instructors have the option to score each post separately. If you choose this option, you can select how the individual scores should contribute to the students’ overall score for the task (e.g., average of all scores, highest score only etc.).
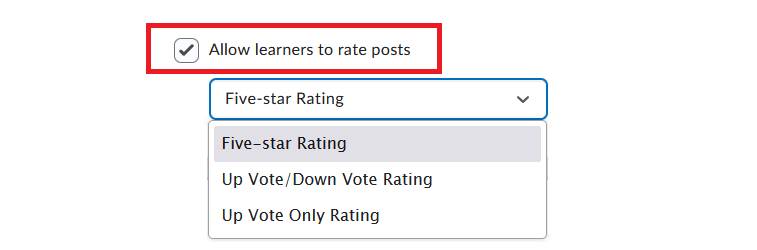
- You can allows students to rate each other’s posts. Several rating schemes are available for this purpose: five-star rating, up/down vote rating, up-vote only rating.
Creating Group Discussions
Discussions in Brightspace do not have to involve all students at the same time. Students can be divided into smaller teams (Brightspace groups or course sections) to discuss topics in a more intimate setting. Group discussions can be organized in two different ways:
- The same topic can assigned to all students, but students discuss it in smaller groups.
- Different groups can be assigned different topics.
For details on how to set up group discussions, click the items below.
1. Create one topic for all & separate students into groups in the Discussions tool
Note
Groups in Brightspace have to be created prior to this step.
- Create a discussion topic by following the steps outlined above.
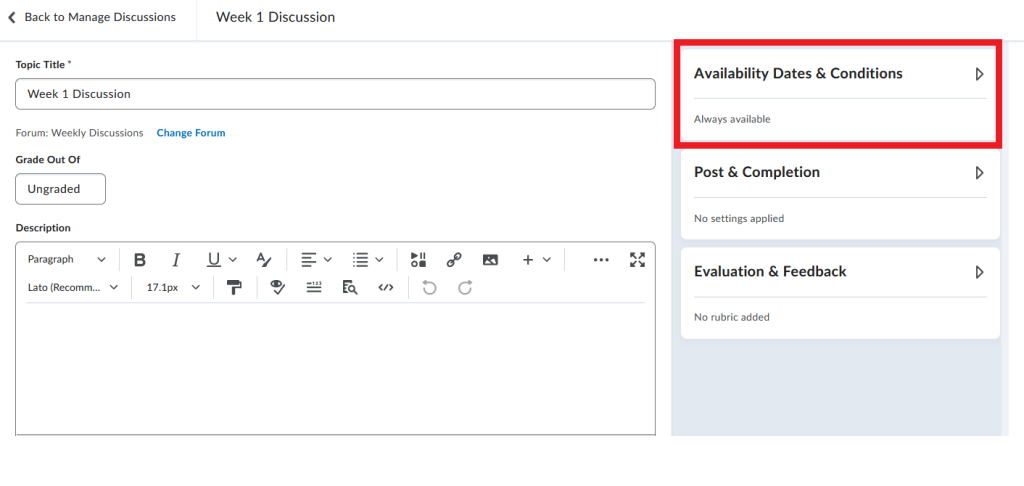
- Click the Availability Dates and Conditions widget to see available settings.
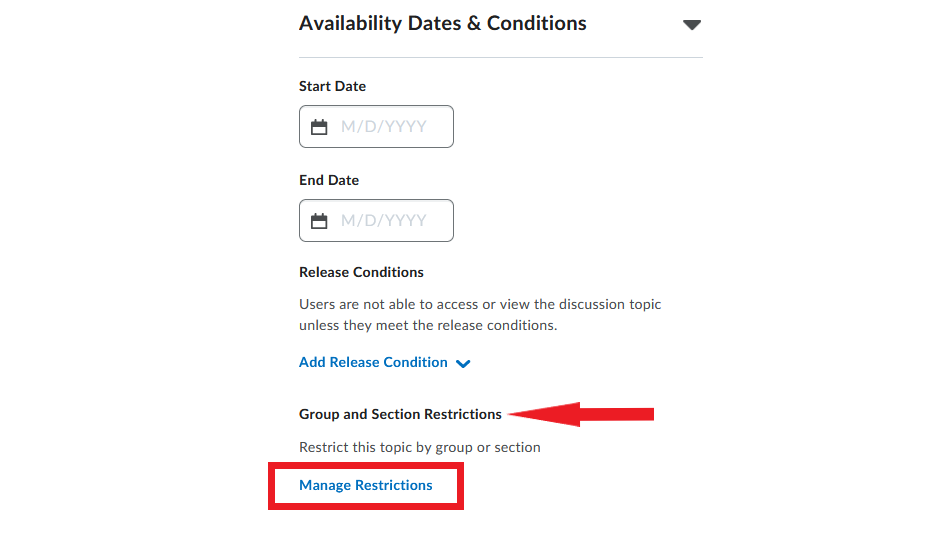
- Locate the Group and Section Restrictions section and click Manage Restrictions.
- In the popup window that opens, select Restrict topic and separate the threads. This setting allows you to assign the same topic to all students, but they will discuss it in smaller groups. Each group will only see their own group’s posts.
- In the same window, go to Group Category or Section. Open the dropdown menu and select the appropriate group category (i.e. the set of groups you have previously created in Brightspace for this task).

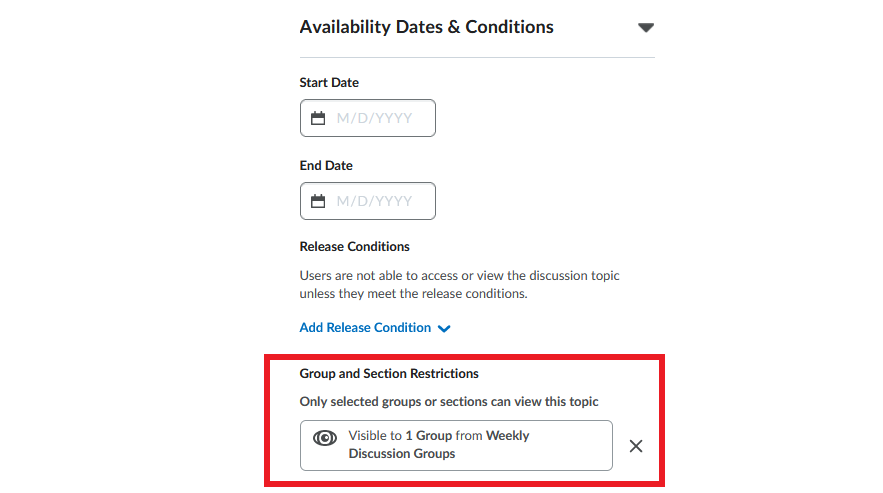
- Click Add at the bottom of the window. The group restriction will now be visible in the Availability Dates & Conditions widget.
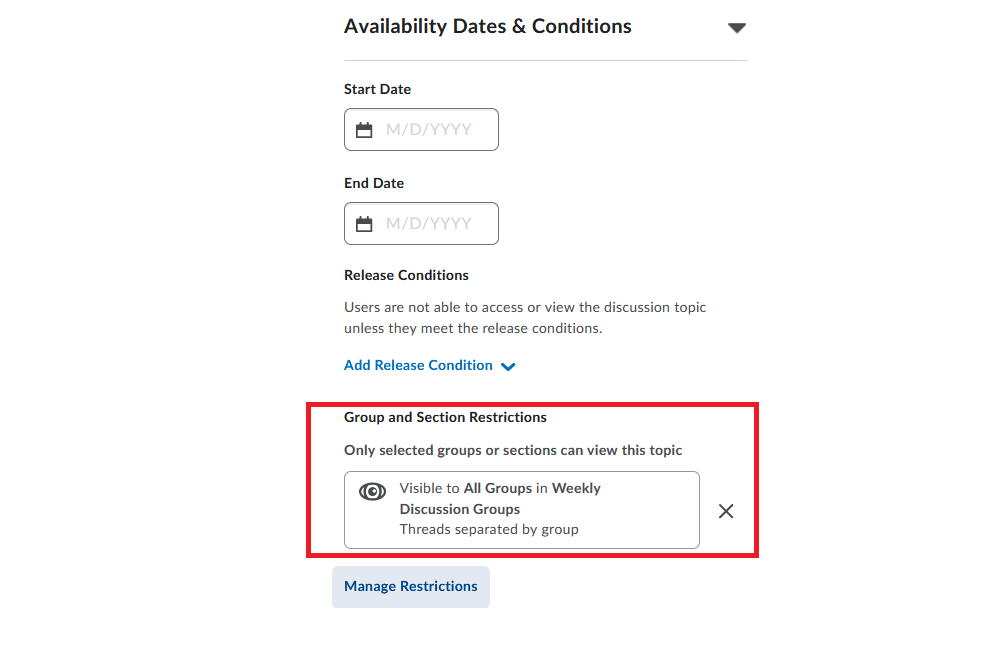
Save your discussion topic.
2. Create one topic for all & separate students into groups in the Groups tool
Note
The Groups tool does not provide the same flexibility for setting up group discussions as the Discussions tool. If you make an error, you will either have to delete the Group Category and start the process over, or you will have to go to Discussions and make your corrections using that tool.
- In the course navbar, click Communication and select Groups from the menu.
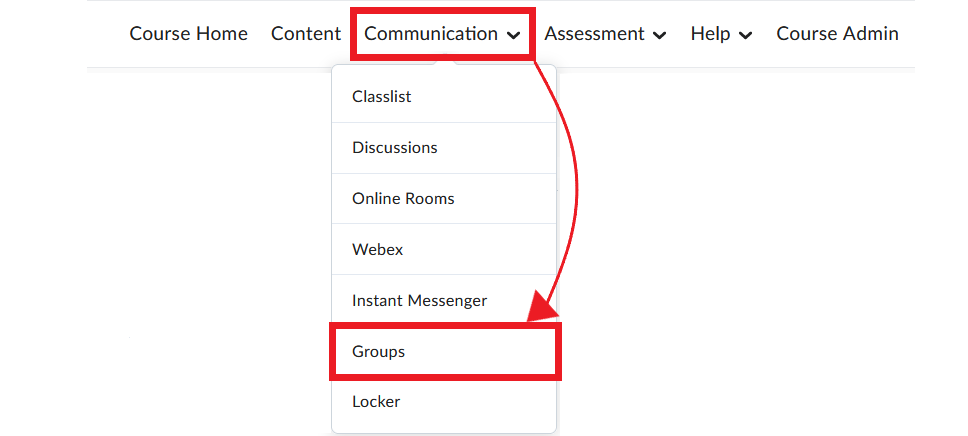
- On the Manage Groups page, click New Category.

- Configure your group category according to your preferences, and scroll down to Additional Options. Select Set up discussion areas.
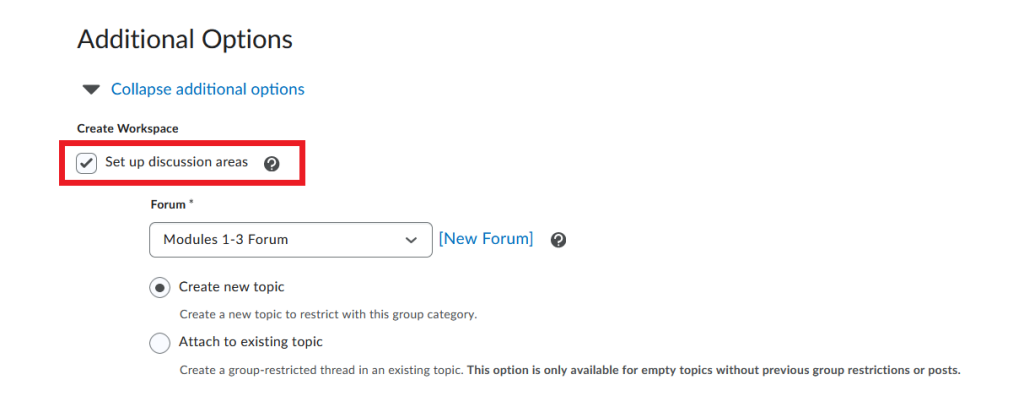
- You will now be prompted to either create a new discussion forum and/or topic, or link your groups to an existing discussion. Follow the prompts as appropriate to set up your group discussions.
- When you are finished, your group category will display information about how many discussion topics have been created for each group.
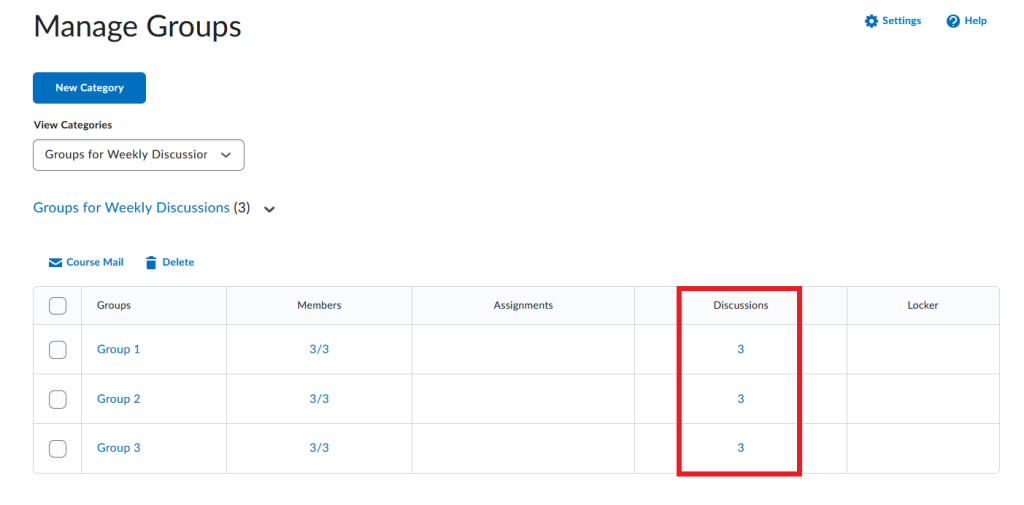
3. Create a different topic for each student group
Note
Groups in Brightspace have to be created prior to this step.
- Create a discussion topic by following the steps outlined above.
- Click the Availability Dates and Conditions widget to view available options.
- Locate the Group and Section Restrictions section and click Manage Restrictions.
- In the popup window that opens, select Restrict topic. This setting allows you to assign a topic to a specific group of students.
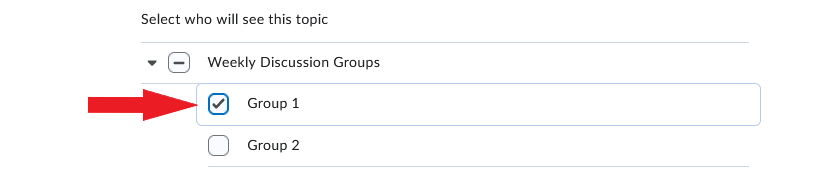
- Open the dropdown menu located just below, and select the appropriate group. (Remember: Groups have to be created prior to this step.)
- Click Add at the bottom of the window. The group restriction will now be visible in the Availability Dates & Conditions widget.