Grading Assignments
The Assignments tool allows instructors to receive students’ submissions and keep them organized. It also provides space and tools for grading assignments and providing feedback to students. Instructors can either annotate and grade assignments within Brightspace using the tools available on the assignment evaluation page, or they can download submission files to their own computer, annotate them using a software/program of choice, and upload them back to Brightspace. Click the items below for details on each method.
> Method 1: Grade Assignments Online Within Brightspace
It is recommended that students’ submissions be graded within the Assignments tool in Brightspace. The assignment evaluation page offers a range of tools available for grading, including multiple annotation tools (e.g., highlighter, shapes, comment boxes) as well as various ways to provide feedback to students (rubrics; written, audio, or video feedback; file upload), all within a single window on your screen. Once the assignment grades are published, students can also easily access the annotations and feedback saved by the instructor.
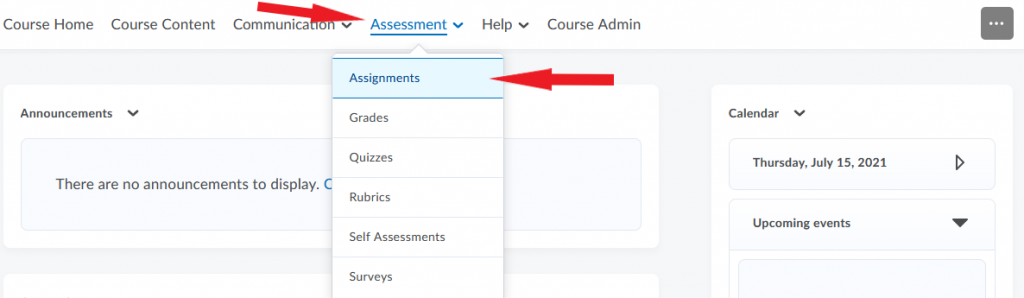
- On your course homepage, go to the navbar and click Assessment.
- Select Assignments from the dropdown menu.
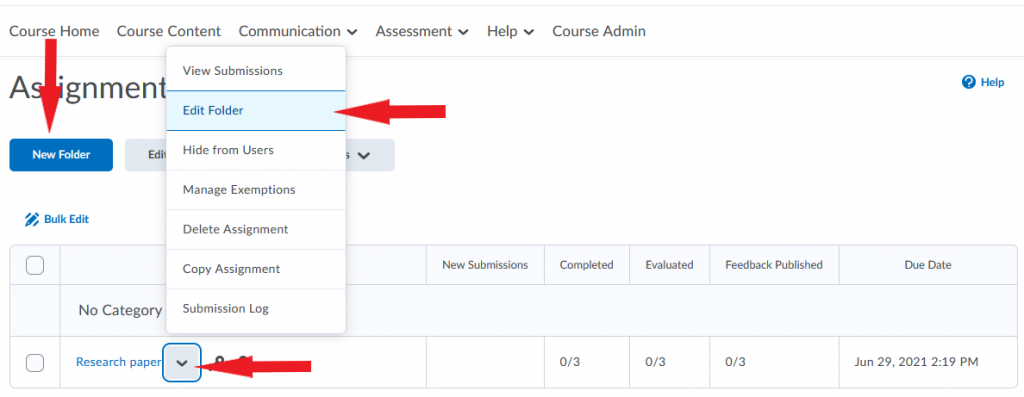
- On the Assignments Folders page that opens, click the folder you want to grade.
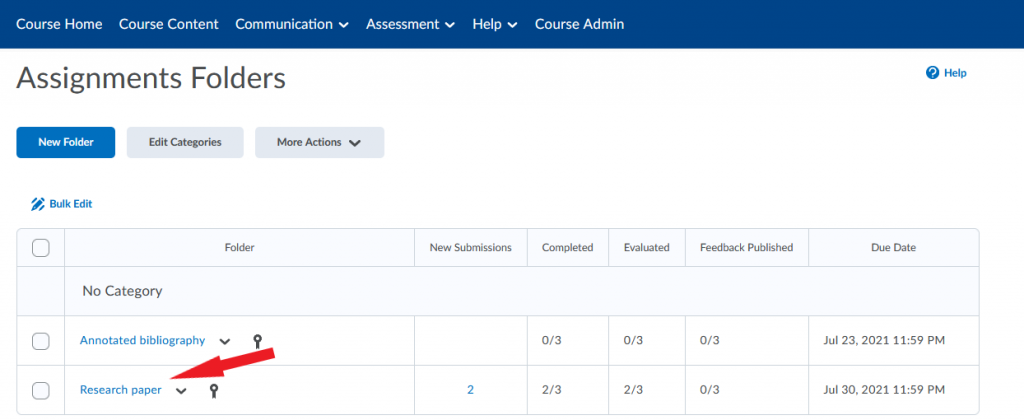
- On the Folder Submissions page for the selected assignment, locate the student whose submission you want to grade and click:
- the student’s name, or
- ‘Evaluate‘ to the right of their name, or
- the file (or one of the files) the student has uploaded as their submission.

- The assignment evaluation page will open. At the top on the document viewer, you will find various tools (page display options, zooming etc.). Click the icon for Annotations.

- Annotation tools will now open. You can choose between Pen, Note, Text, and Line. Clicking on each tool will give you access to additional options such as pen/highlighter color, font type and size, and many others. To close annotation tools and return to all tools, click the arrow on the left.

- Evaluate and annotate the assignment submission.
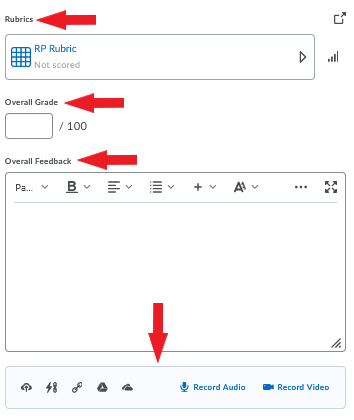
- If the assignment has a rubric associated with it, a Rubrics section will appear to the right. Click to expand it. You can assign points to the evaluation criteria and add feedback for each criterion if you wish.

- Enter the Overall Grade for the assignment in the box. NOTE: If you are using a Rubric, the overall grade will autofill based on the scores you assigned to each criterion in the rubric. You can override the autofill grade by manually entering a score in the Overall Grade box if you wish.
- Optionally, you can provide additional feedback by:
- typing comments in the Overall Feedback box
- uploading a file (e.g., a marked up version of the student’s submission) or adding a link, and
- recording audio or video feedback.
- Click Save Draft at the bottom of the page, and proceed to the next submission by clicking the arrow in the bottom-right corner of the evaluation window.

NOTE: It is recommend that you not click Publish at this point. Publishing the grade at this stage would make the individual student’s grade visible in the Brightspace grade book. We suggest that you finish grading all students’ assignment submissions first, and then transfer all grades to the grade book at the same time (see below).
- When you finish grading all students’ assignment submissions, return to the Folder Submissions page for the assignment (Assessment > Assignments > ‘Assignment Folder‘).
- In the menu at the top of the page, select Publish All Feedback. If the assignment is linked to a grade book item, all students’ grades will now be transferred to the Brightspace grade book.

> Method 2: Grade Assignments on Your Local Computer
If you prefer to grade students’ assignment submissions on your own computer using a familiar software or program (e.g., Word or PDF), the option is available to you. The process involves downloading submission files to your computer, marking them, and then uploading them back to Brightspace. The download-grade-upload process can be completed in two different ways.
+ Download submissions one-by-one
- On your course homepage, go to the navbar and click Assessment.
- Select Assignments from the dropdown menu.
- On the Assignments Folders page that opens, click the folder you want to grade.
- On the Folder Submissions page for the selected assignment, click the first submission you want to evaluate.
- You will now be taken to the evaluation window. In that window, click the download icon
 to save the submitted file to your computer.
 - Grade and annotate the submission on your computer.
- Return to Brightspace. Go to Assessment > Assignments > ‘Assignment Folder‘.
- Click the name of the student whose assignment you just evaluated. The assignment evaluation window for that student will open.
- In the bottom right corner of the page, click the File Upload icon. Locate the student’s assignment submission with your feedback on your computer, and upload it to Brightspace. (You also have the option of attaching files from Google Drive or OneDrive.)

- After you upload the file, enter the grade for the assignment in the Overall Grade box. You can also add audio or video feedback if you wish.
- Click Save Draft at the bottom of the page, and proceed to the next submission by clicking the arrow in the bottom-right corner of the evaluation window.
NOTE: It is recommend that you not click Publish at this point. Publishing the grade at this stage would send the individual student’s grade to the Brightspace grade book for immediate viewing. It is recommended that instructors finish grading all students’ assignment submissions first, and then transfer all grades to the grade book at the same time (see below).
- Complete the steps above for each student in the course.
- When you finish uploading feedback files and entering grades for all students, go to the Folder Submissions page for the assignment (Assessment > Assignments > ‘Assignment Folder‘).
- In the menu at the top of the page, select Publish All Feedback. If your assignment is linked to a grade book item, all students’ grades will now be sent to the Brightspace grade book.
+ Download submissions in bulk
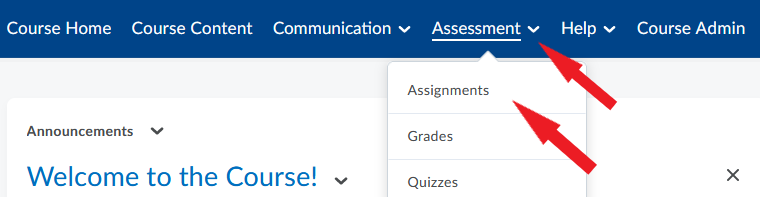
- On your course homepage, go to the navbar and click Assessment.
- Select Assignments from the dropdown menu.
- On the Assignments Folders page that opens, click the folder you want to grade.
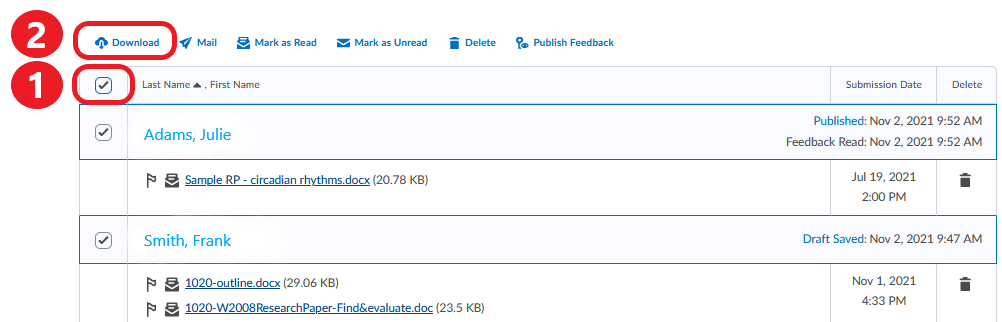
- On the Folder Submissions page, check Select All (alternatively, you can select individual students whose submissions you want to download ) and click Download.
- A .zip file containing all submissions will be generated, and you will be prompted to save it on your computer. Note the location where the .zip file is being saved. In the example below, we used the Downloads folder as the location.
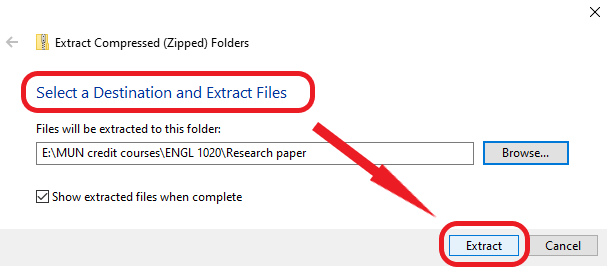
- On your computer, locate the zipped folder, right-click it, and select Extract All.

- You will be prompted to select the folder where you want to save the submission files. Once you make your selection, click Extract.
- You have now saved the submissions to your computer, and you can annotate, grade, and save each file.
NOTE: It is recommended that you not change the file names from the original versions you imported from Brightspace. The file names contain important information that enables Brightspace to ‘match’ each file with the correct student during the process of uploading files back to Brightspace.
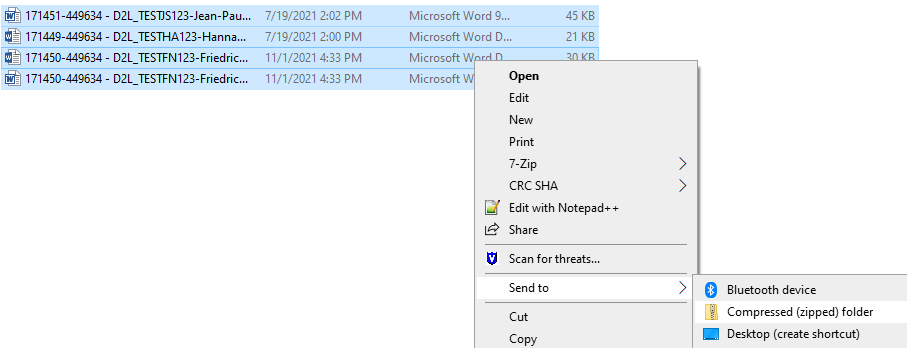
- When you finish marking all submissions, open the folder where they are saved on your computer.
- Select all files (and the html index file if there is one), right-click, and select Send to > Compressed (zipped) folder. A new .zip file will be generated.
- In your Brightspace course, go to the Folder Submissions page for the assignment (Assessment > Assignments > ‘Assignment Folder‘)
- In the menu at the top of the page, select Add Feedback Files.

- Click Upload and locate the .zip file you have just created on your computer, or locate it in your file system and drag and drop it. Click Add. The feedback files will now be uploaded to Brightspace and matched with each file’s original author.

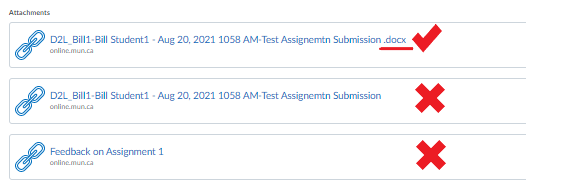
- In order to verify that the upload was successful, click on any student’s assignment submission. On the assignment evaluation page, the feedback file(s) you have just uploaded should be listed under Attachments on the right side of the screen.
NOTE: Check if the attachment contains a file extension at the end of its name. If not, the student will not be able to view the attached file. If the file extension is missing, please review the steps above or contact CITL Client Support.
- Once you have successfully uploaded feedback files, you need to enter grades for the assignment. To do so, open the first student’s submission and enter the Overall Grade in the appropriate box. You can also add audio or video feedback.
- Click Save Draft at the bottom of the page, and proceed to the next submission by clicking the arrow in the bottom-right corner of the evaluation window.
NOTE: It is recommend that you not click Publish at this point. Publishing the grade at this stage would send the individual student’s grade to the Brightspace grade book for immediate viewing. It is recommended that instructors finish grading all students’ assignment submissions first, and then transfer all grades to the grade book at the same time (see steps 10-11 below).
- When you finish entering grades for the assignment, go to Assessment > Assignments > ‘Assignment Folder‘.
- In the menu at the top of the page, select Publish All Feedback. If your assignment is linked to a grade book item, all students’ grades will now be sent to the Brightspace grade book.
Video Instructions
This video illustrates the process of grading assignment submissions within Brightspace.
This video illustrates the process of grading assignment submissions on your computer.