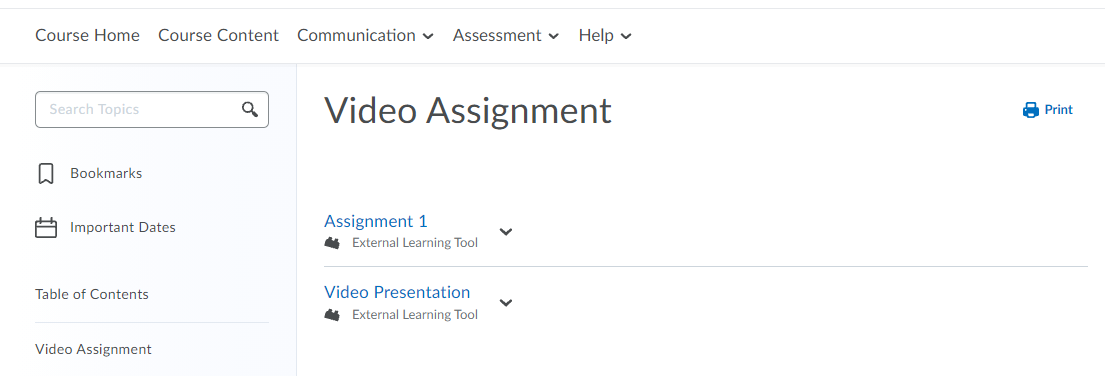
Accessing Your Video Assignment
If your course is using the Brightspace Video Assignment tool, it will be accessed via the Content section of your course. The video assignment Icon can be seen in the below example under the title of each of the two video assignments.
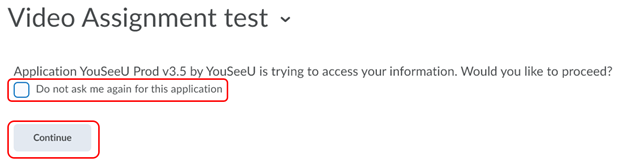
Note: If this is your first time accessing Video assignment you may see the follow message, select the check box and select continue.
Navigating Video Assignments
When you enter your video assignment, you will find important information like due dates, assignment instructions and any already created work. To create or upload new items to your project scroll down to the Add Video section, seen below.
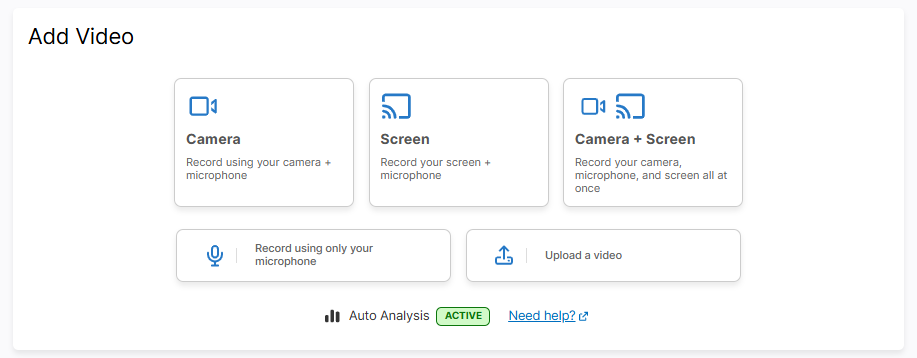
You can use Brightspace to record your video or you can upload a previously recorded video that you have saved on your device using one of the 5 available options:
- Camera; create and submit a video using your devices camera and microphone.
- Screen; create a recording using your devices screen and microphone.
- Camera and screen; create a video using your devices camera, screen and microphone.
- Microphone; create a recording using only your microphone
- Upload; upload a completed video file you have already created.
You can also add links or other file types like PDF and Word documents to your project by using the Attachments section;

Recording Video
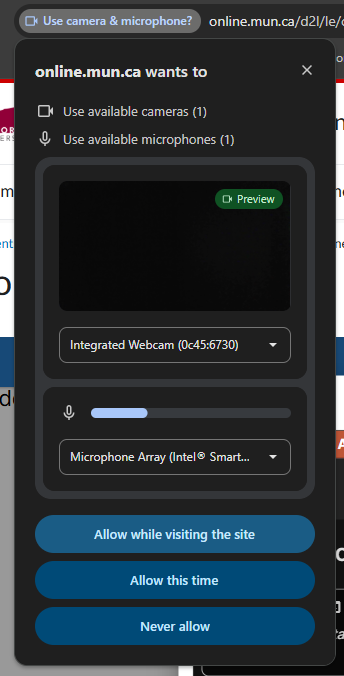
If you choose to Record Video via Brightspace, you can choose to record your camera, your screen or both by selecting the options below. It is likely your browser will ask for permission to access your Camera and Microphone, ensure you allow both;
Note: If you select the screen share option in section 3.2.1, you are asked to share your computer screen or specific areas of your entire screen, window, or browser tab. Ignore this option (section 3.2.3) if you do not want to share your computer screen during your video presentation.
If you would like to capture your screen in your recording, check of the option to record screen and/or camera and select record. Next you will need to determine how you would like to record your screen, you can choose to record your entire screen (if more than one display attached you must choose one); you can record a particular Window, which limits the recording tot a particular program opened on your computer (must be running); or select a Browser tab (if using Chrome or Firefox) and limit the screen recording to just the selected tab.
When you select Window or Tab, you can navigate away from those screens but the recording will only capture the selected window or tab, however if you select Entire Screen anything you do on that screen will be recorded.
After choosing record, the Recorder will pop-up in your browser, you can work within the mini-recorder or you can choose to pop it out in a new window, by selecting “Open Standalone Recorder”.
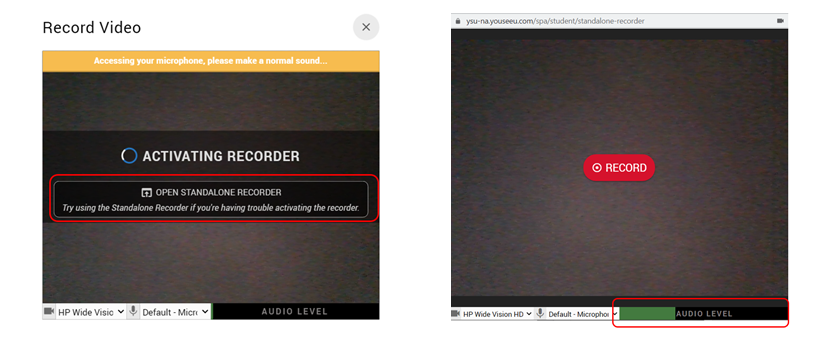
You can ensure your microphone is detecting your sound by viewing your audio level in the bottom. The green bar at the bottom of the screen changes to match your audio level. To record a video, select RECORD. When your recording is complete, you can play the recorded video back, reset or delete the recording if you are not satisfied with it, download the video to your device or save your video to the work in progress section of the assignment.
Upload Video
If you choose to Upload Video, you will be uploading a previously recorded video, you can choose a video file saved locally on your device or in your Google Drive, Dropbox or OneDrive cloud storage. You have the option to drag a video file from an open folder or select “Click here” to search your devices and drives.

After selecting your video, select “Begin Upload”, depending on the size of your video and strength of your internet connection it will take a few minutes to upload. Once completely uploaded it will appear on the “work in progress” screen, you can continue to add more videos or Analyze, preview or manage options of existing videos.
Submit Assignment
Once you have added all the items required project, you must now select which of the items you want to submit, do this by selecting the “Prepare Submission”;

place a checkmark next to the items you want to submit, and select “submit”,