Recording with ScreenPal
NOTE: If you are unable to launch ScreenPal on your computer, visit the Accessing the Software page in this resource and ensure that you have completed all the steps for downloading and installing the software.
To access ScreenPal:
- Log in to Brightspace,
- Click Instructors in My Dashboard widget,
- Celect ScreenPal,
- Copy the SceenPal password generated for you and then click the link provided.
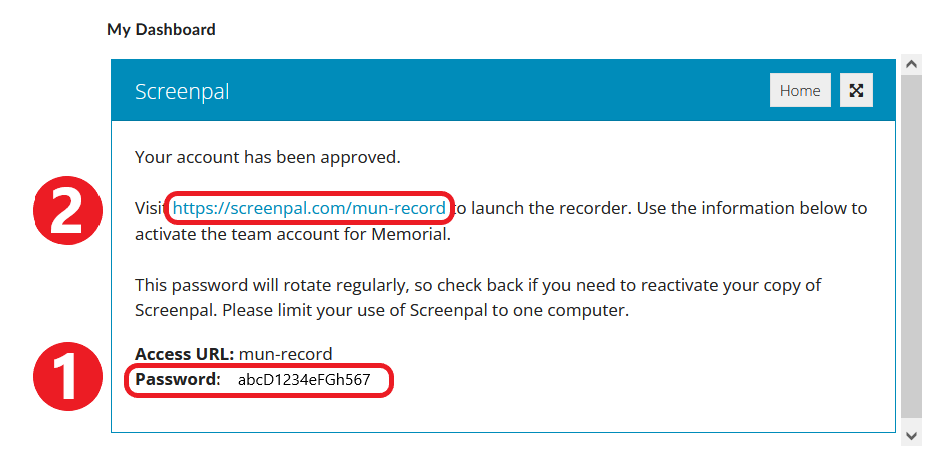
- You will be take to the ScreenPal page for Memorial. When prompted, enter the ScreenPal password you have just copied (not your Memorial password).
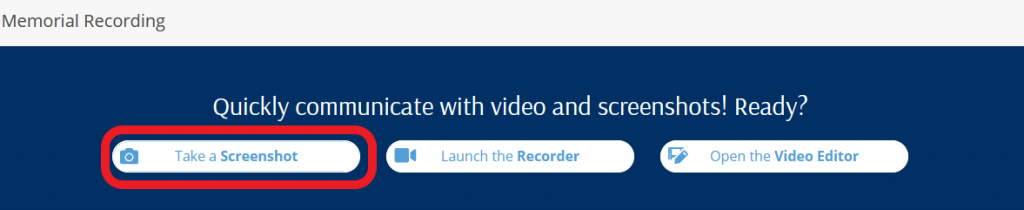
On the “ScreenPal: Memorial Recording” page, you will see three buttons that correspond to the main functions of the tool. Detailed information on each function is provided below the image.

1. Taking a screenshot
- On the ScreenPal page, select Take a Screenshot. This will open the ScreenPal web launcher.
- At the top of the screen, a window will appear asking: Ready to take a screenshot? Go to the computer window or application you want to capture and click Ready.

- Follow the instructions on the screen to take your screenshot.
- After you take a screenshot, a confirmation message will appear. You can now:
- paste the image into a document by pressing Ctrl+V
- edit the image using ScreenPal’s editing tools
- download the image to your computer.

2. Using the screen recorder
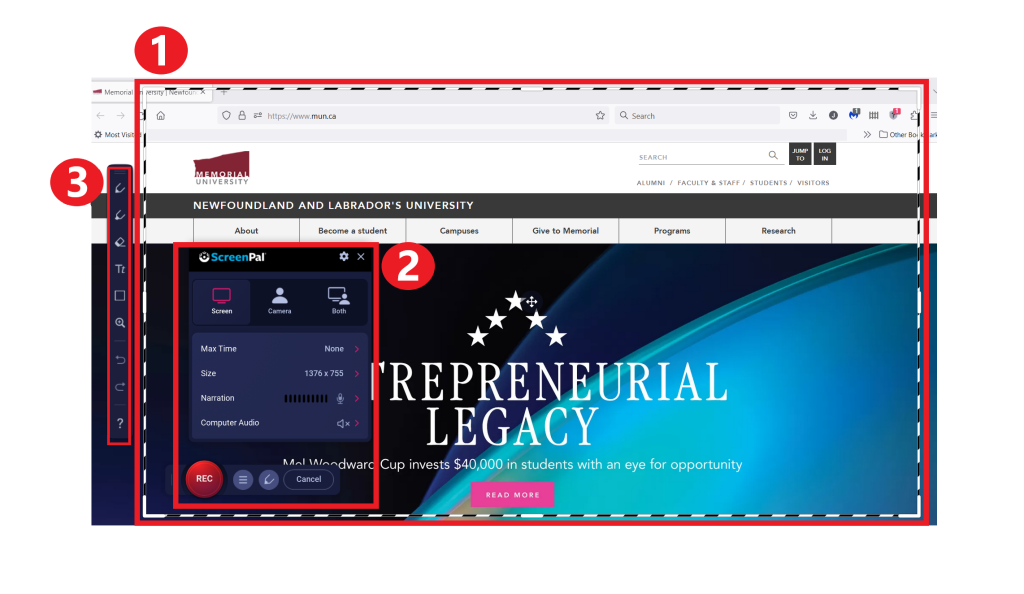
- On the ScreenPal page, select Launch the Recorder.

- The ScreenPal screen recorder will launch. It contains:
- a resizable recording frame (you can record the entire screen or only a portion of it)
- recording controls (input type, length, size etc.)
- various annotation tools you can use for your recording
- Once your preferred options are set, click the red Rec button. A 3-2-1 countdown will begin. When recording starts, the black-and-white dotted frame around your recording area will change to red-and-white to indicate that recording is in progress.
- You can pause the recording at any time by clicking the Pause button
 . When you pause, a bar will display with options to resume recording (click Rec), play what has been recorded so far, end the recording (click Done), or delete it.

- When you have finished recording, click Done.
- You will now have two options: to Save/Upload or Edit Video.
- If you select Save/Upload, your recording will be saved to the ScreenPal folder and you will be able to view it. After viewing the video, you can decide what to do next:
- save the recording on your computer (available formats are MP4, AVI, FLV, and GIF)
- edit the recording in the ScreenPal editor, or
- delete the recording and start over.
- If you select Edit Video, your recording will be saved in the ScreenPal folder and you will be taken to the editing window. For information on editing using the ScreenPal Video Editor, please refer to the section below.
3. Editing an existing recording
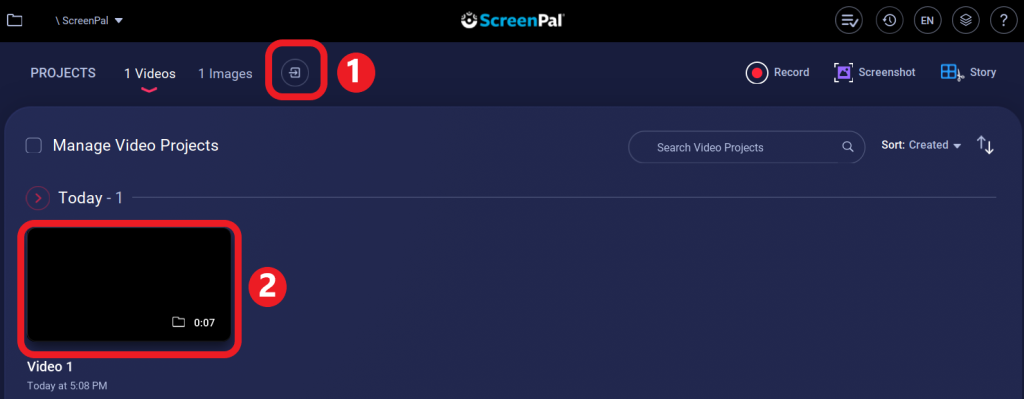
- On the ScreenPal, select Open the Video Editor. This will open the video manager.

- Select the video you want to edit. You can:
- import a video from your computer
- choose a video you recorded using ScreenPal
- On the next page, select Edit Video.

- You will now be able to edit your recording using numerous editing tool available in the ScreenPal video editor. Some of the tools are:
- Adding captions (speech-to-text, typed by you, or from a file)
- Adding music (from the available selection or imported)
- Deleting segments of the recording
- and many, many more (for a complete list of editing tools, visit the ScreenPal site).
- After every edit you make, you will be asked if you want Modify Main Video. Click OK if appropriate.
- When finished, you can save the video file to your computer in one of the available formats: MP4, Avi or FLV.
Video Instructions
The following video illustrates the process of recording using ScreenPal.