Using Mersive Solstice
1. Download the App on Your Mobile Device
In order to use the Solstice system, you first need to download and install the Mersive Solstice app on your device. There are several ways to do it.
- Download from the Website: The main download page on the Mersive website provides all app options: https://www.mersive.com/download/
- Download from App Store: If you are familiar with the app store for your mobile device, you can search for “Mersive Solstice” to find and install the app.
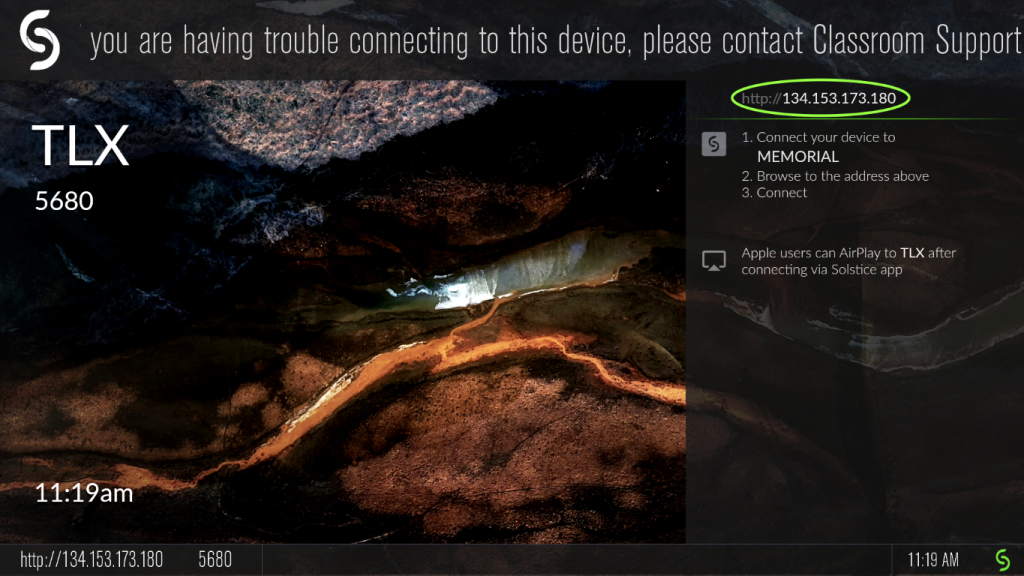
- Enter the Solstice IP Address in a Browser: When you enter the IP number of the Solstice pod in your room into the web browser on your device, you will be redirected to the appropriate version of the app. The IP number is available on the Solstice welcome screen projected in the classroom/meeting room.
- NOTE: iPad users should use a browser other than Safari; otherwise, the Solstice will direct you to an app version meant for a MacOS device.
- NOTE: You need to be connected to the MUN Wi-Fi network to connect to the Solstice IP address.
2. Activate Solstice in the Classroom/Meeting Room
- In your classroom/meeting room, turn on the display you will be using (projector, large TV – depending on the room).
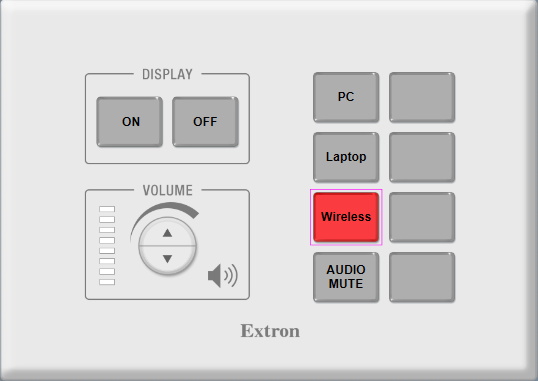
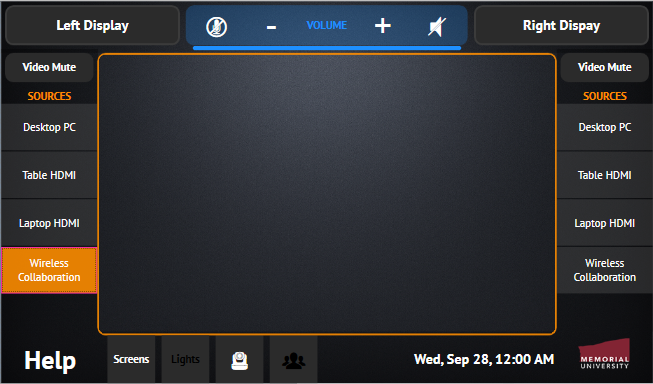
- On the button-based or touchscreen system used to control the display, volume and other inputs, press ‘Wireless’ or ‘Wireless Collaboration’ to launch the Solstice (images 1 and 2 below).
- The welcome screen for the Solstice will display. It will contain the information needed to connect to the session wirelessly.
3. Wirelessly Connect to a Session from a Mobile Device
NOTE: In order to connect to a Solstice session, you need access to the @Memorial wireless network. ‘@Memorial-Guest’ access will not work. A MUN account is needed to connect to the @Memorial Wi-Fi.
Once a Solstice session is started, instructors need to connect to it from their mobile device.
If the intent is for students to share content and/or collaborate during the session, they also need to connect to the Solstice the same way.
- Open the Mersive Solstice App you have previously installed on your device (see Step 1 above).
- When prompted, enter the following information:
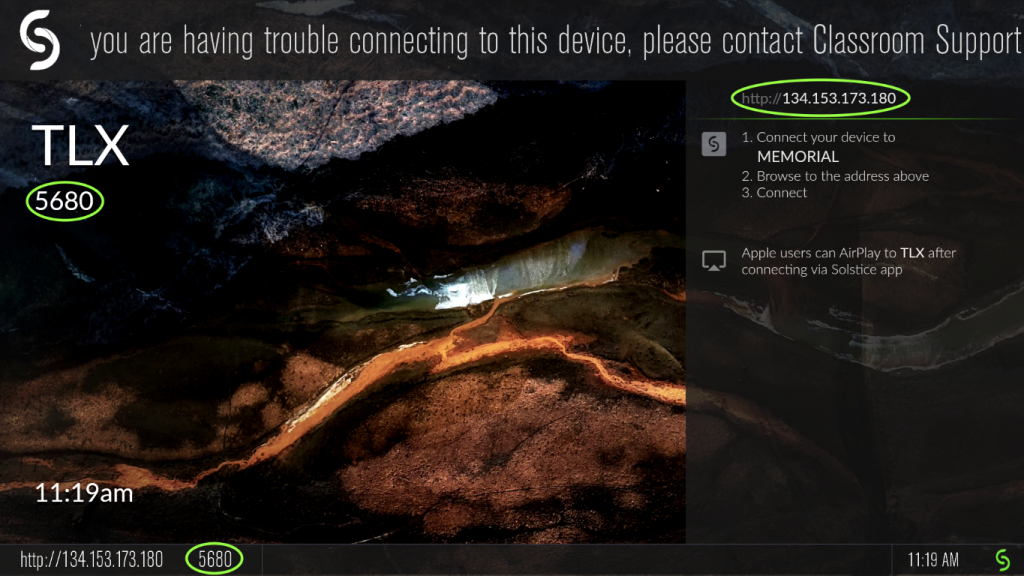
- IP Address – the unique number assigned to the Solstice pod in each room. This IP number is fixed (never changes for the room), but each room has a different number. The IP number is located in the top right section of the Solstice welcome screen (see image below).
- Room Code – a randomly generated, 4-digit code assigned to each Solstice session. This number is reset when everyone disconnects from the Solstice session or when the instructor resets the session manually from the Solstice touchscreen display.
- If no content is being shared, the code will appear on the left side of the screen, both at the top and bottom (see image below).
- If content is being shared, the code will not be visible until someone connects; then it will briefly display at the bottom of the screen.

4. Share Content
Users connected to a session through the Solstice app can share:
- media files (e.g., pictures, videos)
- real-time views from a camera, or
- the entire screen from the mobile device if they wish to showcase particular documents or applications.
Content Sharing from a Mobile Device
The images below illustrate the content sharing interface for different types of devices.
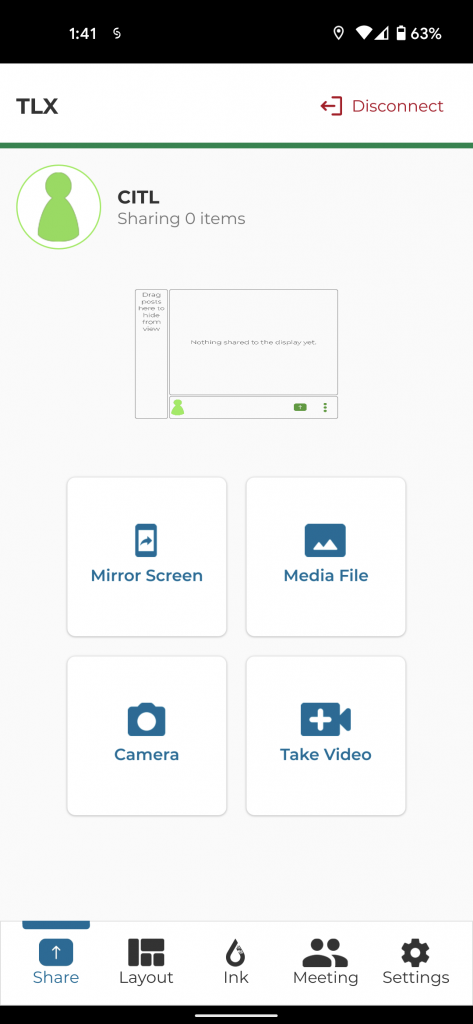
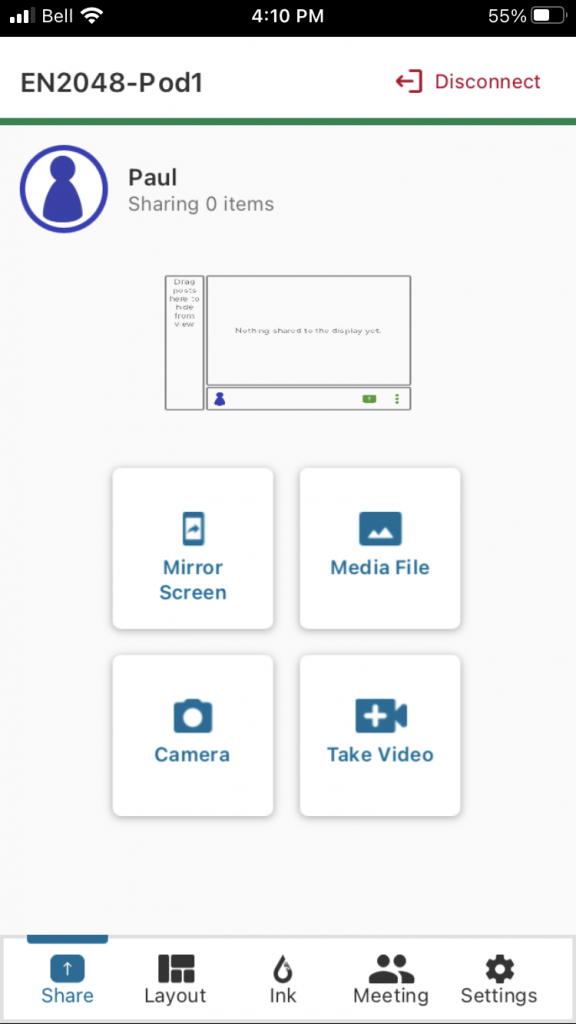
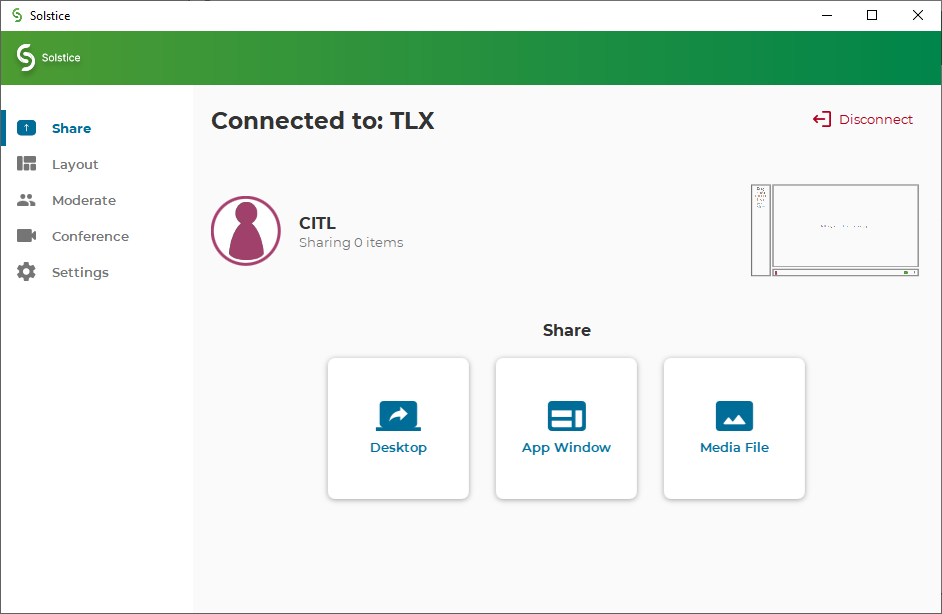
NOTE: Newer MacOS versions require additional permissions: How to Allow Desktop and Audio Sharing on a Mac.
When content is being shared to the Solstice display, the view on a user’s mobile device will be similar to the one below.
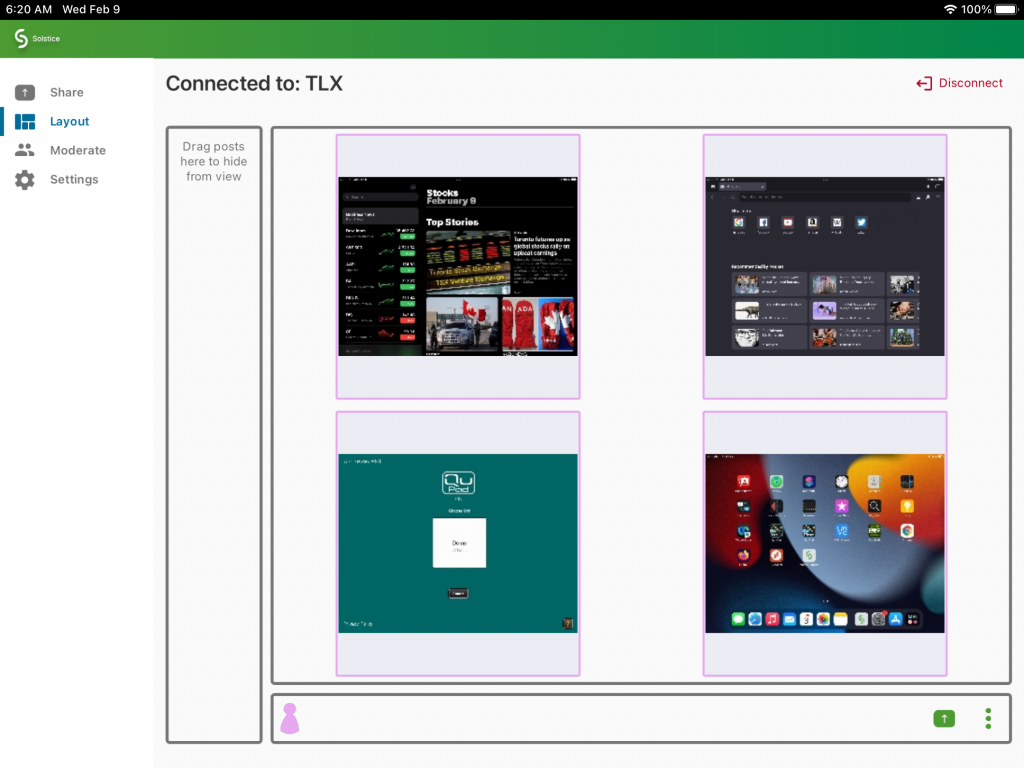
NOTE: For information on how to share your entire screen from various devices visit App-Free Sharing to a Solstice Display.
Content Sharing on the Solstice Display
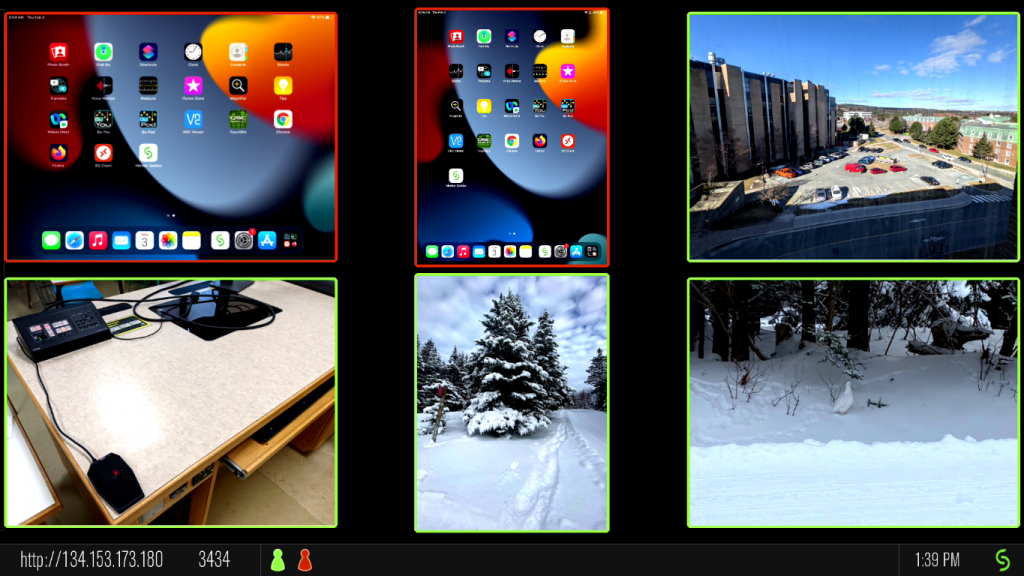
When multiple pieces of content are shared simultaneously, the display will look like the image below.
5. Control the Content
General Information
- Content on the Solstice display can be manipulated with a touchscreen or a mouse.
- Touching/clicking and holding a piece of shared content provides options to ‘Display full-screen’, ‘Delete’ or ‘View additional details’.
- When multiple participants are sharing content, you can control the order in which it is shared.
NOTE: Every participant connected through a mobile device can control the content on the Solstice display. Rather than having multiple people try to control it simultaneously, consider designating one participant to control the display for everyone.
Organizing Shared Content
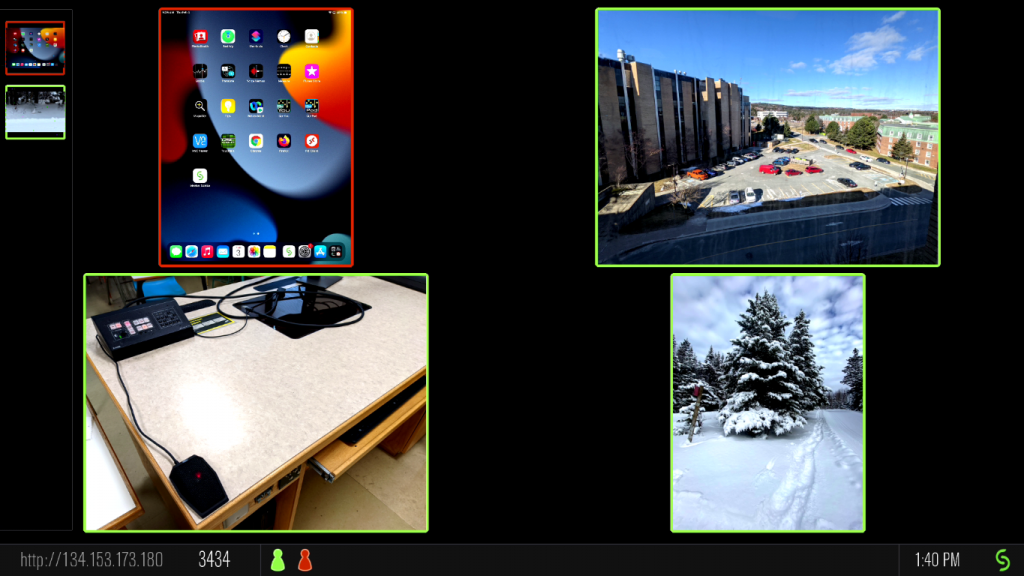
You can either share one piece of content at a time on the Solstice display, or you can share multiple pieces simultaneously. If you share multiple pieces, you can organize them on the display so that they remain in a ‘shared’ state and you can easily switch from one to another.
- You can move shared content to the panel on the left, as seen in the image below.
- You can also organize shared content into ‘stacks’, or virtual folders, on the screen.
- To create a stack, click/touch and hold.
- Drag content into the stack as needed.
- Click/touch and hold to edit the stack or unstack all content inside.
The ‘Ink’ Tools
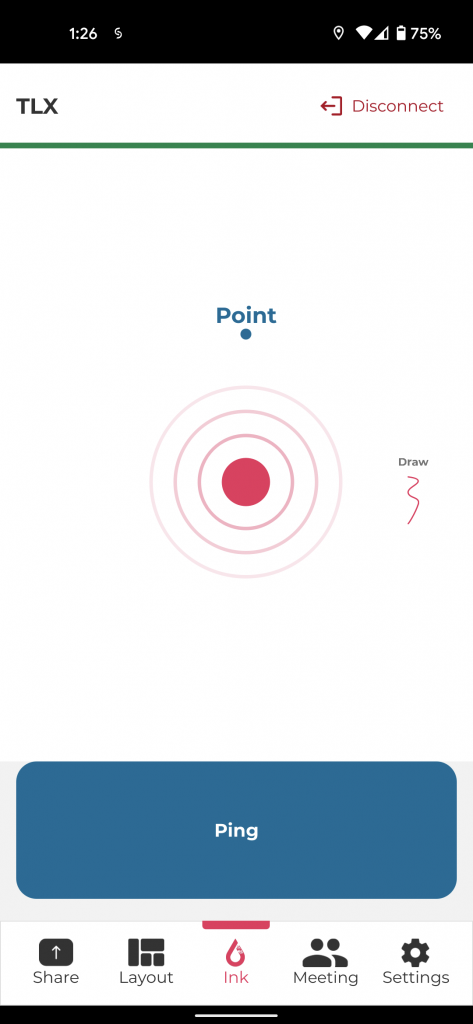
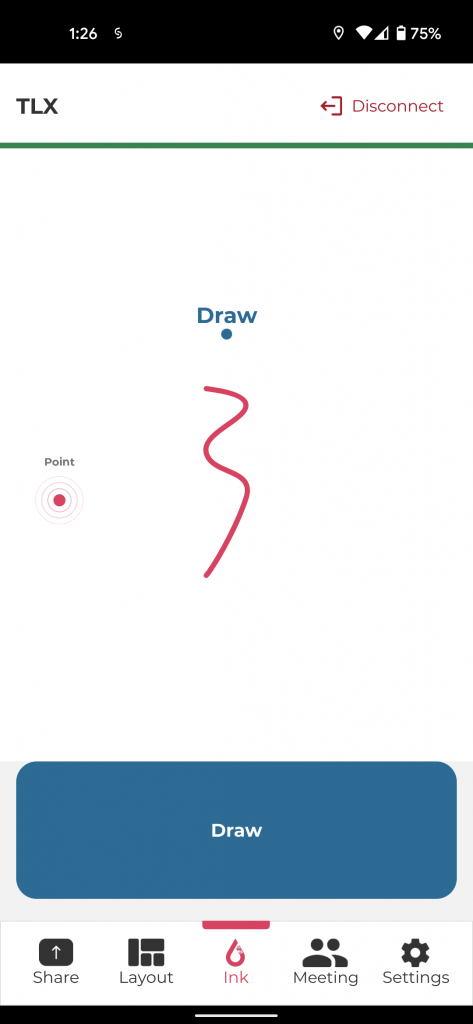
When using a device that supports motion control (e.g., a mobile phone), you have access to two controls that can be used to draw focus on the shared content. These controls are available through the Ink button at the bottom of the Solstice app.
- Pointer (Image 1 below): This feature acts like a laser pointer onscreen. As you touch the screen on your mobile device, a dot in your assigned color (see Multiple Participants in the menu on the left) will move accordingly on the Solstice display. By pressing the Ping button, you can also create ‘a ripple’ around your pointer to draw focus to the content you are referencing.
- Draw (Image 2 below): When the ‘Draw’ button is pushed, touching the screen of your mobile device will create annotations that disappear after a few seconds. This allows for more focus than the ‘Pointer’.
6. Utilize Controls Available at the Console (not through the app)
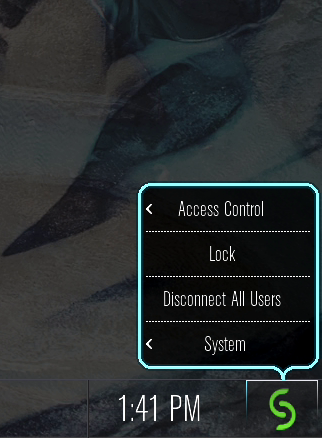
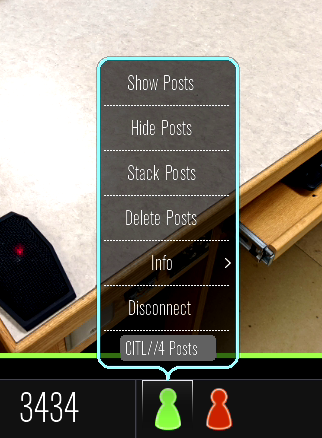
In some classrooms, the instructor has access to additional controls available through the touch monitor at the presentation desk. By pressing on the participant icon (Image 1 below) or the Solstice icon (Image 2 below) at the bottom of the screen, you will have access to the following additional controls:
- Lock the session so that no other users can join
- End the session so that all users are disconnected and a new room code is generated
- Show, hide, stack or delete a participant’s shared content from their participant icon
- Remove individual participants from the session
7. End the Session
At the end of each session, instructors should:
- return to the console
- select the Solstice icon on the touchscreen
- select Disconnect All Users option.
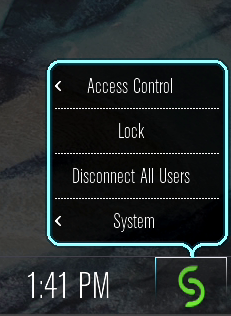
This will ensure that all participants are disconnected and a new room code is generated for the next potential class.