CITL Video Uploader: FAQs
What file types can I upload?
You can upload the following file types:
.3gp, .avi, .flv, .f4v, .mov, .movie, .mp4, .m4v, .mpeg, .mpg, .ogv, .qt, .rmvb, .rv, .webm, .wmv,
Can I upload audio files to this service?
Audio files cannot be uploaded and hosted using this service. Audio files must first be converted to a video file before they can be uploaded and streamed.
What if I receive an error on uploading my video file?
Some video files cause errors while uploading due to unsupported codecs within an acceptable file type. If you receive an error, reach out to the CITL Support Centre and our team will investigate.
How secure is my file?
Files uploaded to the self-service video upload service are not browsable by the public. They will only appear on pages where you insert your embed code.
As an additional layer of protection, individuals who try to access the recordings are required to have a valid MUN Login ID.
This may result in problems if your Brightspace course site includes users who are external to Memorial. If this is a concern, please reach out to the CITL Support Centre to discuss.
Can I extract my video from the service?
It is not possible to extract your original video from the hosting service. Once uploaded, the video is converted into a number of formats suitable for streaming through our streaming player. You are encouraged to keep a copy of your video in case you need it in the future for editing or hosting.
What are optimal video recording settings?
It is recommended that you record your video in no more than 720p (resolution of 1280×720 pixels). 720p is the maximum quality that can be streamed. If you upload a higher quality file, it will work fine, but it will consume more of your quota. If your device records a higher quality, you should consider reducing quality to 720p before uploading. If possible, it is best to record in native 720p format instead of converting. See the instructions below for converting your video, or changing your native recording settings per device.
Converting Video With Handbrake
You can use the free tool Handbrake to convert any existing video to 720p. It is available for Windows, MacOS, Linux.
- After installing, run Handbrake and it will ask for your video file.
- Once selected, it will auto-detect the input file and suggest some settings.
- The easiest way to select the optimal settings is to choose the Very Fast 720p30 option in the Preset menu. This option will give you the lowest file size with the best settings. Each of the tabs below will allow you to tweak the settings for your output video. You probably won’t need to tweak these settings.
- At the very bottom of the screen you will see a Save As: box which will include a path to the output file. It will set a path based on the location and file name of your input file, but you can adjust it here.
- Once you are satisfied with your settings, click the Start Encode (
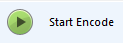 ) button at the top of the screen.
- Note: Video encoding/transcoding takes significant computing power. Your video conversion may take a while depending on your computer. You will see a progress bar in the bottom left corner of the window.
- Once complete, you should confirm that your file plays back as you intend. You can now upload your converted file to the service.