Creating Group Discussions
Discussions in Brightspace do not have to involve all students at the same time. Students can be divided into smaller teams (Brightspace groups or course sections) to discuss topics in a more intimate setting. Group discussions can be organized in two different ways:
- The same topic can assigned to all students, but students discuss it in smaller groups.
- Different groups can be assigned different topics.
For details on how to set up group discussions, click the items below.
> Create one topic for all & separate students into groups in the Discussions tool
NOTE: Groups in Brightspace have to be created prior to this step.
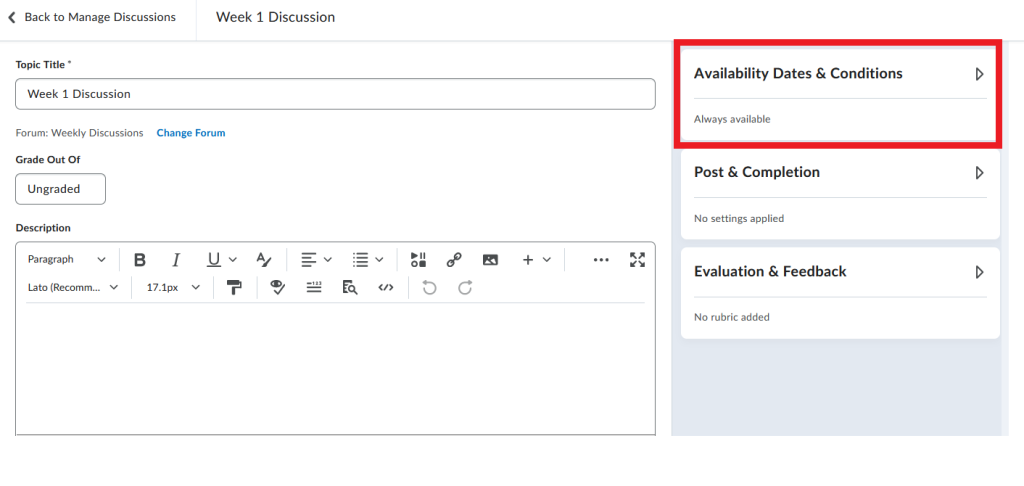
- Create a discussion topic by following the steps outlined on the Creating a Topic page.
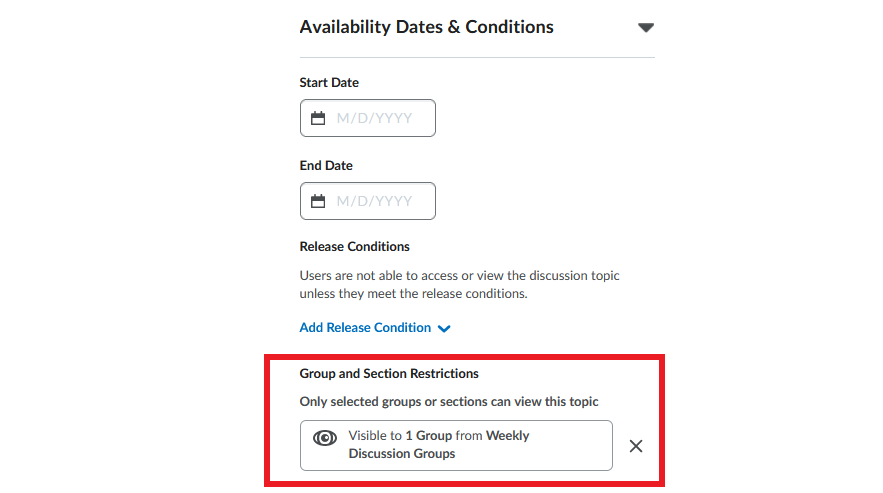
- Click the Availability Dates and Conditions widget to see available settings.
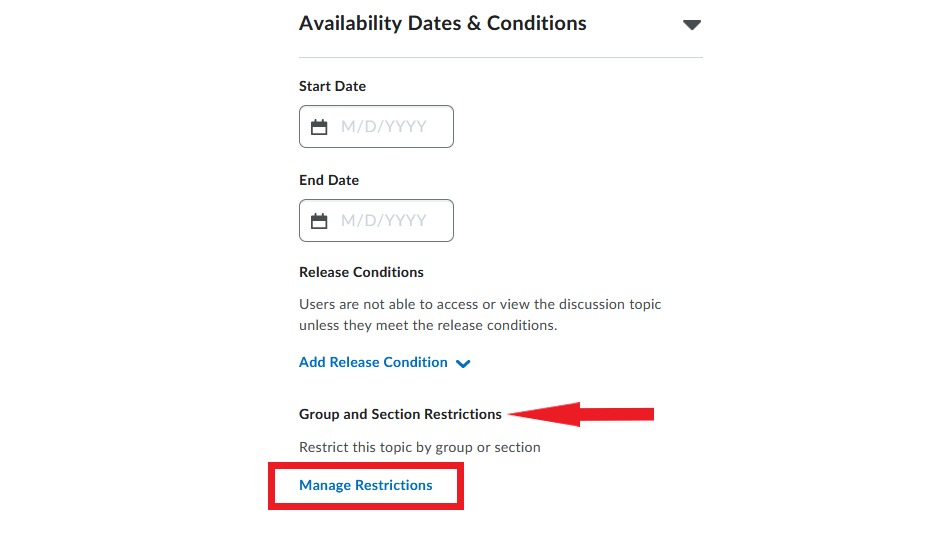
- Locate the Group and Section Restrictions section and click Manage Restrictions.
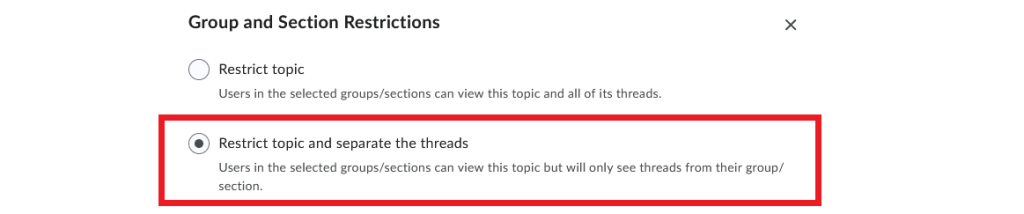
- In the popup window that opens, select Restrict topic and separate the threads. This setting allows you to assign the same topic to all students, but they will discuss it in smaller groups. Each group will only see their own group’s posts.
- In the same window, go to Group Category or Section. Open the dropdown menu and select the appropriate group category (i.e. the set of groups you have previously created in Brightspace for this task).

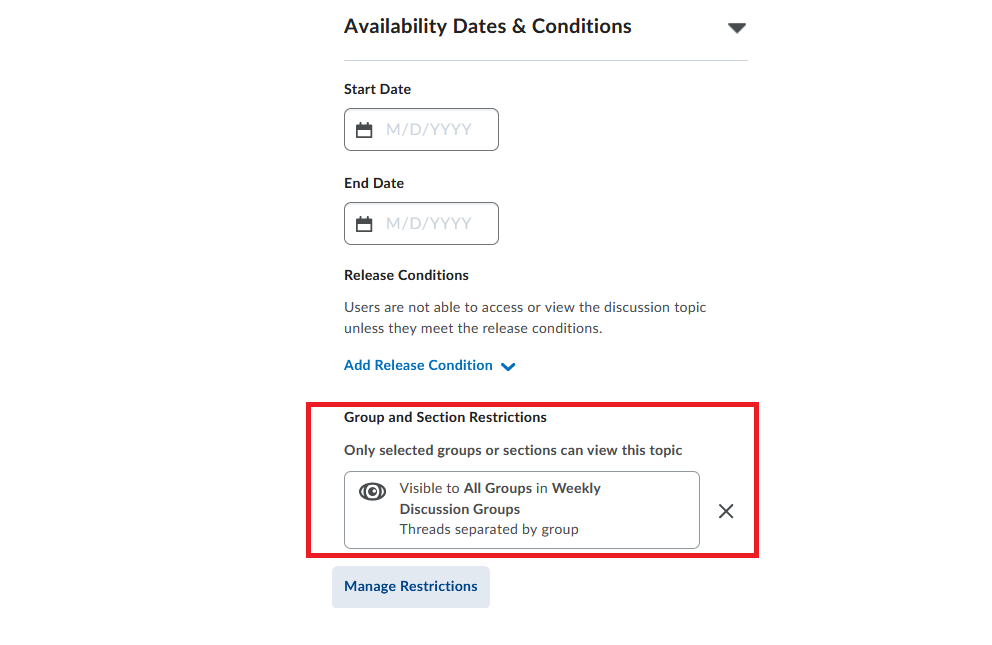
- Click Add at the bottom of the window. The group restriction will now be visible in the Availability Dates & Conditions widget.
- Save your discussion topic.
> Create one topic for all & separate students into groups in the Groups tool
NOTE: The Groups tool does not provide the same flexibility for setting up group discussions as the Discussions tool. If you make an error, you will either have to delete the Group Category and start the process over, or you will have to go to Discussions and make your corrections using that tool.
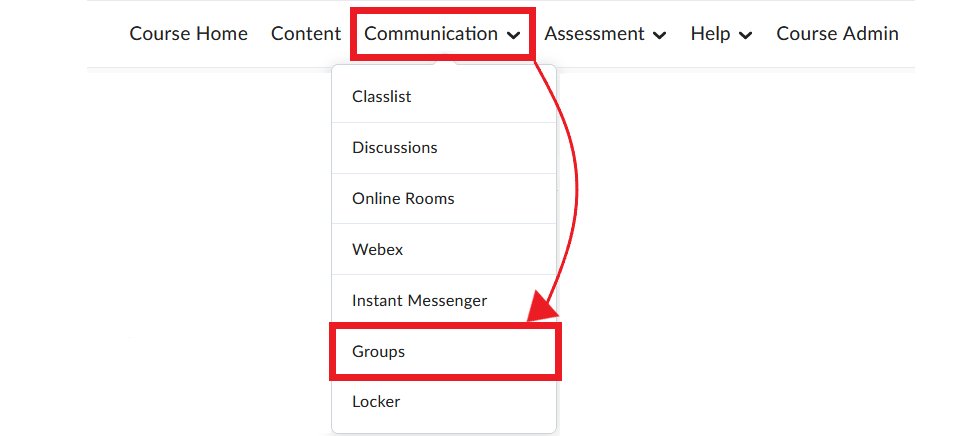
- In the course navbar, click Communication and select Groups from the menu.
- On the Manage Groups page, click New Category.

- Configure your group category according to your preferences, and scroll down to Additional Options. Select Set up discussion areas.
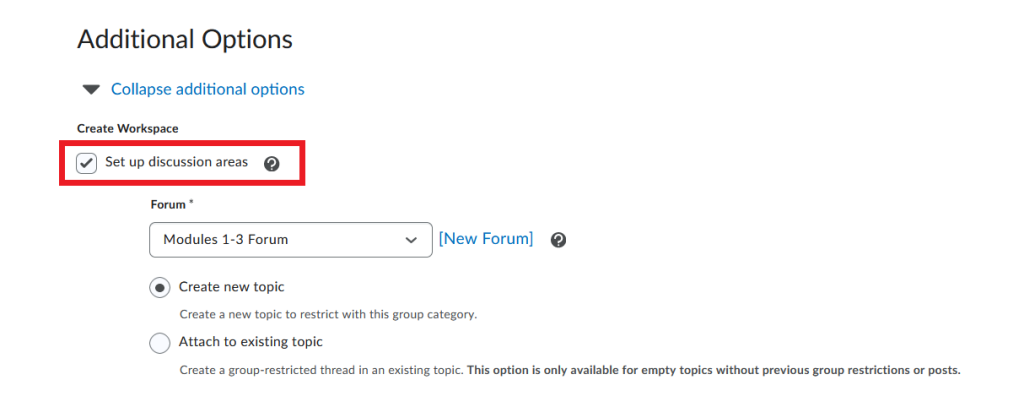
- You will now be prompted to either create a new discussion forum and/or topic, or link your groups to an existing discussion. Follow the prompts as appropriate to set up your group discussions.
- When you are finished, your group category will display information about how many discussion topics have been created for each group.

> Create a different topic for each student group
NOTE: Groups in Brightspace have to be created prior to this step.
- Create a discussion topic by following the steps outlined on the Creating a Topic page.
- Click the Availability Dates and Conditions widget to view available options.
- Locate the Group and Section Restrictions section and click Manage Restrictions.
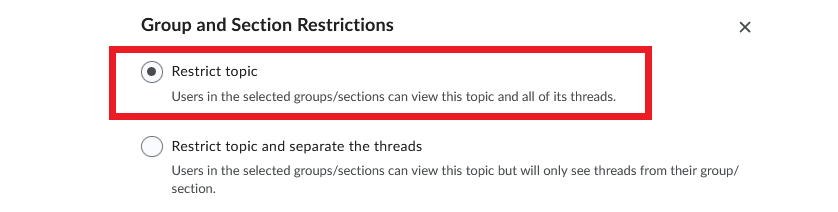
- In the popup window that opens, select Restrict topic. This setting allows you to assign a topic to a specific group of students.
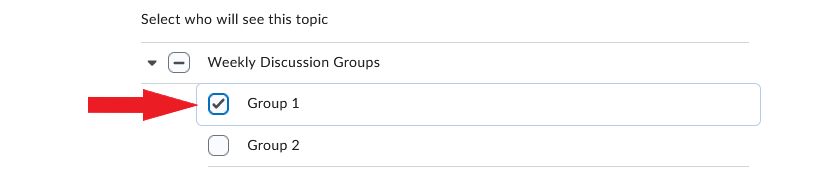
- Open the dropdown menu located just below, and select the appropriate group. (Remember: Groups have to be created prior to this step.)
- Click Add at the bottom of the window. The group restriction will now be visible in the Availability Dates & Conditions widget.
- Save your discussion topic.