Webex
Webex provides a number of options for customizing recordings from your sessions. (For general information about using Webex, please visit our resources under Communication.) These options are important to consider if you are planning to share a recording of a synchronous session with students or if you are recording asynchronous lectures using Webex.
It is important to note that once you set your recording preferences for a session, they will apply to all future recordings as well, unless you change the configurations between your sessions.
Note
Webex recording preferences have to be configured before you launch the session you plan to record. You cannot adjust them during the session, even if you have launched the session but have not yet started recording.
Overview of Recording Settings
To access your Webex recording settings, log into mun.webex.com with your MUN Login ID and password. Once logged in, go to Preferences and then Recording (#1 and #2 in the image below).
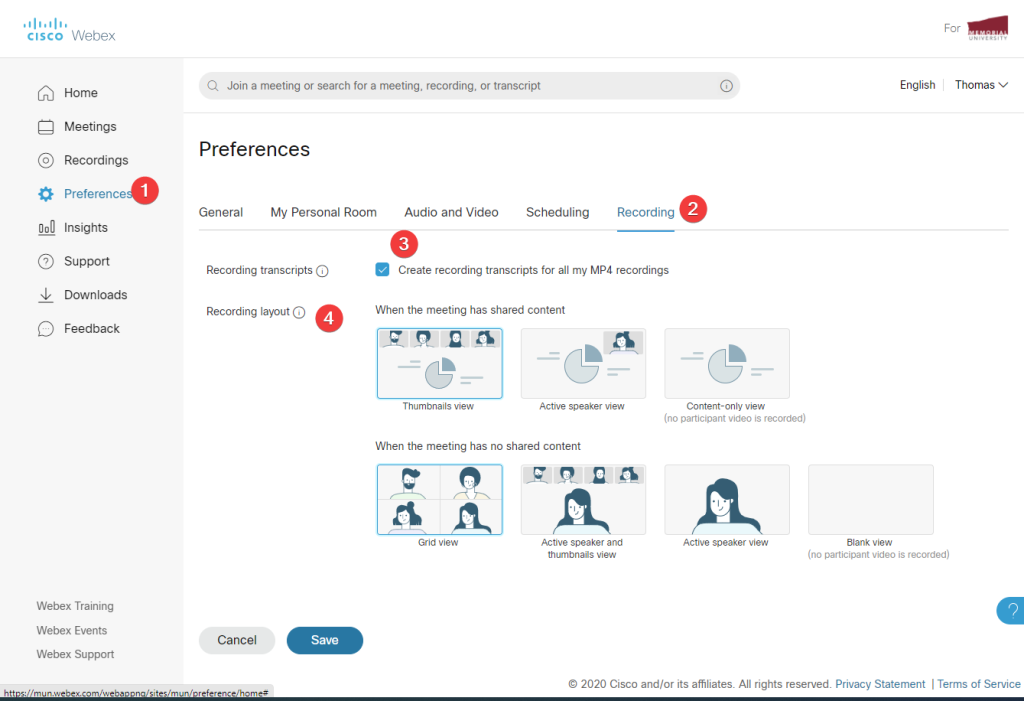
- Recording transcripts (#3 in the image above): You can enable or disable the creation of a transcript of the sessions you are recording to the Webex cloud.
- A recorded session will be processed through AI voice recognition software, and a transcript will be generated along with time marks. Viewers can then see this transcript as they watch the recording, or they can enable closed captioning on the videos.
- The accuracy of recognition is not 100%. Depending on the speed of speech, background noise, and number of speakers, voice recognition accuracy will vary. However, you can review and make corrections to the transcript before you share the recording.
- Transcripts are only available in English.
- Recording layout (#4 in the image above): This option lets you control how content or video is recorded in your sessions. Two items are always recorded: shared content and audio. You can control what will be recorded in the following two scenarios (both are explained in detail in the next menu item):
- when the meeting has shared content
- when the meeting has no shared content.
Recording Layout Options Explained
All Webex recordings capture audio from all participants. The video portion of the recording, however, can be configured in a variety of ways.
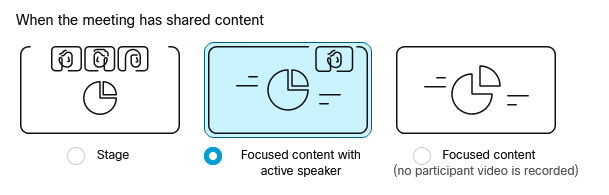
When content is being shared, the recording options are:
- Thumbnails view: Shared content will be displayed in the centre of the screen. Above it, there will be a row of thumbnail videos of the last few speakers. Thumbnails will automatically reorder themselves as people speak in the session.
- Active speaker view: Shared content will be displayed as full screen. In the top right corner, there will be a floating thumbnail video of the active speaker.
- NOTE: In this view, information that appears in the top right of your content may be obstructed by the video thumbnail.
- Content-only view: Only the shared content will be recorded with no participant video.
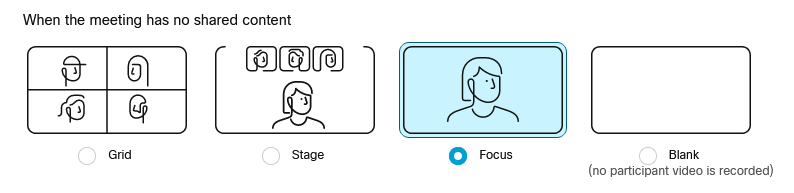
When no content is being shared, the recording options are:
- Grid View: Video of up to 25 participants will be recorded and displayed in a grid.
- Active speaker and thumbnails view: The active speaker in the session will appear in the centre of the screen, and thumbnails of the last few speakers’ videos will be at the top.
- Active speaker view: Only the active speaker will appear on the screen. When a participant starts to speaks, their video will appear on the screen.
- Blank view: No host or participant video is recorded, and the screen will appear as blank.
Recording with Webex
Using your Personal Room, you can launch a Webex session, configure your environment, and record your session using the built-in tools within Webex (audio, webcam, screen sharing). A transcript can be automatically generated for your file.
The resulting video file can be saved to the Webex cloud, and A URL link along with a password will be generated for your recording. You can then share the link and password with students in your Brightspace course. Alternatively, you can save the video file to your computer for further editing with your own editing software.
Pros:
- Can automatically generate closed captioning files and a transcript for your recording
- Can share screen, audio, and webcam easily
Cons:
- Password required for shared links to recording
- Cannot easily edit the resulting video
Managing Transcripts
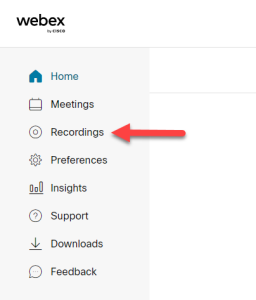
If you have enabled transcript generation in your Webex account using the instructions above, you will be able to view and edit the transcripts. Simply log in to the Webex portal with your MUN Login ID and password, and click on Recordings in the left-side menu (#1 below).
Note
Depending on the length of the session, it can take several hours for a recording to process and become available. Transcripts will not be available at the same time as the recording. It takes roughly double the processing time for transcripts to be made available.
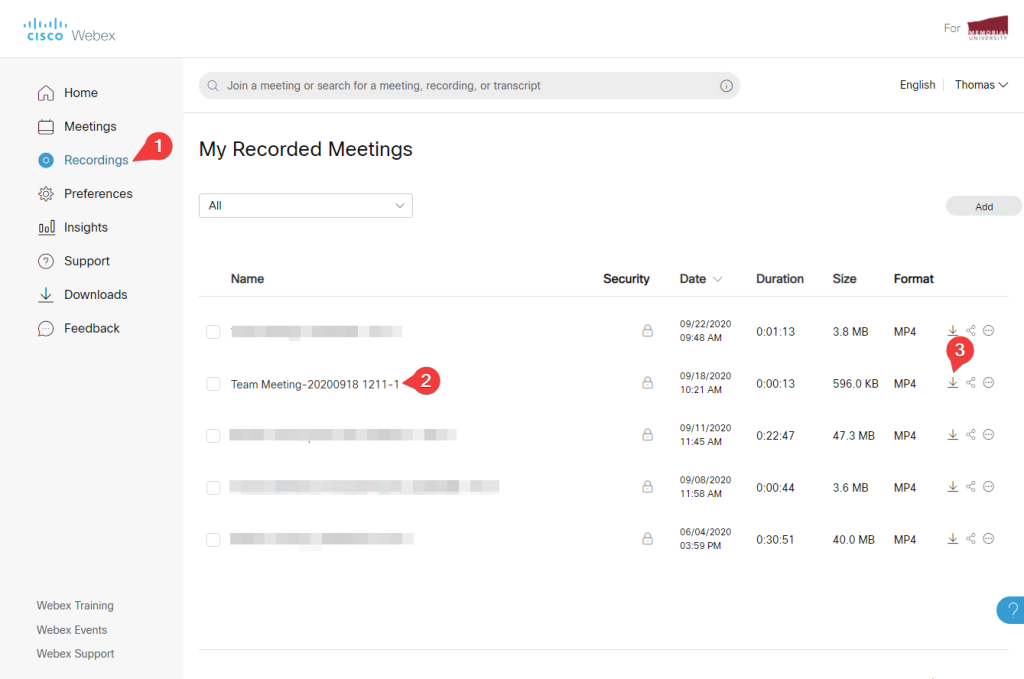
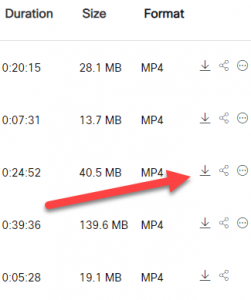
To view your recording or to edit your transcript, click on the title of the meeting (#2 above). If you would like to download the video and the transcript file, you can do so by clicking the download button (#3 above).
Your recording will appear similar to the one displayed below.
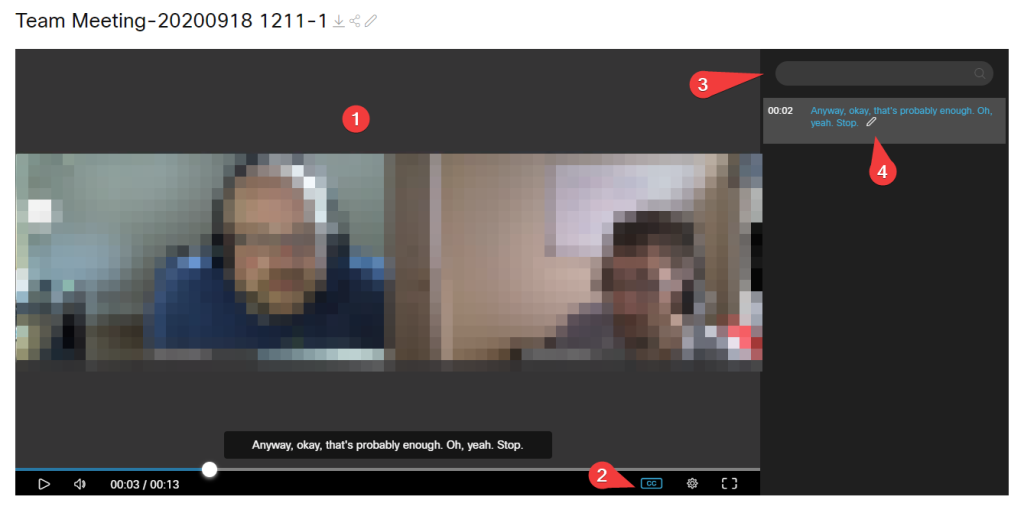
- The playback area (#1 above) will show the video or content shared in the session.
- The closed captioning button (#2 above) will allow you to enable or disable the display of closed captions on your video. This is a personal setting – others viewing your videos will be able to enable or disable this option themselves.
- The transcript area (#3 above) will display the transcript of the session to viewers.
- At the very top of this area is a search box, that allows searching through the transcript.
- Blocks of text in the transcript have the following properties:
- A time stamp indicating when the text begins, and at what time the text will appear in the video if closed captioning is enabled.
- The text generated by AI that will be displayed.
- A pencil icon (#4 above) which allows you to edit the text in the transcript. Clicking the pencil opens a basic text field that will allow you to adjust the text and save it to the transcript. This is useful to correct words that were not properly detected by the AI.
- Blocks of text can be clicked on, and the video will skip to the timestamp of that block of text.
Managing Webex Recordings
Taking stock of your previous Webex recordings can result in identifying elements that may be helpful in future offerings of your course. For recordings you would like to keep, it is recommended that you download them from the Webex system. This resource will guide you through the process of downloading, editing, and sharing your recordings.
What You Can Download
Recorded demonstrations or lectures on a specific topic where students are not visible, and/or interacting in the lecture can be downloaded for future use. In these cases, instructors are encouraged to chunk content into usable elements, keeping them to no more than 15 minutes in length whenever possible (see the section on editing Webex recordings on this page). You are not permitted to share recordings of students or guest speakers in your class without their consent. Hence full Webex recordings of past classes should not be downloaded and reused. These recordings can confuse students, as the activities and/or conversations captured are outside the context of the current course.
How to Download Recordings
One feature of the Memorial Webex environment is the ability to download recordings as mp4 files. This resource illustrates the process of downloading the mp4 file associated with a session that you recorded. You can download session recordings either directly from Webex or from Brightspace. Click on the menu items below for details on each method.
Downloading from Webex
The ‘Webex Dashboard’ is a site where you can create and manage your meetings and recordings. You can access the dashboard by going to https://mun.webex.com, selecting the Sign In button and using your Mun Login credentials to authenticate. Note: Do not use your MUN Login alias (e. g., zoem@mun.ca). Once logged in, select the Recordings button on the left menu. This will take you to the My Recorded Meetings page.
The My Recordings Page will display all of the recordings associated with your Webex account. Find the one you wish to download and select the  icon to start the download process.
If there are multiple items to download, you will be asked to specify what you want to download. Note: Multiple items will be downloaded as separate files.
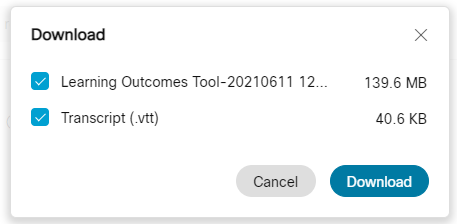
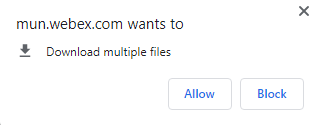
Depending on your browser settings, you may be asked to allow the downloading of multiple files. Select Allow to download a video and a transcript.
Your files will be downloaded to your specified location (typically the Downloads folder associated with your browser).
Video Instructions
Downloading from Brightspace
Recordings can also be downloaded via the Brightspace-Webex integration. NOTE: Only meetings created and recorded via this integration will be available in Brightspace.
- In your Brightspace course site, go to Webex and select the Recordings tab.
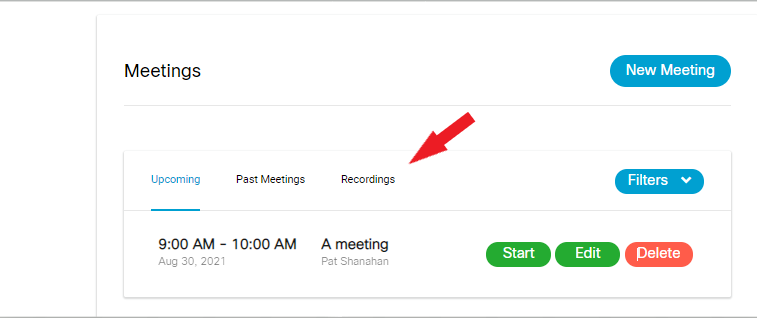
- A list of all recordings associated with this course will appear. NOTE: Recordings take 24-48 hours to appear in the course.
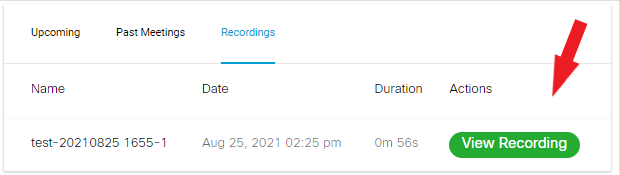
- Select View Recording next to the recording you would like to download.
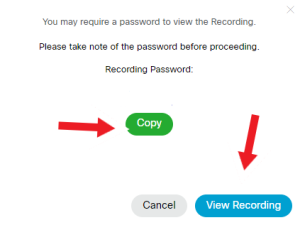
- A new window will appear. Make note of the password, and press the Copy and then View Recording.
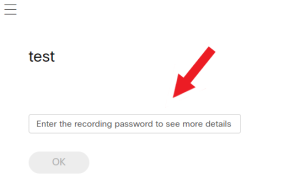
- A new page will appear. This is the page to watch your recording. Enter the password and press OK.
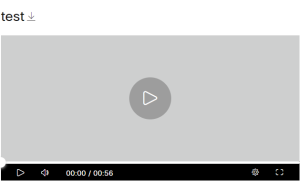
- The next page to load will be your recording. On the top of the page to the right of the title a download button will appear ( ). Click on it to start downloading the video to your computer.
Video Instructions
How to Trim Recordings
After you have downloaded the Webex recording to your computer, you can trim them by following the steps below.
Trimming Videos on a PC
Windows 10 Video Editor is a free software available on all Windows 10 computers. The steps below outline the process for trimming your Webex recordings.
Note
Before you begin trimming a recording, make a note of the location where the recording is saved on your PC.
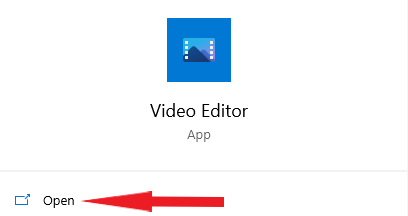
- Locate the Video Editor app on your computer. If unsure of its location, search ‘video editor’ in your Windows search bar. Click Open to start the application.
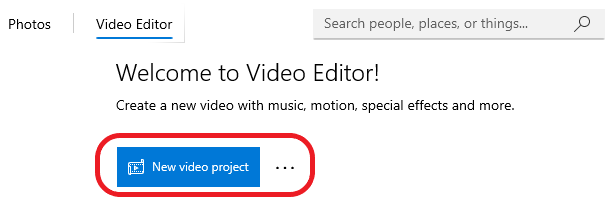
- Choose New Video Project.
- Name your project and click OK.
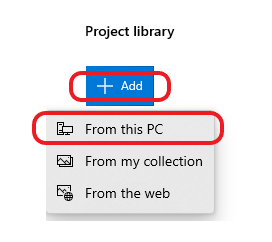
- To add your Webex recording to the project, click +Add and select From this PC. Locate the correct file on your computer.
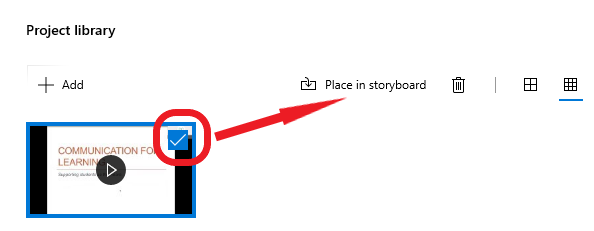
- A video thumbnail will appear in the Project Library window. Select the thumbnail and click Place in Storyboard, or click and drag the recording down to the Storyboard along the bottom.
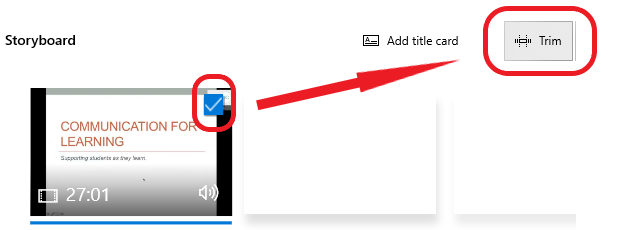
- Using the Storyboard tools, select the video thumbnail and choose the Trim tool. The Trim window will open.
- Slide the Start and End trim markers to the start and end points of the section of the recording you want to keep. You can preview the clip by selecting the Play icon. You can also scroll through the clip.

- Once you have the clip start and end points marked, click Done. The edited clip will appear on your Storyboard. Note that the duration of the clip has changed from the original time to the new edited time.
- When you are finished, select Finish Video in the top right corner of the page.
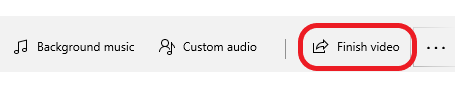
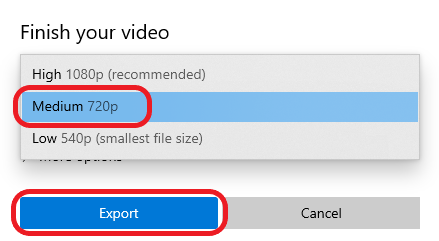
- In the popup window, select Video Quality: Medium 720p. That is the optimal quality for uploading to your Brightspace course site. Click Export.
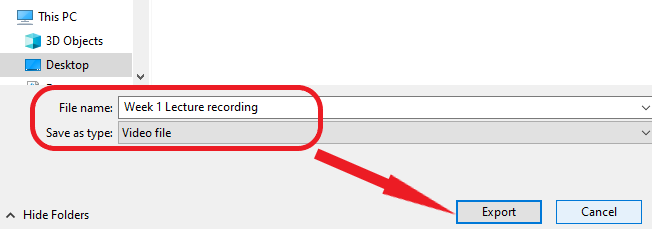
- Choose a name for you file and the location where to export the video. Click Export.
The video file can now be uploaded to your Brightspace course site using the Self-Service Video Hosting tool.
For more information on using the Windows 10 Video Editor, view this tutorial.
Video Instructions
Trimming Videos on a Mac
To trim your recordings on a Mac, follow the steps below.
- Open Quicktime Player.

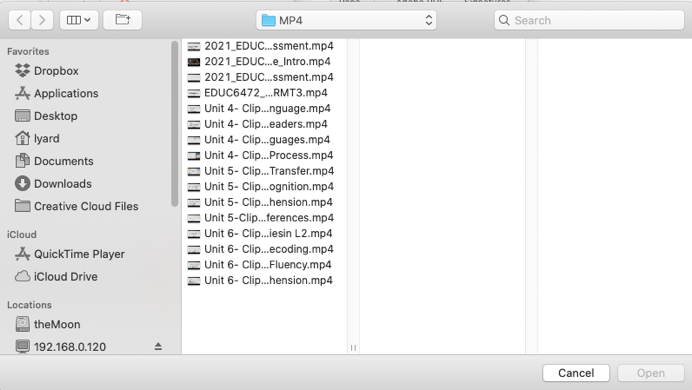
- When prompted, select the video file you want to edit.
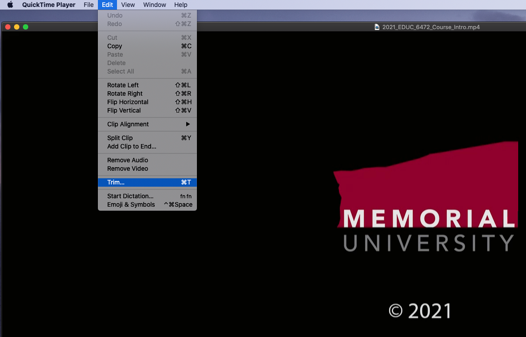
- Once you have the video loaded in Quicktime, go to the menu bar and select Edit>Trim.
- A yellow trimming window will appear at the bottom of the screen. You will see thumbnail images of your video in this yellow window.
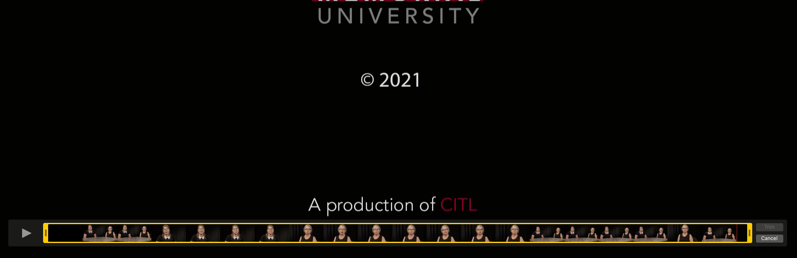
- You can press the play button in the lower left-hand side to play your video. When you have identified the area you want to trim, move the yellow handles on either side of the trimming window to move to where you want your video to start and end. When you trim the video – the new video will be what is inside the yellow window.
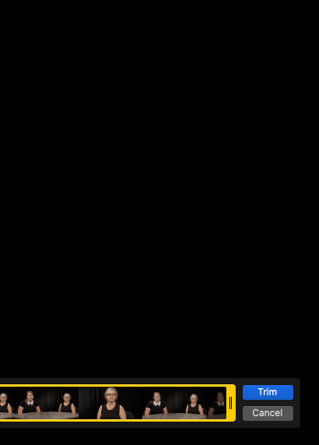
- Press Trim on the right-hand side of the trimming window and you will create a new video.
- Go to the menu bar and select File>Save As to save your video.
The video file can now be uploaded to your Brightspace course site using the Self-Service Video Hosting tool.
Video Instructions
How to Share Recordings with Students
Once your videos are ready to be shared with students, you can add them to the appropriate place in your Brightspace course. Please note that unlike PowerPoint, Word, and other files, video files should not be uploaded directly to the Brightspace course site.
It is recommended that instructors first upload their recordings to a streaming service, preferably the CITL’s Self-service Video Uploader tool. Once the videos are uploaded, you are encouraged to link or embed them on a content page in Brightspace. The reasons for this approach are as follows:
- Quality when streaming directly from Brightspace can be poor, especially in areas with poor internet connection.
- It may make content very slow to load.
For any additional information about Webex, please contact the CITL Support Centre.