Teaching with PowerPoint
PowerPoint is widely used by instructors to support both online and in-person teaching. This resource highlights common presentation types that can support synchronous and asynchronous learning sessions.
Presentation Types
There are several different presentation types you can create using PowerPoint.
1. Simple Presentation
Students can learn about many topics through simple text-based content, with or without images. You can:
- Outline clear, step-by-step instructions for learning activities
- Help students process key concepts using clear paragraphs, lists, diagrams, and charts
- Engage students with reflective questions
- Provide additional information (e.g., videos or external resources)
View sample slides in the image below.
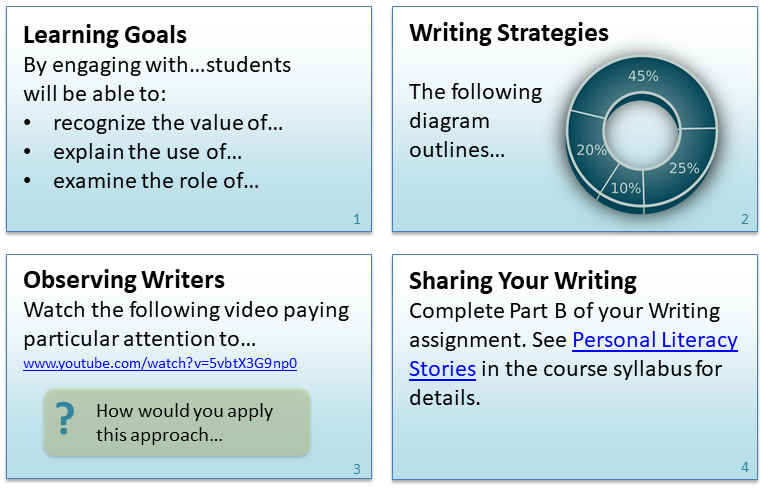
For asynchronous learning, you can upload the PowerPoint file or a PDF version directly to your Brightspace course.
You can also upload your presentation to a web conferencing tool (e.g., Online Rooms or Webex) to present during a synchronous session or to record a session for asynchronous viewing.
Note
To include your speaker notes with your PPT slides, export your presentation as a PDF/XPS file rather than using ‘Save as PDF’. This allows you to publish your notes pages. Note that this feature may not be available in all versions of PowerPoint, so be sure to test it first. Steps to export as PDF
2. Narrated Presentation with Annotation

In some cases, it is beneficial for students to hear your voice as part of the content. You can add narration by recording audio on specific slides or you can record a video of yourself speaking.
Narrating slides may be helpful if you want to:
- Stress important parts of the message using inflection, tone and other voice qualities.
- Tell a story, which is more authentic with voice as opposed to text.
- Explain a complex concept, diagram, or procedure because students learn better from animation with spoken text than animation with printed text.
Note
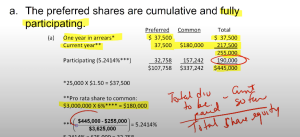
If you want to annotate your slides, you may need additional hardware. Writing on slides may be easier and more legible when using a pen and a tablet rather than a mouse and a monitor. See Draw and write with ink in Office
Adding narration to a presentation works well for asynchronous learning. Rather than saving the presentation as a PowerPoint file for students to download and review, export it as a video that you can embed into your course.
3. Narrated Presentation with Video
PowerPoint has the ability to record slide narration, add video and other media, including a video recording of yourself speaking to each slide (see example below).
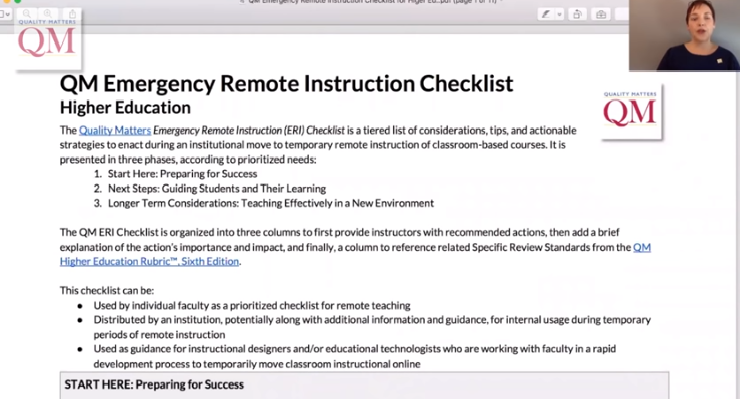
These features provide the opportunity to further elaborate on the content presented on each slide, and create a video that can be exported and presented to students remotely and asynchronously.
There are many great resources online to help you create these experiences. A couple of them are listed below.
4. Narrated Presentation with Application Sharing
For some concepts, students may need a demonstration on how to use an application or how to solve a problem using a specific application. In PowerPoint, you can record your screen and embed it in your PowerPoint slide or save it as a separate file that can be uploaded to Brightspace.
There are many ways of recording your screen. Some of them include:
- Recording your screen in PowerPoint
- Recording your screen using a separate application such as ScreenPal
- Uploading your presentation to a Web conferencing tool such as Online Rooms or Webex and recording as you share your screen/application
This type of presentation works well for asynchronous learning as students can review the presentation multiple times.
Saving PPT Presentation as a Video
If you wish to share your recording with your students (especially if you have video incorporated) you need to save this as a video file and not share it as a PowerPoint Show file.
It is recommended that you use the CITL’s Video Uploader, instead of uploading the file directly to your site, as it will allow the students to stream the video, instead of downloading it to view.
To submit your recording to CITL’s streaming service for remote instruction, you must save the the presentation as a video file (i.e MPEG4-Video).
Follow these steps to save and export the file as a video:
- Open your presentation and click File in the upper left corner of the window.
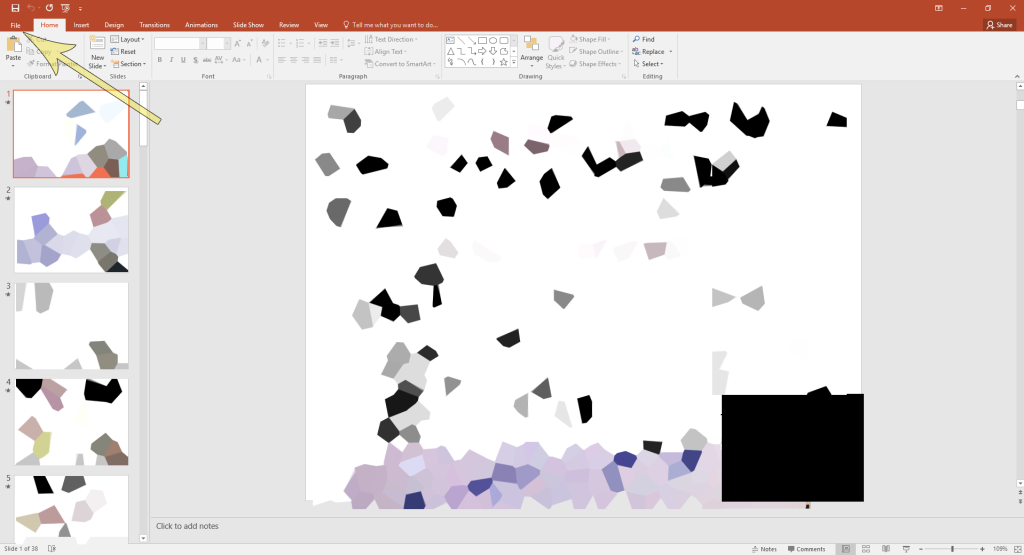
2. From the menu of the left, click Export.
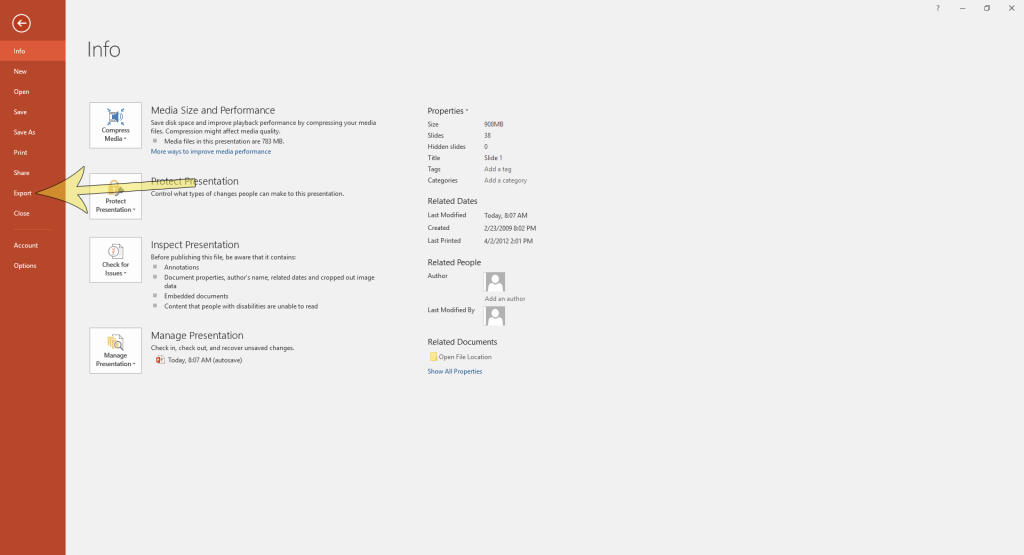
3. Use the option Create a Video and leave the default settings. This will provide an appropriate quality video to be uploaded to the CITL Video Uploader tool.
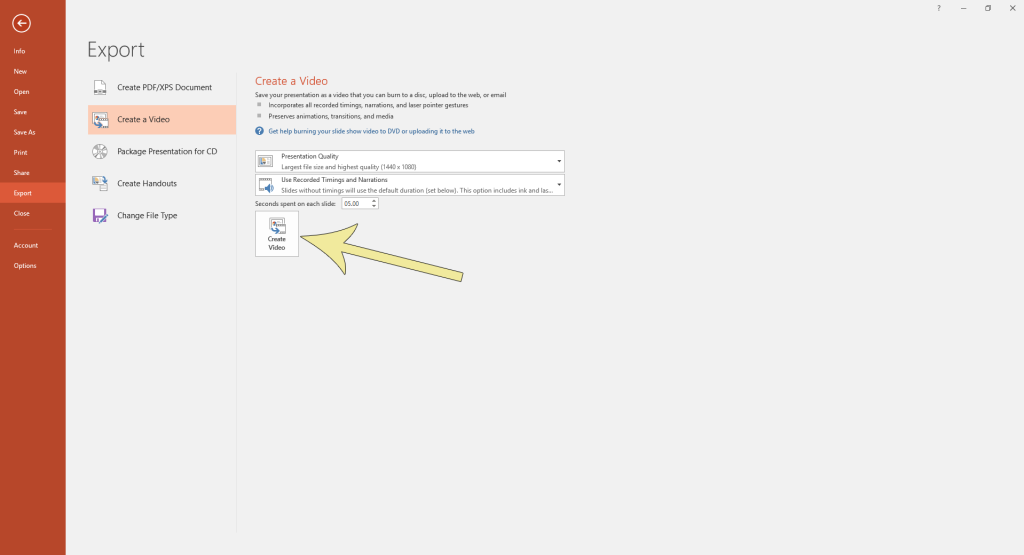
4. A Save As dialog box will open. Here you will choose where you want to save your file and the name you want to use. We suggest including your name or initials, the course name, and perhaps the lecture number of topic of the presentation (e.g., CITL_ABC100_Lec1.mp4). When done, click the Save button.
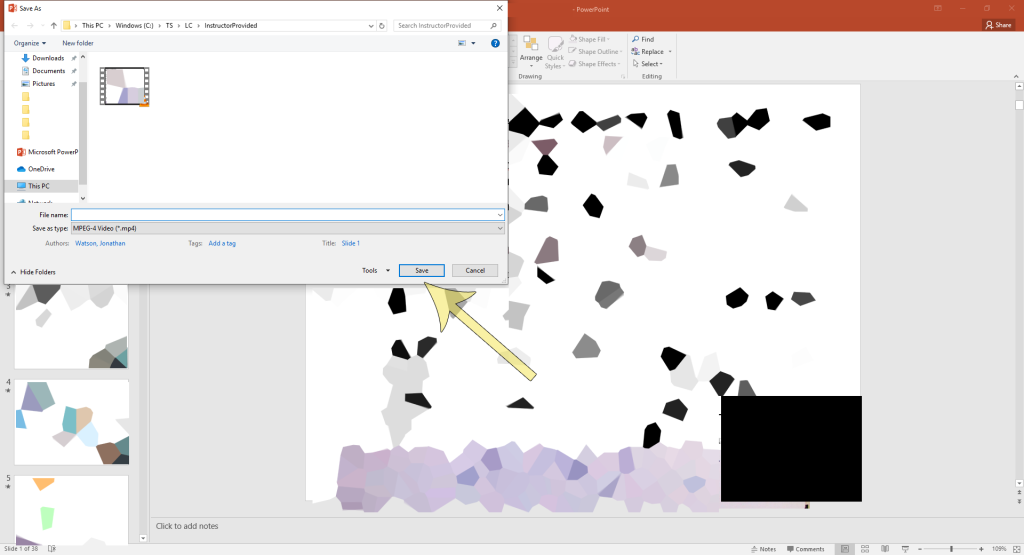
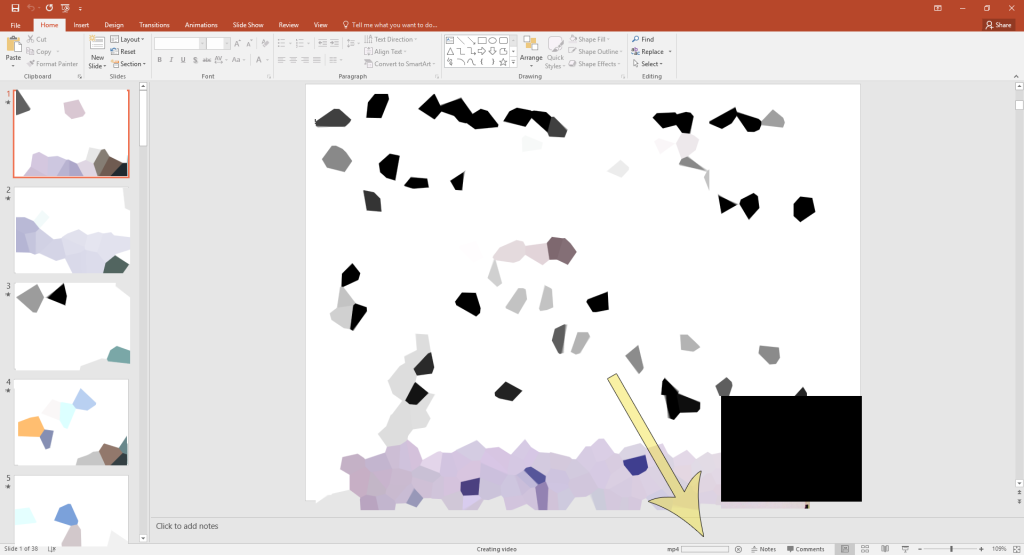
5. After clicking Save, you will return to the main presentation. At the bottom of the screen, you will see a progress bar indicating the export progress of the video. Do not close PowerPoint and wait for the progress bar to disappear. Depending on the size of the presentation and the amount of video or audio, the process could take up to an hour to complete.
6. Once you have a completed the creation of the video file, you can share it with your students using a variety of ways (using the CITL’s Video Uploader is recommended).
Adding PowerPoint to Brightspace
There are several options for adding PowerPoint presentations to Brightspace. Select the option that best fits your presentation type and how you want to present the content to students.
1. Add the PPT file to Course Content
You can add your PowerPoint file to a content module. Simply select the module where you want the PPT to appear, and click ‘Upload/Create’ button to add your file. When students navigate to the content file, Brightspace converts the PPTX to a PDF for student viewing.
Note
Since narration and timings, animation, and notes are lost in the conversion to a PDF for student viewing. Some design elements may also change. Thus, for narrated presentations and more complex slide layouts, direct students to use the Download button at the bottom of the preview window to download the original PPTX file to their own device for viewing in PowerPoint. In doing so they will view the presentation as it was originally designed.
2. Insert a Link to a PPT file on a Topic Page in a Module
When you add a link to the PowerPoint file using the Insert Stuff on the HTML editor within a content topic/page, the original presentation is automatically downloaded for viewing in PowerPoint—there is no conversion to a PDF for previewing the file. Encourage students to download Microsoft Office 365, which includes PowerPoint. It is freely available to all students at Memorial. See Software for You.
Refer to Creating Pages for information on how to link to a PowerPoint file from within the page.
3. Copy Your PowerPoint Content into a Topic Page in Module
If your presentation contains mostly text and images, and no audio or interactivity, create a topic page within a module and copy the content from your slides and paste onto a new or existing topic page using the HTML editor. Students will be able to view the content directly within their browsers, thus eliminating the need to use PowerPoint as a third party application. Also, you can include additional notes on the page to further explain the context.
Refer to Creating Pages for more information.
4. Embed a Video Version of Your PowerPoint
When you save or export the slide presentation as an video (MP4 file), you can upload the MP4 file to the CITL video streaming server and embed the video onto a topic page in a module. Students will play the video from the topic page and it will stream from the server; no additional software or hardware is required.
Refer to the CITL Video Uploader site for instructions on uploading a video to the CITL streaming server and embedding it on a topic page in your Brightspace course.
5. Upload PowerPoint Slides in a Web-Conferencing Session
You can use PowerPoint slides in Online Rooms or Webex to present during a live session that you can record.
Best Practices
Below you can find some tips to help you create PPT presentations designed to guide students’ learning and processing of information presented.
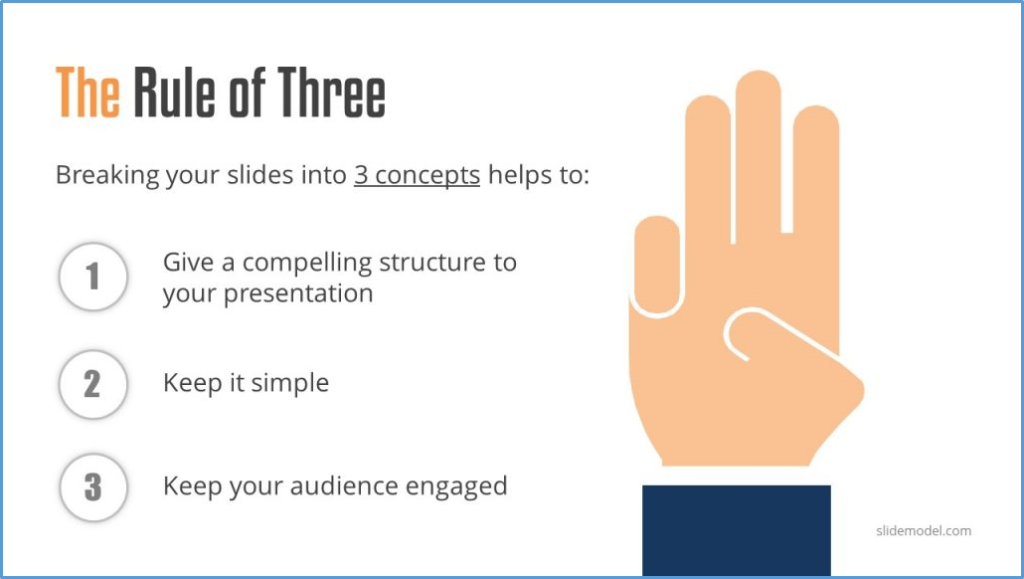
Keep it Simple!
When creating a PowerPoint presentation, best practice is to keep slide design simple. Aim for a design with plenty of white space, or ‘negative space,’ and place corresponding words and pictures on slides next to each other. This allows learners to quickly separate items and find logical order. The less clutter you have on your slide, the more powerful your visual message will be.
Extraneous information can be distracting. Do not feel compelled to fill empty areas on your slide with logos or unnecessary graphics or objects that do not contribute to a better understanding of the topic. Determine the purpose of the text, visuals, video and audio before using. Ask yourself if they directly support students in achieving learning outcomes. If not, remove them.
Do this:
Limit Text
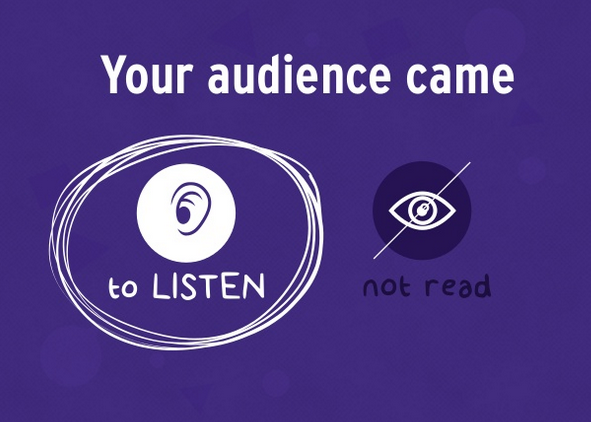
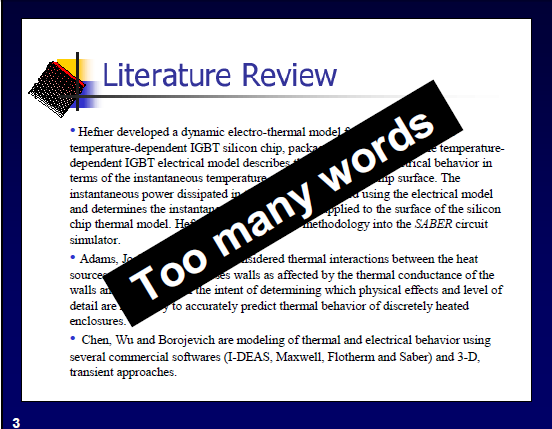
It is important to remember that the purpose of a slide presentation is to support the auditory portion of the presentation, not to replace it. The literature clearly indicates that audiences do not want paragraphs of text on slides read to them. To ensure the PowerPoint is a guide, keep the text short. Avoid using full sentences unless using quotations and slide titles should explicitly explain the main point of the slide.
Do this:
When Using Bullets
A common formatting recommendation is to use the general “rule of sixes,” a maximum of six bullets per slide and six words per line (less if possible). Bullets should be:
- structural
- meaningful on their own right
- brief
- noncontroversial
- key-worded (each bullet point should contain at least one, but preferably several keywords)
Avoid this:
Need to change bullets on each slide? Use the Slide Master! Instructions on using the slide master are available on Microsoft’s Support website.
Left-Justify Slide Titles
It is recommended that you left-justify slide titles because people read an online screen from left to right. If you wish, you can hide a title by positioning it off the slide. That way, the slide has a title for accessibility or sorting requirements, but you save space on the slide for additional content.
Highlight Important Information
Add cues such as bold, italics, color, arrows, shapes, titles, sounds, or narration to encourage learners to attend to important information in the presentation.
Limit Transitions and Animations
Use object-builds (a PowerPoint technique which reveals each point in a topic, line by line) and slide transitions sparingly, if at all. If you feel you must use them, choose a simple effect such as fade, dissolve or wipe. Avoid effects such as fly in, random effect, or flip up, just to name a few. Avoid effects or transitions that are slow and distracting.
Optimize Presentation Length
PowerPoint does not limit the number of slides you can create. However, try to optimize the length of your presentation. The literature indicates that a learner’s full attention starts to decline after approximately the first 6 -7 minutes of a presentation and then decreases more rapidly after approximately 10 minutes. If your presentation exceeds this time limit, consider dividing content into two or more presentations. Basically, limit each presentation to one major topic.
Use Speaker Notes
Although bullets have meaning in their own right, they are not adequate in making the fully associated meanings between bullets explicit; your dialogue is meant to do this. Therefore, when designing your online presentations, include the details of your presentation in the Speaker Notes section below each slide when in Normal view. This will help you reduce the amount of text on each slide.
The added benefits of speaker notes are they can:
- be saved when exporting your PowerPoint presentation as a pdf and uploaded to your Brightspace course site;
- serve as a script when narrating your presentation; and
- be used to create closed captioning and/or a transcript when presentation is saved or exported in as a video file.
Instructions on how to add and print speaker notes are available on Microsoft’s Support website.
Instructions on how to save PowerPoint presentation as a pdf file are available on Microsoft’s Support website.
Adding Audio Narration
Speak slowly in a conversational style and use a script, at least for the first narration attempt. This will help you to think through the sequencing of your slides and avoid including unnecessary information. Keep in mind that your narration does not record when a slide is transitioning. Therefore, stop speaking when moving to a new slide so your narration begins a few seconds after the slide appears.
Instructions on how to record your narration are available on Microsoft’s Support website.
Review: Making Online PowerPoint Content Engaging: Writing a Narration Script
Page Orientation and Slide Layout
A horizontal (landscape) slide layout is preferred. By default, the slide aspect ratio is 4:3 when creating a new presentation. The Centre for Innovation in Teaching and Learning (CITL) recommends an aspect ratio of 16:9 to help facilitate the conversion of your presentation as a video for the online environment.
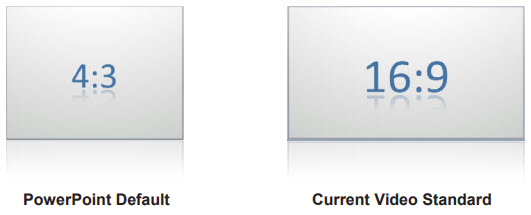
Via CITL (2020). Designing PowerPoint for the Online Environment.
It is best to select the aspect ratio of your slides before you begin creating your presentation. This will prevent you from having to backtrack and readjust text or image sizes after the completion of your PowerPoint.
Instructions on how to change the slide layout are available on Microsoft’s Support website.
Further information on working with slides is available on Microsoft’s Support website.
Use Sans Serif Fonts
The type of font you choose for your presentation is important. For clarity, research supports the use of sans serif typeface for online reading. Avoid uncommon and obscure fonts.
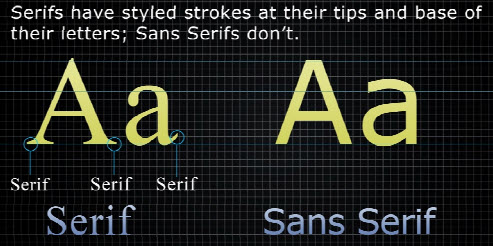
Minimize the number of fonts used in your presentation to one or two and use a font size of 24 points or larger to ensure text is legible when viewed on the Internet or in a video.
The use of ALL CAPS should be avoided as most difficult to read; use predominantly lowercase letters in your presentation. Many designers recommend bold type styles to make more readable. Options such as use of italics and underline should be minimized, as they can obscure text.
Instructions on how to change text fonts, color and size in PowerPoint are available on Microsoft’s Support website.
Use High Quality Graphics
Graphics and photographs can add life to your presentation, but be mindful of the images you use. Keep your images relevant and of a reasonably high quality. Generic clip art or cartoon images that have no relation to the topic can be very distracting and can interfere with learning. They can also undermine the credibility of the presenter or the topic.
Instructions on how to edit pictures, charts, and tables in PowerPoint are available on Microsoft’s Support website.
Pixabay and Wikimedia Commons are two image repositories that contain quality, freely licensed images.
Include Alternative Texts (Alt Tags)
Be sure to include a text alternative for images. It is important, as alternative text is read out loud for those using a screen reader. The text alternative should explain what is depicted in the image and be as descriptive as possible.
Instructions on how to add alternative text to a shape, picture, chart, SmartArt graphic, or other object are available on Microsoft’s Support website.
Choose Warm or Cool Colors
Color is often the most overlooked element in the success of PowerPoint presentations. Color is powerful and evokes feelings; it can help persuade and motivate. You do not have to be an expert in color theory; just keep a few basic guidelines in mind.
Color can be divided into two general categories; warm and cool. Cool colors include blue, green, and purple and are perceived to be peaceful and calming. In contrast, warm colors include red, orange, and yellow and are perceived to be arousing and/or anxiety provoking. As a general rule, cool colors are used to display regular text, and warm colors are used to emphasize and draw attention to main points, as cool colors generally recede and warm colors project forward.
Use Sufficient Color Contrast
It is important to use sufficient color contrast between the background and foreground color of slides to enhance objects and the readability of text. Contrasting colors (color complements) are located opposite to each other on the color wheel. Colors should be used sparingly and color schemes should complement each other.
White or light backgrounds are generally recommended as the background for educational text. The most attractive and highly rated colored slides have been found to be those that present cool colors on either white or black backgrounds. It is recommended that red and green color combinations be avoided, as these are the colors most affected in people who have color blindness.
The Interactive Color Wheel should provide you with a basic understanding of color compliments and appropriate color schemes.
Instructions on designing your slides backgrounds and themes are available on Microsoft’s Support website.
Obtain Copyright Permission
Remember – all content and visuals that have been developed by others must be cleared through the Memorial University Library before they may be used in your presentation and uploaded into your course shell. Obtaining timely copyright of submitted items is a shared responsibility between the instructors, faculty, content author, and the library.
To many peoples’ surprise, even generic clip art will likely require copyright clearance. It is therefore important to always check copyright permissions associated with all sources you are using.
If copyright clearance cannot be obtained for an item, it cannot be used. If an item is identified as being within the “public domain” and thus unlikely to require copyright permission, written documentation to this effect will be required. Although not always possible, the best way to avoid copyright issues is to develop your own materials.
And Finally…Review in Slide Sorter View!
Now that you’ve created a great PowerPoint presentation, go in to Slide Sorter view and take a few minutes to make sure everything is where it should be. Browsing through your slides in this view will give you a chance to see how the overall flow of your presentation works. At this point, you may decide to break up a slide into two smaller slides, or remove a graphic or visual element that doesn’t fit with the flow of the presentation. You can also add, rearrange, duplicate, and delete slides in PowerPoint.
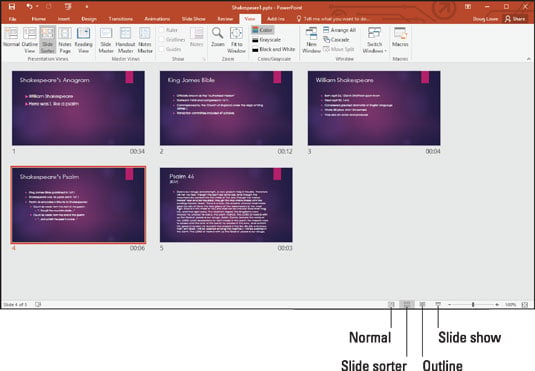
Instructions to add, rearrange, duplicate, and delete slides changing to slider sorter view are available on Microsoft’s Support website.
For further examples and techniques on designing multimedia instructional messages, see Richard Mayer’s research on principles of multimedia learning.
Reference: St. Croix, L. (2020). Designing PowerPoint for the Online Environment. Center for Innovation in Teaching and Learning. Memorial University.