The Git Command Line interface is the most basic way to manage a repository. The command line is cross platform, meaning whether you develop on Windows, Mac OSX, or Linux, the process remains the same.
Creating a Project/Repo
To begin, we will need to create a project. In the GitLab interface, repositories are referred to as Projects as GitLab adds more functionality outside basic version control. Git is referred to as a decentralized version control system. The commits are local to your machine until a Push is made to send the changes to the repository server. This is contrasted by Subversion which is a centralized version control system. All the commits are made directly to the repository server.
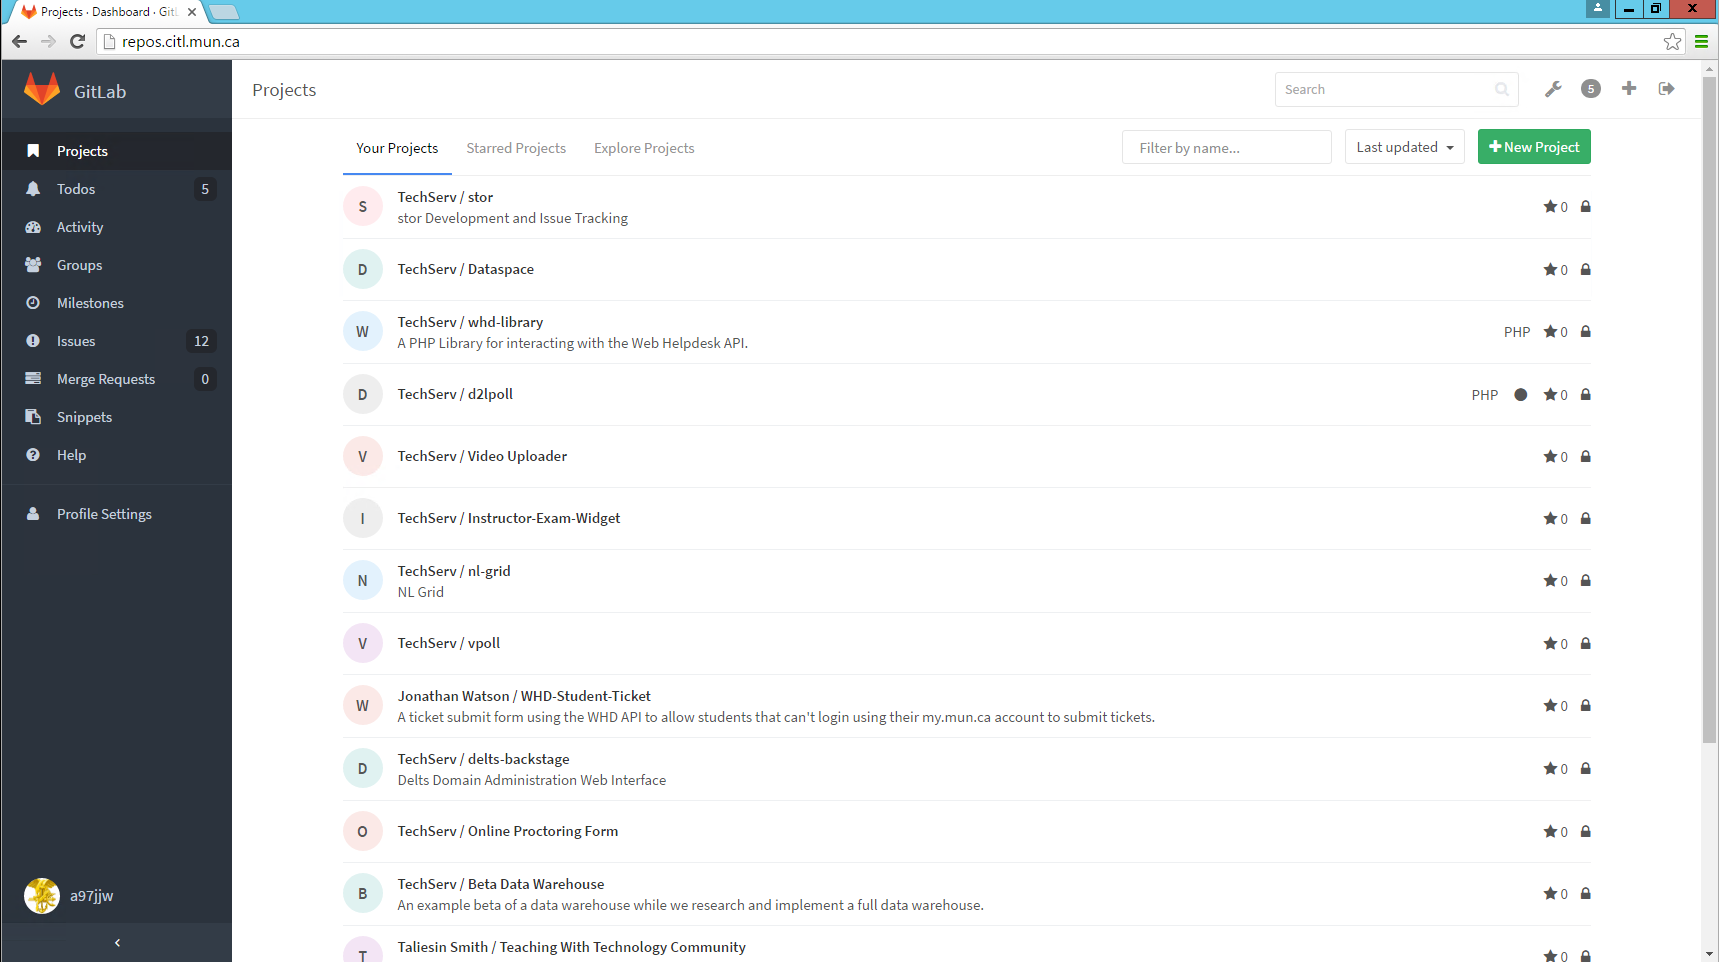
Lets start by logging into http://repos.citl.mun.ca and clicking the New Project button:

From here, you will need to enter at minimum the name of the project. By default, the project falls in your personal namespace which is hidden from others unless you explicitly give them permission to see it. Clicking the drop down next to the project name will reveal a list of namespaces you have access to. In the case of the Course Development team, you will see multiple groups with pre-defined access permissions. This saves time setting up who can view/edit the project if they all fall into a similar category. See image below for example.
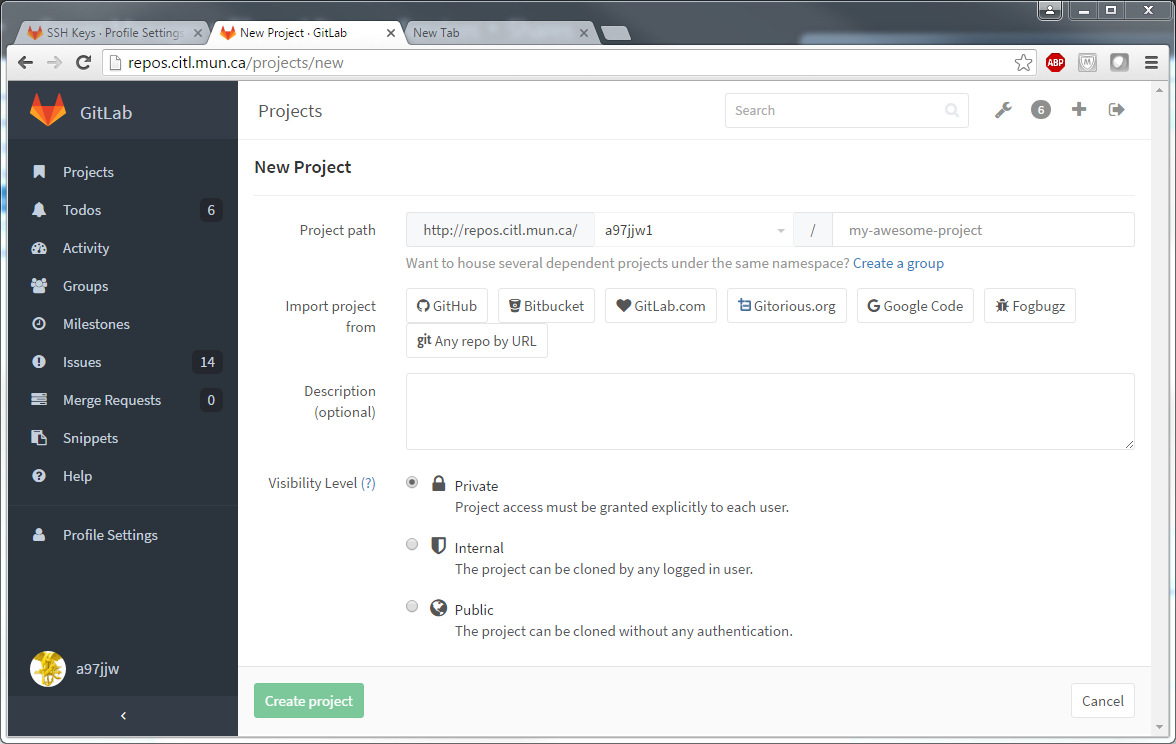
The visibility level should always be left private which you defining who has access. In our deployment, the Public option will not work.
You will also notice that you can import a project from various other sources that use git for version control. If you are working on a project outside GitLab but require it to be brought in, you can use the option to save time configuring a project from scratch and losing the commit history.
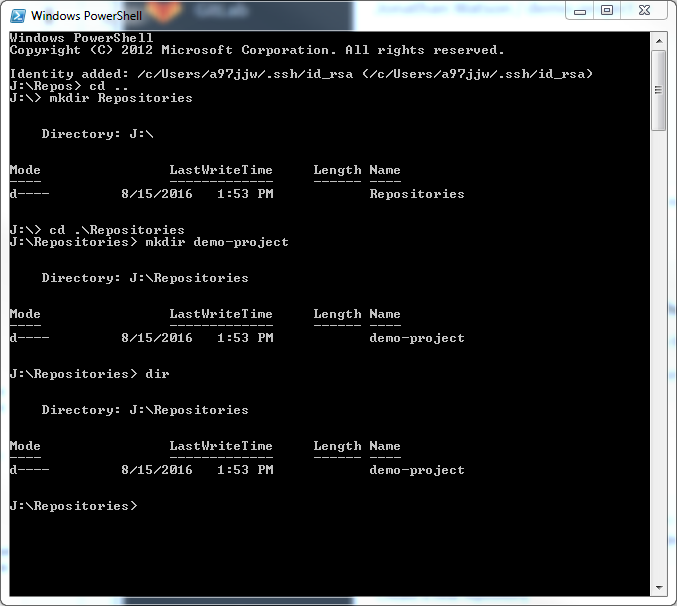
Although this is command line, this is a necessary step for future topics. Now we need to create the repository locally so we can add files to it.
Open up the Git Shell (Windows) or Terminal (Mac/Linux). Here we will want to navigate to the directory we want to create the repository in. This can be done using the cd and mkdir commands. For simplicity, we will create a folder in My Documents (Windows) called Repositories and a sub folder called the same as your project.
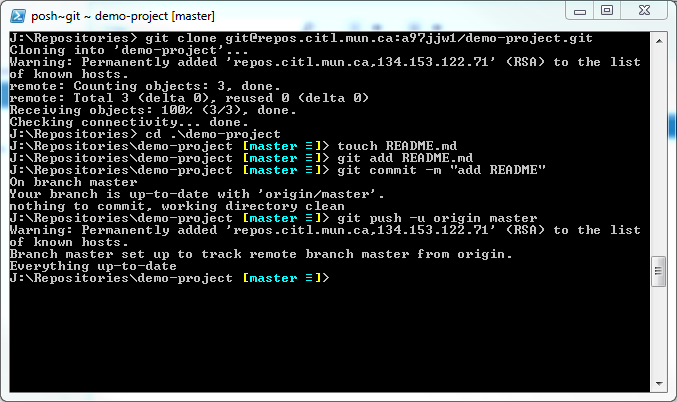
You will notice with GitLab, it really likes to help you along. On your new projects Dashboard, you will notice it has instructions on setting up your repository. The steps on this page have been executed below.
You have no successfully created a project and a local repository. You are ready to start managing code via Git.
Cloning a Repository
Cloning a repository is the process of initializing or downloading an existing project to your local machine. To reiterate, Git is a decentralized version control system so a clone will copy the entire repository to your local machine. It is isolated from the original stored on the GitLab server.
To clone a repository, you will need the origin URL. This can be retrieved from the project dashboard in GitLab. We will use the previous project we created as an example. The steps are as follows:
- Create a directory where you want the repo to go. (You can skip this step and it will use the project name for the directory, leave out the period at the end of the command if you wish to do this.)
- Run the command:
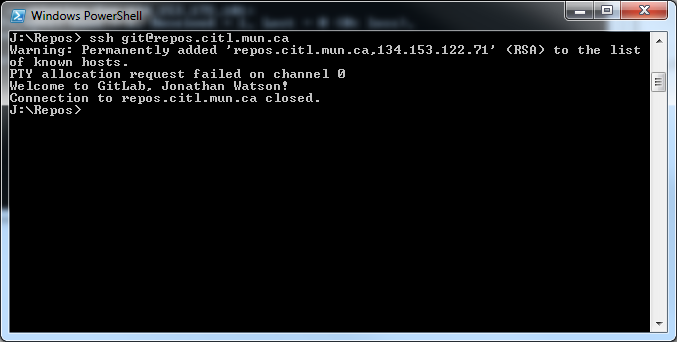
git clone git@repos.citl.mun.ca:/a97jjw1/demo-project.git .
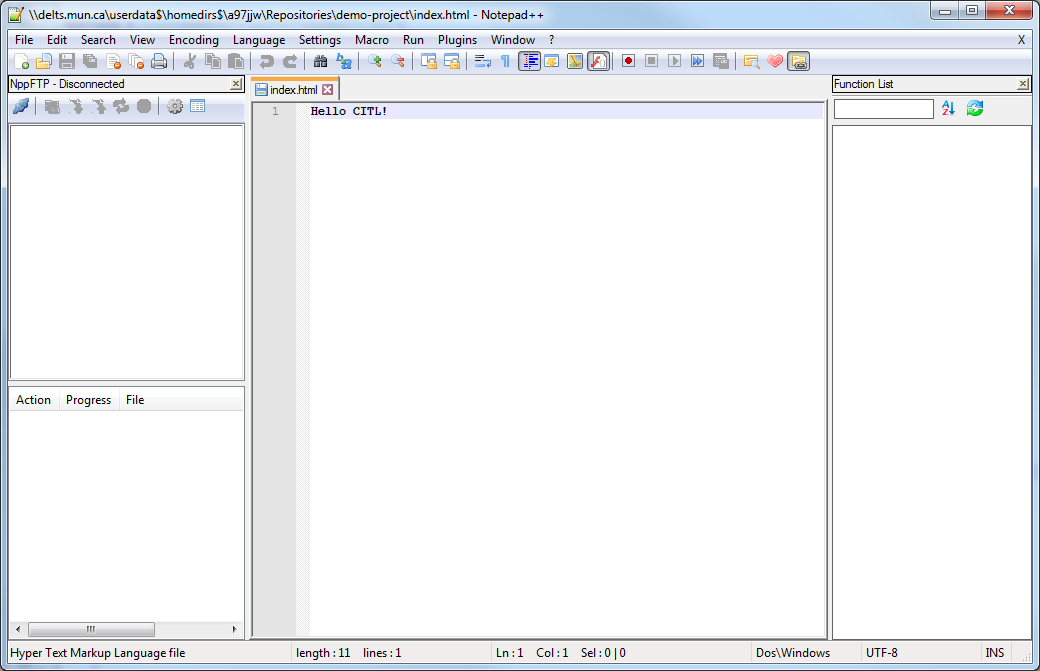
If you look inside the folder we created (or automatically generated), you will see all the files in the repository. There is also a .git folder. This contains all the information about the repository such as history, commits, merges, branches, etc. Do not edit or delete this directory, it will break your repository.
Commit/Push
The commit/push commands are used to maintain versions of your code. This is especially handy when making changes that may impact the overall system and you may need to revert back. Commit is a local command and will not affect any other user. It is recommended you commit often and not in huge lumps. In order to commit you first must prepare any changes that have been made:
git add –all
The –all flag checks for changes in all files (edits,creations, and deletions) and prepares them for a commit. Now run the commit command:
git commit -m “Your Message Here”
The -m flag is for a description or message describing the commit. You must add a message to every commit, it will fail if you leave out this flag.
If you are ready to send this code to the server (someone might need the code to work on or to ensure it is safely backed up), you can use the push command. Before you can run the push command, you must have at least one commit made. Only the changes in the commit are pushed to the server. It is highly recommended you do a Fetch/Status/Pull of your repository before pushing. (Please see the topic on this below) If you don’t, you may receive a number of different errors ranging from file conflicts to out of sync repository. (You may have an older repository than whats stored on the server.)
The syntax for a push to the remote repository is:
git push <remote location> <branch>
In most cases, the command will look like:
git push origin master
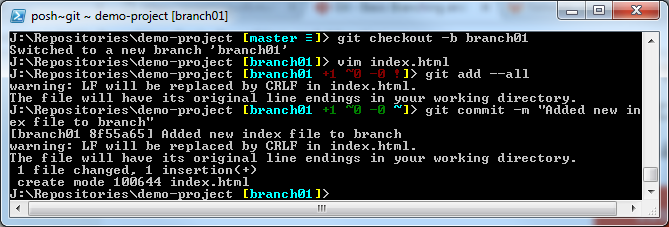
Origin refers to the remote location set when we did a clone/initialized the project while master refers to the primary branch of the project. More advanced users may create a branch of their project to make changes without effecting the project. This is particularly useful if you have a project in production. You can branch off to develop a new feature before deploying it into production. Please see the section on Branching/Merging for a more thorough description of this process.
Fetch/Status/Pull
When working with multiple users on a project, it is common practice to run these commands to ensure you get their changes. Lets walk through this process. In the below example, a change was made to the README.md file.

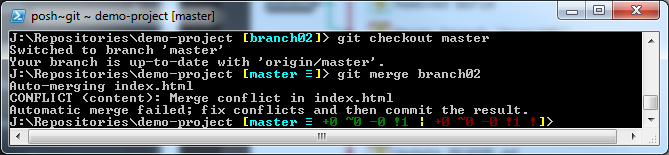
We first run git fetch. This will check the server if there are any changes not in our repository. This command will not always provide you with the necessary information to know if there are any changes to pull. This is where git status comes in. After running this command, we notice that our branch is behind by 1 commit. Before we can push any of our changes to the server, we need to run git pull. We see that the file README.md has been updated and our repository is now up to date. If there are any conflicts, this will be noted here, please refer to the Branching/Merging topic for how to deal with these conflicts. (Known as a Merge)
Revert (Checkout/Reset/Revert)
There are two ways you can go back to a previous commit and it depends on your specific situation. If you are looking to temporarily to go back and play around but wish to return back to the latest commit, the checkout command is what you need. If you wish to delete previous commits, never to return to that work, the reset command is used. The reset command only works locally so before you can do a push, you will need to do a pull and this is where it can start getting messy. The command you really want to use is revert. This will maintain the history but bring the commit to the HEAD (latest commit) of the project.
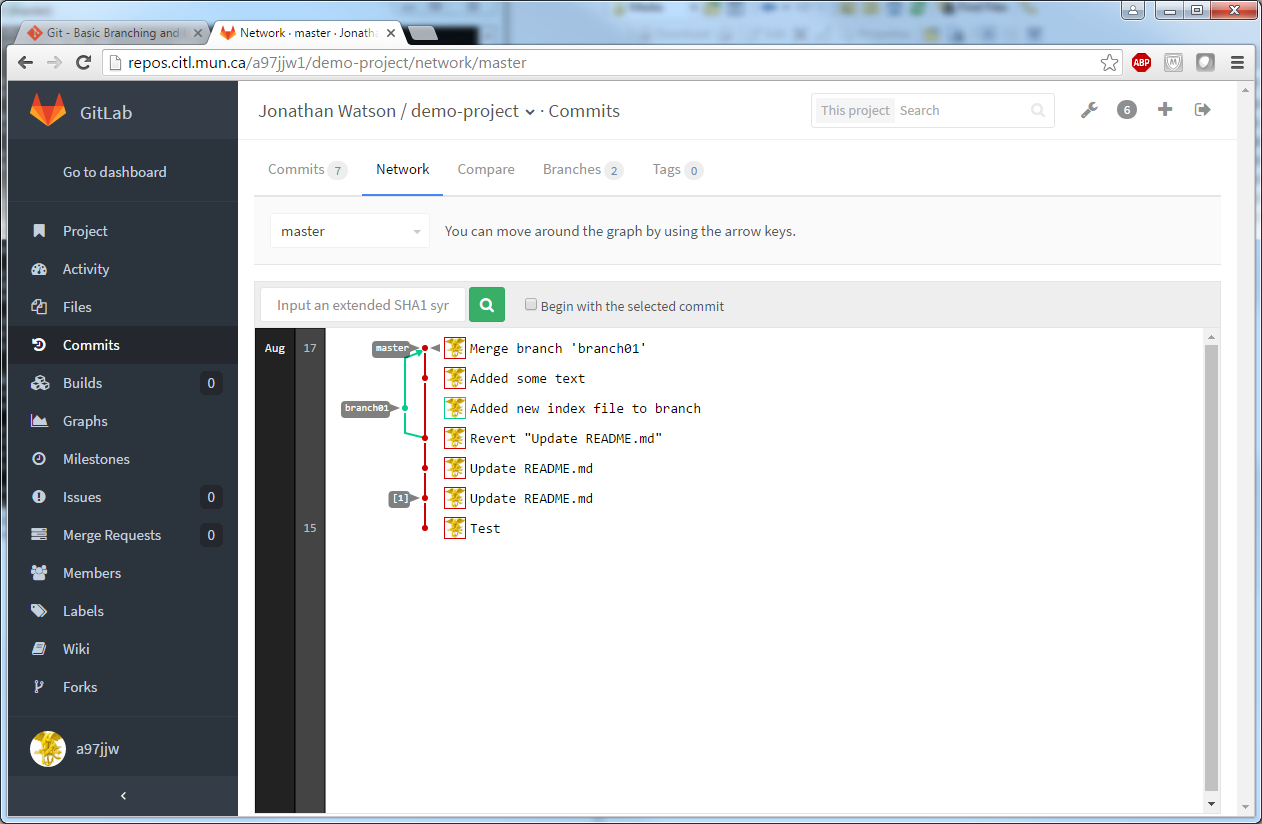
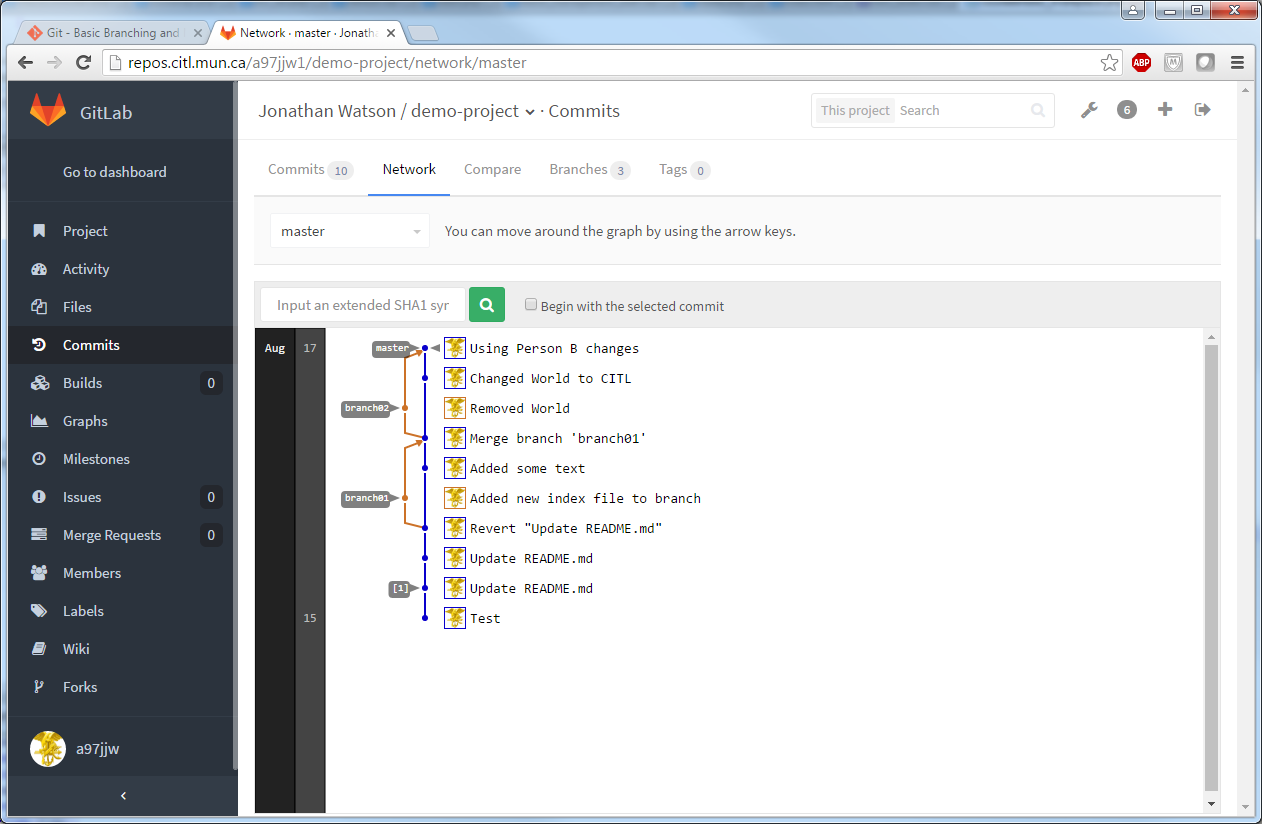
To run either of these commands, we first need to find what commit you want to revert back to. This can be obtained from both the GitLab interface or by running the command: git log.
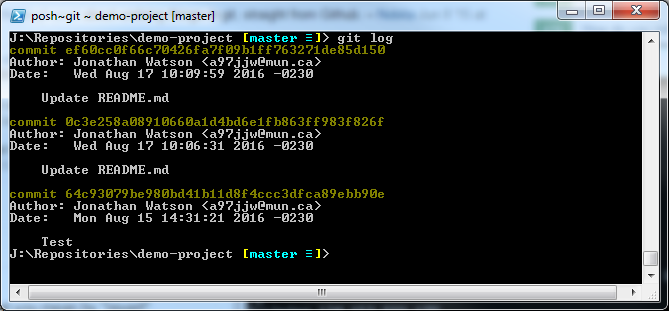
In this example, we will revert to the previous commit: 0c3e258a08910660a1d4bd6e1fb863ff983f826f.
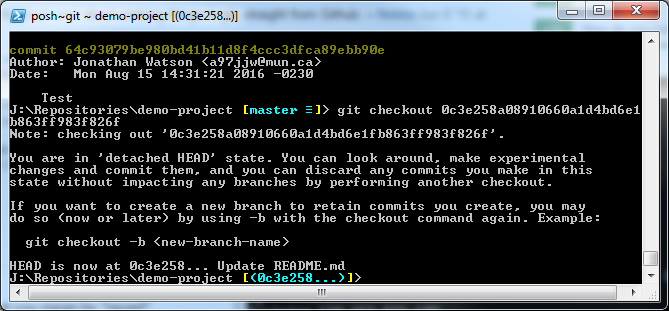
If we run git log again, we will notice only the commits from this commit back are now listed. This however is only temporary and any changes you make can’t be committed to the repository. If you wish to make changes, the command you should run is:
git checkout -b <branch-name> <commit>
This command checks out the previous commit as a new branch. You will need to merge this back into the project later to make it part of the master. (Please see the topic on branching and merging for a more in depth discussion on this.)
When you are finished playing with the old code, you can return to the HEAD (last commit) of the project by checking out the master:
git checkout master
We will ignore the reset command in this tutorial as it will rarely be used so lets have a look what a hard revert looks like. We will bring an old commit to the head of the project and push the changes to the server.
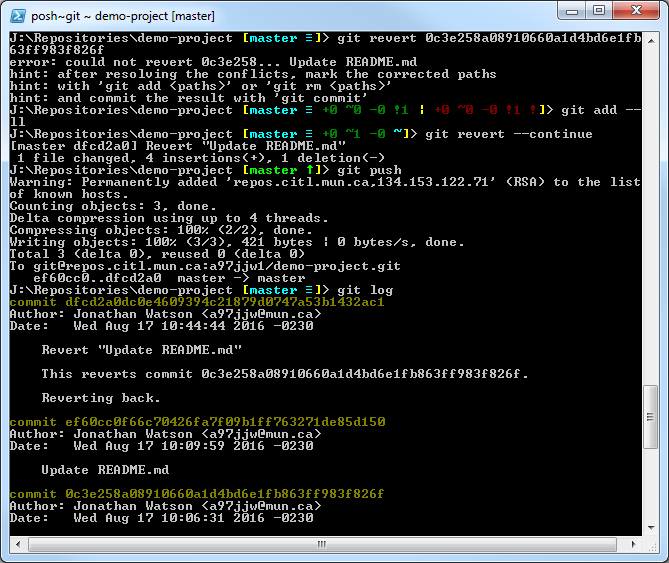
Let us walk through this. The first command we run is:
git revert 0c3e258a08910660a1d4bd6e1fb863ff983f826f
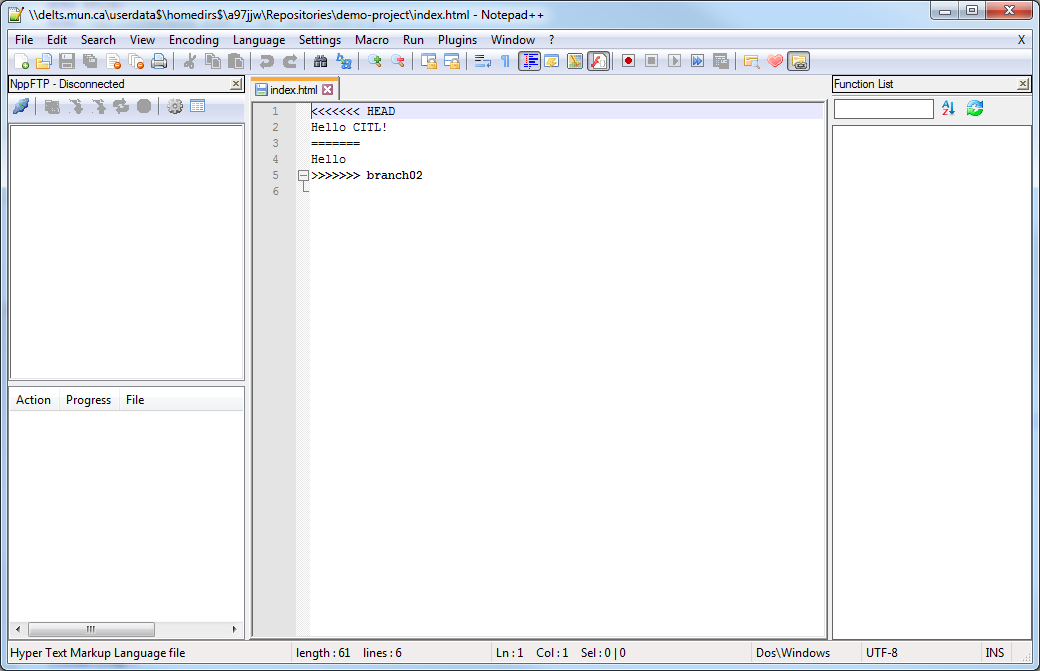
This will initiate the revert process. We will notice some errors start to pop up. This will ask you to analyze any change that has been made after the commit we are referring back to. If you open the file, you will notice sections/blocks of code indicating what commit they belong to.
<========================= HEAD
SOME CODE HERE
==============================>
It is up to you to clean this up before reverting. Ideally you would delete all the blocks called HEAD as they are the latest commits. You can avoid this step by conducting a git checkout 0c3e258a08910660a1d4bd6e1fb863ff983f826f first as this will take care of reverting the code back for you.
Once you have the corrections made, we run the commands:
git add –all
git revert –continue
Out project is now ready to be pushed to the server.
Going back to a previous commit will almost always cause some kind of problem with git that will need some minor troubleshooting. Where CITL works mostly in small groups or independently on projects, it will be quite rare that we will need to use this procedure but understanding how you can go back is an important aspect of git version control.
Changing the Repository Origin